In Plano, we love our trees. We believe healthy trees make healthy lives. They also play an important role in what makes us a recognized “Tree City USA” community and the City of Excellence. Historic winter storm Uri brought record low temperatures to Texas for a few days in February 2021. The bitter cold shocked trees and other plants. As a result, over 6,000 trees in Plano are expected to be dying or damaged, and may need to be removed or pruned for the health and safety of residents and property. Plano’s parks contain 200 dying or damaged trees. Plano Parks & Recreation will remove the dead and damaged trees, and replace them with healthy native and well-adapted tree species as they become available.
Download a list of recommended trees here (PDF). These native and well-adapted trees will help diversify our growing urban forest, which consists of over 1.69 million trees with a replacement value of $1.6 billion.
The remainder of the 6,000 trees are located on private property. We’ll need your help removing those dead trees to make room for healthy new greenery in Plano’s tree canopy. This webpage provides resources and information to help you identify a possible dead or dying tree in your yard, as well as help you to choose a tree contractor to assist with tree removal.
How Do I Know If I Have Dead or Damaged Trees in My Yard?
Potential signs of a dead or damaged tree include:
Brown and brittle bark falling off and/or vertical cracks
Few healthy leaves left
An abundance of dead wood
Branches falling to the ground
New sprouts coming from the trunk or base of the tree
A sudden or gradual lean
A host of insects and rodents
How to Hire a Contractor for Tree Removal
Did you know that Tree Care is not regulated in Texas? Anyone with a chainsaw and a truck can cut down a tree without experience. Be cautious with door-to-door tree salespeople.
Ask the following questions to find out if a Tree Care Professional is qualified:
Are you “Insured”?
Do you have an ISA Certification?
Will you be roping down limbs?
How will you protect my irrigation sprinklers, the sidewalk, my home, other trees and my neighbor’s home from getting damaged?
Can you explain the tree removal process to me?
Beware of the door-to-door solicitor. You may get a better price for tree removal, but at what cost?
Right now, many Plano residents are doing extensive tree trimming or tree removal because of February’s winter storm. Locals are encouraged to have a reputable contractor haul away large piles of tree materials, which may save time in the long run. Why?
Here’s why. The City’s Public Works staff is currently running behind schedule due to the high volume of calls received after the winter storm. Wait times are expected to become even longer as more requests come in for tree debris removal. To avoid a lengthy wait, it’s recommended you use a contractor to haul away large piles limbs, and branches.
If you opt to wait for City crews, you must schedule a special paid collection for piles larger than 6 feet x 4 feet x 4 feet. Debris should be neatly stacked at your regular collection point at least 2 feet from trees, fences, utility boxes, gas meters, and vehicles. Do not place piles between the fence and alley (easement).
A few things to consider if tree material waits for collection:
Large collection piles may block your driveway for an extended period of time.
Grass underneath those piles may die or suffer damage.
Debris piles often become a habitat for rats and mice, which may attract other wildlife.
By hiring a contractor, it’s likely your large debris piles will be picked up much sooner.
Is my tree dead? The general consensus among Texas arborists is to wait until the end of summer to make an assessment of your tree(s), especially if you have more than 60 % of the canopy covered with leaves. Some trees have begun pushing out new growth at the base of the tree, the trunk of the tree, and in older branches. This type of growth is typically a sign of stress and should be closely monitored throughout the summer. We expect some trees to recover and some trees to continue to decline over the summer.
Will the City of Plano help pay for tree removal? Residents are responsible for removal of trees on their property and any adjacent right of way they are required to maintain. Residents are responsible for right of way areas like the alley grass strip and the sidewalk grass strip adjacent to their property.
Why do I have to remove my tree? Trees that are dead and/or damaged from the winter storm can be a safety hazard. Over time, wood can become brittle and is susceptible to breakage which could lead to limbs and branches falling down. These limbs can injure citizens and cause damage to buildings, vehicles, sidewalks, and other amenities.
What is reduction pruning? Reduction pruning involves removing dead branches located on the outer edge of a tree canopy. This can be done to decrease the size of a tree and to remove any dead or damage tree limbs.
What is an ISA Certified Arborist? Professionals that have an ISA Certification have achieved a high level of knowledge and skills to properly care for trees. In the case of tree removal, the need for a Certified Arborist is not as important as being insured.
How do I select a contractor to remove my tree? Please check out our “Contractor Selection” section for more information.
What kind of insurance should my contractor carry to protect myself and my family in case of an accident? Being insured protects the Tree Care Company from any accidents, incidents, or property damage during the course of business. An accident that occurs on your property could place liability on the home owner. Make sure to request a certificate of insurance from any tree company. Also, it is extremely important that the company has worker’s comp for tree climber’s and tree care and not landscapers insurance. This protects the property owner from being liable for injuries. You can verify insurance coverage in Texas at https://www.tdi.texas.gov/wc/employer/coverage.html.
What is stump grinding? Stump grinding involves the removal of the remaining tree stump once the tree has been removed. We recommend grinding the stump 1-2 feet below soil grade.
Where should I stack the wood that has been cut down from my tree? When hiring a contractor to cut down your tree, make sure to have debris removal included in the work. Please click here for Bulky Waste Collection Information.
What kind of tree do I have? There are several resources available to the public (for free). The Texas A&M Forest Service has an “ID by Leaf” page set-up here: http://texastreeid.tamu.edu/content/idByLeaf/ There is also an app called “iNaturalist” that will let you take a picture of any plant using your phone and help ID it for you. Check your phone’s app store for availability.
Can I cut down my own tree? Yes. However, we do recommend that homeowner’s with medium to large sized trees hire a contractor for safety reasons.
What are no cost opportunities for replacement trees? TBD
Does my HOA require that I get permission before cutting down my tree? Contact your HOA for more information. More information here.
Does my HOA require that I re-plant a tree? Contact your HOA for more information. More information here.
What kind of trees should I plant? We recommend planting native and well-adapted trees. You can visit the Texas A&M Forest Service Tree Selector Guide here. You can also see Plano’s Recommended Tree List here.
Can I plant a tree in the same location as the previous tree? Depending on the size of your previous tree, you may find an extensive root system that will make it difficult to dig a hole large enough to plant a tree. We suggest planting a tree at least 5’ away from the previous tree.
Do I need to call 811 before planting my tree? Always call 811 before you dig. It is FREE! Texas811 Call 811, understand where your irrigation/water service pipes are, and electrical/gas/sewer service lines.
When is the best time to plant a tree? The best time to plant a tree is in the fall and winter months, when the tree is dormant and has no leaves. This will give the tree time to root in the spring before the hot summer sets in.
Published on April 19, 2022 / Last updated on November 1, 2022
How to Make a Smoothie: my formula for the thickest, creamiest, most delicious fruit smoothie every time! Tons of options for your liquid, your fruit and your add-ins!
But, as simple as they are to make, they’re also surprisingly easy to mess up. They can be too thick, too thin, too sweet, not sweet enough, too chunky, too icy…yeah, you get it.
Well, I’m going to show you just How to Make a Smoothie! This is my formula for making the perfect one every time with just the right amount of liquid, fruit, yogurt, and add-ins.
I’ve also included plenty of variation ideas so you can customize it just how you like!
What Should I Put in My Smoothie?
The great thing about a fruit smoothie recipe is that the customization opportunities are virtually endless. Here’s a quick run through of what I usually put in my smoothies:
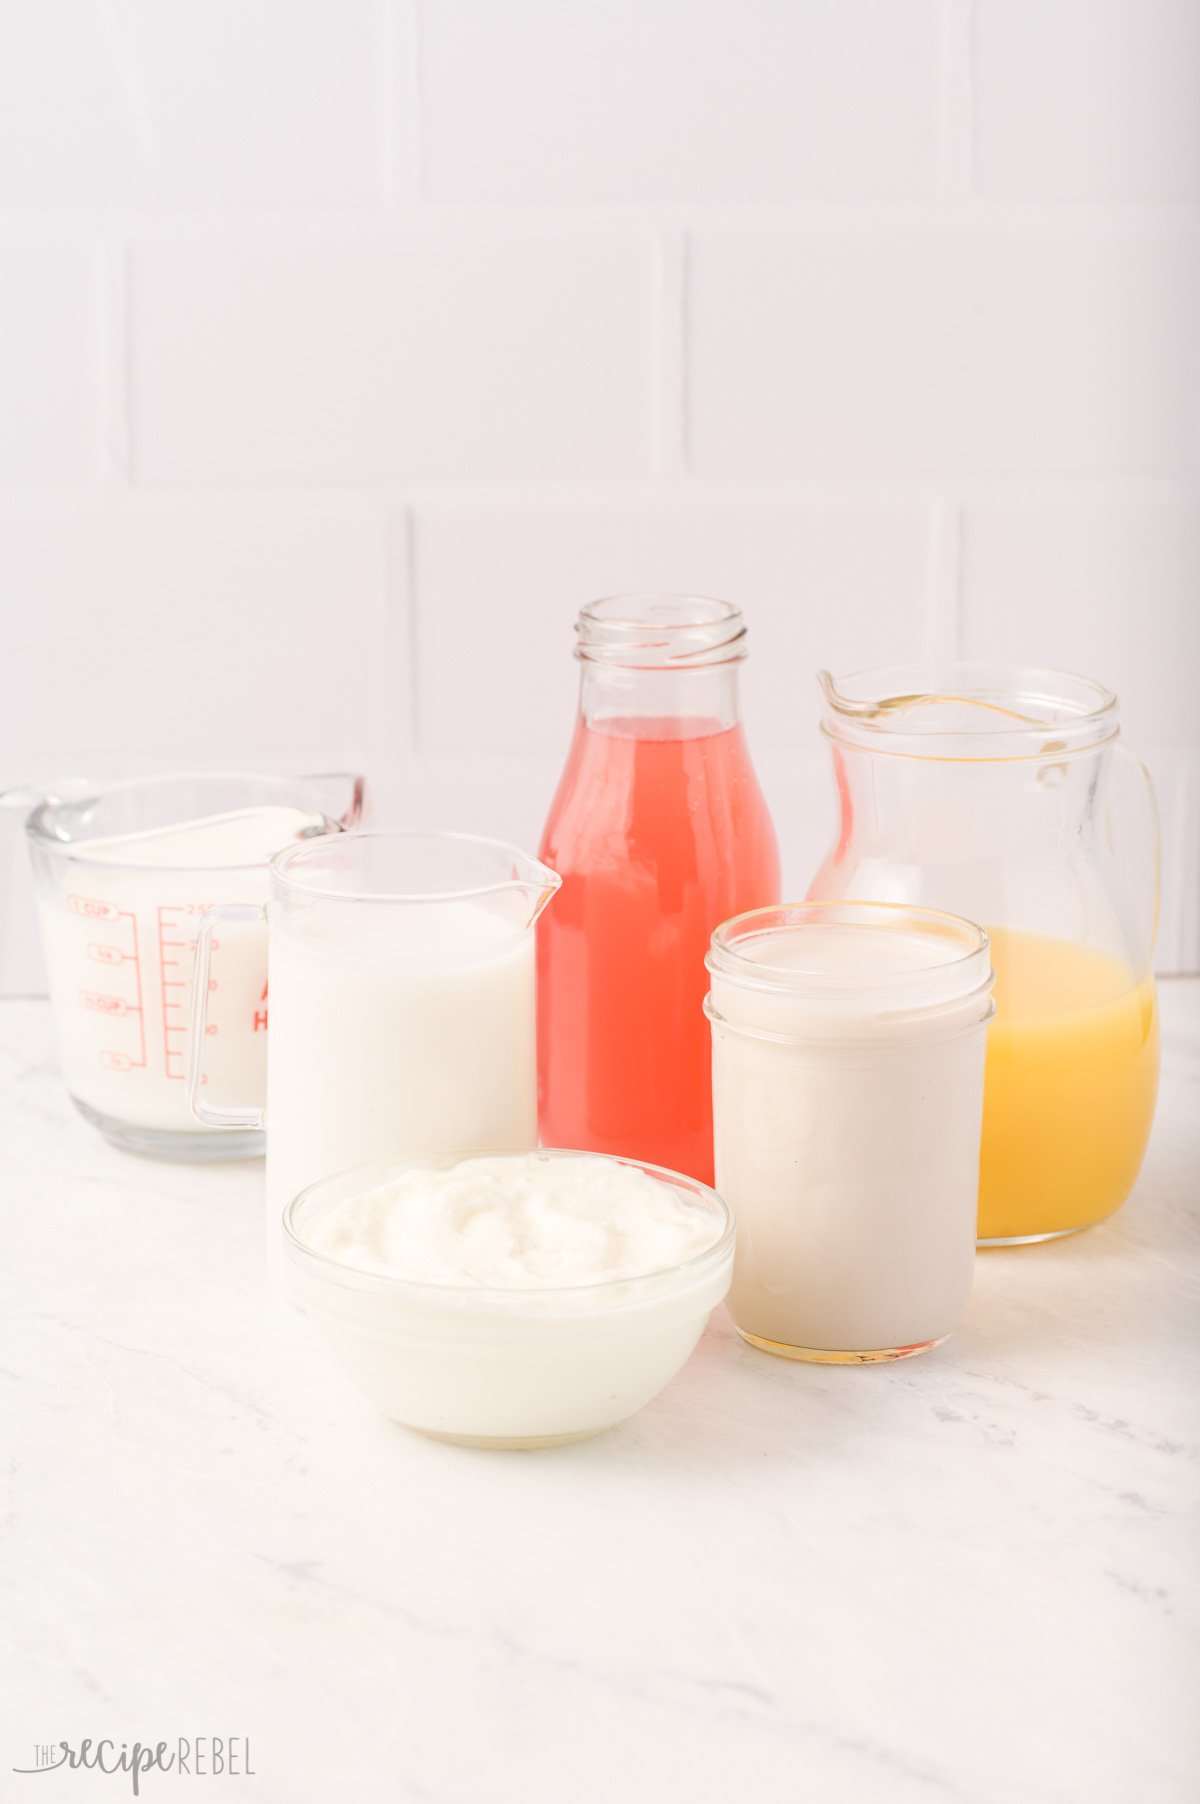
Milk or Juice: you can use dairy milk, non-dairy milk, juice, or even coconut water — really any liquid goes! You can even use cold tea.
Greek Yogurt: yogurt is a great way to kick the protein up a notch and to make a deliciously thick and creamy texture. Dairy-free, plant-based yogurt works well, too, and you can skip it if you need (it just won’t be as thick).
Banana: I love to keep frozen, sliced banana on-hand. The frozen banana makes it extra creamy and acts as a natural sweetener.
Berries/Other Fruit: any frozen fruit work great in smoothies! Pineapple, mango, and berries are our favorites. You can even use watermelon like in this refreshing Watermelon Smoothie!
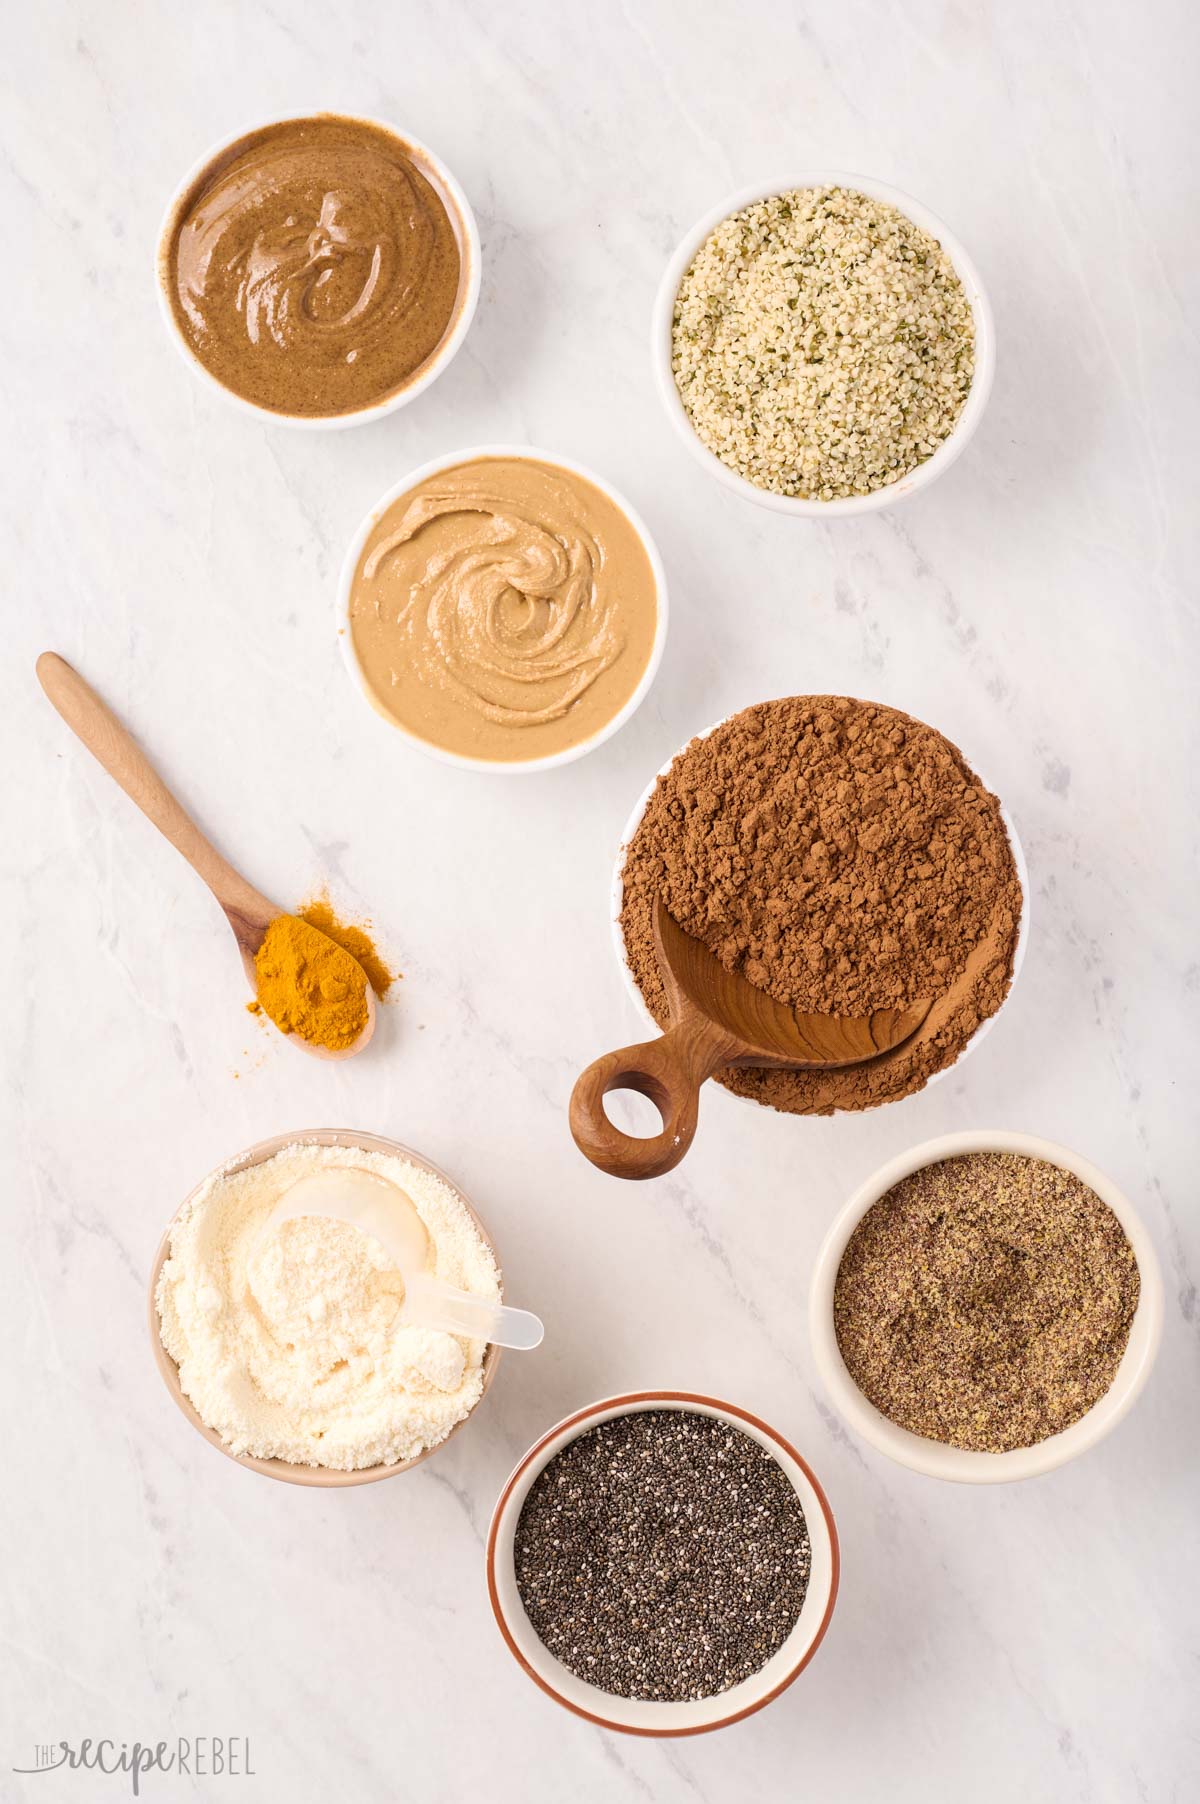
Add-Ins: you can customize it with so many different add-ins. Protein powders, nuts or seeds, oats, extracts, sweeteners, even avocado!
Smoothie liquids:
We’ve gone over the basics above, but here are a few more fun options:
Chocolate milk or chocolate almond milk
Cold coffee or tea
Pineapple or mango juice
Oat, almond, soy or coconut milk.
Kombucha or kefir — for some fermented goodness!
Smoothie fruits:
Frozen is best because they create a thick and refreshing smoothie! If you have fresh fruit, try to balance it out with a frozen banana or a cup of ice.
I use frozen banana for almost all of my smoothies! It makes them rich and creamy.
Apples (not peeled) or oranges (peeled)
Berries — they are full of antioxidants and fibre! (this Blueberry Smoothie is one of our favorite berry smoothies!)
Pineapple, mango, kiwi — these are fun tropical flavors (they pair well with coconut milk — like in this fun Tropical Smoothie!)
Peaches, cherries or other stone fruits (grab a bag of frozen and skip paying the high price when they are out of season)
Smoothie Add-In Ideas
Nut Butters: give it a boost of nutrition and nutty flavor with a scoop of peanut butter, cashew butter, almond butter, or sunflower seed butter.
Seeds: add in a sprinkle of flax seeds, chia seeds, or hemp hearts.
Grains: add a scoop of quick oats or even cooked brown rice or quinoa.
Protein: make it more filling with a scoop of your favorite protein or collagen powder.
Make it creamy: Cream cheese and cottage cheese make an incredibly thick and creamy smoothie.
Veggies: a handful of fresh spinach or kale, half an avocado, or even a handful of frozen cauliflower is a great way to add some extra nutrition. Cauliflower and avocado also create an extra smooth and creamy texture!
Sweeteners: prefer it sweeter? Try adding a drizzle of honey, agave, pitted Medjool dates, or simple syrup.
Extracts: add a dash of vanilla, almond or maple extract to add some extra flavor.
Spicesand Powders: try Acai powder, maca powder, spirulina, cinnamon, nutmeg, you name it.
How to Make a Smoothie
This healthy snack comes together in a quick 5 minutes! Here’s how:
Add ingredients to the blender: Add all of your ingredients to a high powered blender in order from softest to firmest.
Blend: Blend until smooth, stopping to stir if needed.
Adjust as needed: Check the flavor and texture, adjust as needed, then serve right away!
Healthy Fruit Smoothie FAQs
What fruits are best for smoothies?
You can pretty much use any fruit you like in a smoothie. Try strawberries, blueberries, raspberries, banana, mango, peaches, cherries, pineapple, watermelon, you name it. For the best results, use frozen fruit. It makes for a creamier smoothie!
Are smoothies best with milk or water?
I definitely recommend using milk for your smoothie. It creates a creamier texture and better flavor. Dairy milk, almond milk, and coconut milk are all great options.
Do you put ice in a smoothie?
If you’re using frozen fruit, no. It isn’t necessary to use ice in a smoothie. Frozen fruit is the best way to get a cold and creamy smoothie without watering it down. If all you have is fresh fruit, or you like your smoothies super cold, it is fine to add ice.
Human consumption of meat goes way, way back, long before anyone was keeping count—or before pescetarian-except-for-bacon-at-brunch was a thing.
What Is Meat?
In Old English, the word meat (“mete”) was a general blanket term for food. These days, the definition of meat most commonly refers to the edible flesh of an animal, though you could also use it when describing the edible part of a plant, like coconut meat or nut meat. The meat industry is one of the largest in the world, and according to the USDA, the United States is the largest producer of beef.
Three Main Meat Categories: Is Fish Meat?
Though pescetarianism has emerged as one of the more popular dietary choices, eating fish can technically be considered eating meat.
1. Red Meat: All livestock is considered red meat. This includes beef, pork, goat, and lamb.
2. Poultry: Commonly referred to as white meat, poultry includes chicken and turkey.
3. Seafood: That includes fish, as well as crustaceans, like crab and lobster, and molluscs, like clams, oysters, scallops, and mussels.
Is Eating Meat Healthy?
As with most things, meat becomes unhealthy when you eat too much of it. Red meat has been shown to be especially risky when it comes to things like heart disease and cancer, but animal protein has many benefits when ingested in small quantities. Its primary benefit is, of course, protein, along with its stores of essential amino acids and collagen. Most meats contain high levels of vitamin B12, B6, K, as well as zinc and iron. Depending on the animal and how it was raised, fat content varies, but is relatively low. Happy, fit animals will yield leaner and more tender muscle tissue.
There are other factors that contribute to whether different kinds of meat are healthy for consumption or pose a health risk. Overly processed meat products can be full of unhealthy chemicals and preservatives. Grass-fed beef is always healthier than grain-fed beef. Each type of meat and animal product has an internal temperature it should meat by the end of cooking to meet food safety standards, as consuming raw meat can be very dangerous.
10 Different Types of Meat: Nutritional Benefits, Concerns, Ways to Eat Each
Pork: High in vitamin B1 as well as omega-6 fatty acids, pork is one of the world’s most popular types of meat. From Italian sausage to barbecued pork ribs to bacon, pork is easy to prepare and incredibly flavorful. For an easy weeknight dinner, quick brinepork chops before you sear them off in a cast-iron skillet. Serve with apple mostarda and grits.
Beef: From a prehistoric looking T-bone steak to your average ballpark hot dogs and beef jerky, beef is a delicacy best enjoyed sparingly. It shares a main fatty acid with none other than olive oil—oleic acid. Ground beef makes for quick and easy burgers: combine the meat with egg, onions, salt, and spices or flavorings of your choice (think Worcestershire sauce and powdered garlic) and form the mixture into patties. Grill for a few minutes on either side and pair with your favorite burger toppings.
Lamb: Lamb is categorized as meat from a young sheep under a year old. While lamb tends to be on the more expensive side of the different meats, it’s also thought to be one of the healthiest, with good levels of nutrients. Sear a rack of lamb in a cast-iron skillet before basting in garlic butter and finishing in a 375°F oven for 5 minutes.
Goat: A slightly tough muscular composition makes goat a popular addition to stews and braises, where a low and slow cooking technique can best break down the fats and infuse the meat with flavor.
Chicken: Chicken meat is high and protein and low in fat, which varies in white and dark meat. Boneless, skinless chicken breast meat is one of the only types of meat that doesn’t contain saturated fat. A roasted chicken is one of life’s simplest pleasures. Brush the chicken with clarified butter and season all sides with salt, then roast at 475°F for 20–25 minutes. Reduce heat to 400°F and continue to roast another 30-45 minutes, until thighs and center of the chicken breast registers 160°F and the juices run clear. Let rest at least 20 minutes before carving.
Turkey: King of the holiday table and the deli meat aisle, turkey is a mild white meat with a reputation for being tricky to prepare without drying out. It’s a prime candidate for the brining-roasting one-two punch.
Duck: Duck meat generally refers to the breast and legs of the bird, though the liver is also enjoyed as foie gras. Ducks have a layer of fat between the outer skin and meat (primarily to insulate in water environments), giving it extra rendering power for soaking the meat with flavor as it cooks. Braised duck legs, in anything from red wine to an aromatic stock, will infuse the meat with even more flavor and fall-off-the-bone texture. Throw it in the fridge to cool, and crisp it up in the oven once the skin has set.
Rabbit: Nutrient-dense rabbit is especially popular in France and the United Kingdom. It’s meat is high in B12 and selenium, and is relatively low in calories compared to its protein levels. Rabbit is traditionally stewed or fried.
Seafood: Seafood is a massive and popular category, including everything from fish to crustaceans to shellfish. The nutritional value of seafood is incredibly vast and depends on the species, but it is generally thought to be the best form of protein for those looking to maintain a healthy diet, thanks to its high levels of omega 3s. Steam shellfish and add to pasta, or grill cleaned fish whole over the grill and serve with an herb salad and preserved lemon.
Game Meats: This category includes everything from pheasant to venison to wild boar—meats that are not typically found in a grocery store, though you may find them in some specialty meat markets. Generally these meats are quite lean, since they are caught in the wild and eat varied, natural diets. Because they’re not farmed, game meats are among the more expensive options. Their tougher muscle structures benefit especially well from braising.
One plant in your hydroponic system gathering mold or mildew can mean the difference between a blooming, blossoming harvest and an unhealthy, sick garden. Don’t ignore the speckles of dusty mildew on your plants—do your part to fix the problem and keep it from getting worse. Acting quickly to save your harvest from algae, mildew, and fungus can save you from throwing entire plants into the garbage bin. Learn how to eliminate and prevent mildew on hydroponic plants and keep your crop safe from any fungal menace.
Immediate Solutions
If you’ve noticed a dusting of white mildew on the leaves of your plants, you need to act quickly before it spreads. Severe cases of powdery mildew can prevent your plant from photosynthesizing and can harm any fruits or vegetables if it reaches them. Even if you notice just a few specks, it could turn into a full blanket by the end of the week if you don’t address it.
Here are a few ways to deal with plants afflicted with powdery mildew:
Natural Fungicides
While investing in a chemical fungicide may seem like the easy way out, you may put your plants in danger. Chemicals are also harmful to helpful insects, if you keep any, such as ladybugs. Make a few different at-home fungicides so the mildew can’t build a resistance. Do your best to wipe the most afflicted leaves with a cloth—avoid simply blowing the dusty mildew off to prevent its spread to the rest of your crop.
The most common fungicide recipe includes one gallon of water, a tablespoon of baking soda, a tablespoon of vegetable oil, and a teaspoon of dish soap. If you use dish soap with oil in it, you may not need to add the vegetable oil.
Another method involves any kind of milk—even skim milk. Mix 12 fluid ounces of milk with 28 fluid ounces of water.
For any water-based solution you make, use the same water that you use to mix your hydroponic solution to avoid throwing off your garden. Pour whichever homemade solution you create into a clean spray bottle. Before spraying all affected leaves, test the spray on one leaf first. If it burns or injures the leaf, you may need to alter your solution.
Cut the Afflicted Area
If your mildew problem is currently limited to one lower area of a plant’s leaf, you can cut the tip of the leaf off to prevent its spread. You can make cutting problematic, powdery leaves part of your pruning process. After you prune the mildew away, focus on preventing it from coming back.
Move the Afflicted Plant if Severe
Once you’ve done all you can for the plant, it may be time to make the hard decision to isolate it to save the rest of your harvest. If the mildew has reached the fruit of the plant or caused rot on your leaves, separate it from the rest and dispose of it. If you believe you can still salvage it, keep it in a quarantined area far away from your other plants and treat it however you see fit.
Mildew Prevention
With your powdery mildew under control, it’s time to make sure it never happens again. Go down the checklist of these essential mildew prevention steps to ensure that your future crops don’t suffer the harmful effects of mildew:
Ventilate Your Greenhouse
Mildew struggles to grip your plants’ leaves if there’s a steady breeze in the greenhouse. Make sure that there’s airflow in the growing area by installing vents and placing fans. Prevent bugs from getting in through the vents by covering them with a screen. Oscillating fans will keep dust from settling on the leaves in the first place.
Control the Humidity
Fungi and mildew require high humidity to form—that’s why powdery mildew is typically only an issue during the late summer, or in humid greenhouses. Plants, however, only need around 50 percent humidity to grow and remain healthy. Keep a humidity meter on hand and dehumidify the room if it gets too humid.
Regular Cleaning
If you don’t clean your plants’ containers after every harvest, you’re doing your future crops a disservice. Clean them thoroughly and use the homemade fungicide solutions for a deeper clean.
Mildew can also grow on things within the room that aren’t a part of your garden. Clean up dead leaves and any puddles on the floor as soon as you see them to prevent fungus growth.
Don’t Bring the Outside in
When you own both a hydroponic and an outside soil garden, it’s important to keep the two completely separate from each other. Don’t use any tools from outside in your sterile hydroponic gardening environment—they may have spores or pests on them from the outside that will ravage the fragile hydroponic plants. You shouldn’t even wear the same shoes that you use to garden outside while in a greenhouse.
Sticky Gnat Traps
If you notice that your garden has a gnat problem, you need to handle it right away. Gnats love to eat your plants’ roots and the fungi that grow from mildew. Where there’s a fungus, you’ll soon find these tiny pests and their larvae. Set up sticky traps around the greenhouse to capture the stragglers and look into natural pesticide solutions for larger infestations.
Stop Algae From Growing
While algae itself isn’t a huge problem for your plants, when it rots, it becomes food for gnat larvae. Prevent algae from building up in your plants’ containers by purchasing solid colors—never clear, transparent plastic. At FloraFlex, our hydroponic grow kits come with lids that further block light from coming in without hindering the growth of your plants.
Dispose of Infected Plants Properly
When there’s nothing left to do but dispose of an afflicted plant, make sure that you discard it correctly to avoid future mildew infections. Don’t compost a plant suffering from mold or mildew—bag it up and throw it away. Be careful not to disturb the mildew-stricken leaves so you don’t blow the dusty mildew all over your garden. Scrub all remains of the plant from its container and disinfect with your fungicide solution.
Mildew is a common problem for any hydroponic gardener. Don’t feel discouraged if mildew infects your plants—approach the problem with a cool head and with the knowledge that there are ways to eliminate and prevent mildew on hydroponic plants. Connect with the FloraFlex community on social media today and get in touch with plenty of experienced growers who can help you with any mold or mildew problem.