Category: Favorite Recipe

  • Pork Butt Roast

    Pork Butt Roast

    RECIPE


    • Author: RecipeTeacher
    •  Total Time: 3 hours 30 minutes
    •  Yield: 4-6 servings

    The most tender, juicy and succulent boneless pork butt roast made right in your oven. No special outdoor equipment needed.


    INGREDIENTS

    IngredientsWhere from
    Sweet & Sassy4 teaspoons seasoned salt
    2 teaspoons dark brown sugar
    1 1/2 teaspoons granulated sugar
    1 1/2 teaspoons paprika
    1/4 teaspoon garlic powder
    1/4 teaspoon pepper
    1/8 teaspoon dry mustard
    1/8 teaspoon ground cumin
    1/16 teaspoon ground ginger
    Southern Living
    Sweet with a Bite1/2 cup brown sugar
    1/4 cup white sugar
    1/4 cup salt
    1 tbsp. dry mustard
    1 tbsp. cumin
    1 tbsp. celery seed
    1 tbsp. chili powder
    2 tbsp. paprika
    2 tbsp. onion powder
    2 tbsp. garlic powder
    1 tsp. pepper
    1/4 – 1/2 tsp. red pepper flakes
    Six Clever Sisters
    Some heat1 tbs brown sugar
    2 tsp kosher salt
    1 tsp onion powder
    1 tsp garlic powder
    1 tsp ground mustard
    1 tsp paprika
    1 tsp black pepper
    ¼ tsp cayenne
    Original: Recipe Teacher
    More heat¼ cup paprika
    2 tablespoons firmly packed dark brown sugar
    2 tablespoons kosher salt
    2 tablespoons garlic powder
    1 tablespoon fresh-ground black pepper
    1 tablespoon chili powder
    1 tablespoon cayenne pepper, or more to taste
    1 tablespoon onion powder
    1 tablespoon ground dried chipotle chili pepper
    1 ½ teaspoons ground cumin
    1 ½ teaspoons dry mustard powder
    All Recipes

    This is scaled for a 3–4lb. boneless pork butt roast


    INSTRUCTIONS

    1. Combine all seasoning ingredients in a small bowl and mix well.
    2. Remove netting from pork if present. Trim any unwanted fat from pork butt roast. If it has fat cap, best to leave a little bit on, less than ¼″ thick.
    3. Apply seasoning rub over the meat. Massage and press into meat as best possible.
    4. Place meat in a large zip-top bag, sealed, overnight to marinate.
    5. Preheat oven to 350°(F).
    6. Place seasoned pork but on wire rack of a roasting pan with the fat side up. Place in oven at 350°(F) approximately 3-4 hours. Monitor closely with an instant read meat thermometer. Remove from oven when center of meat reached 185°(F). (This is more important than the time and the indicator that it’s done)
    7. Remove roasting pan with pork butt from oven and let rest for at least 15 minutes before transferring meat to a cutting board to be sliced.
    • Prep Time: 10 min
    • Cook Time: 200 min
    • Category: Dinner
    • Method: Oven
    • Cuisine: American

    EQUIPMENT AND INGREDIENTS

    The only equipment you’ll need is a roasting pan. A roasting pan is an oven safe pan which has a wire rack upon which the food sits. The pan collects the liquids from the meat and the rack helps promote even roasting on all sides – which is important, especially when cooking times exceed a couple of hours.
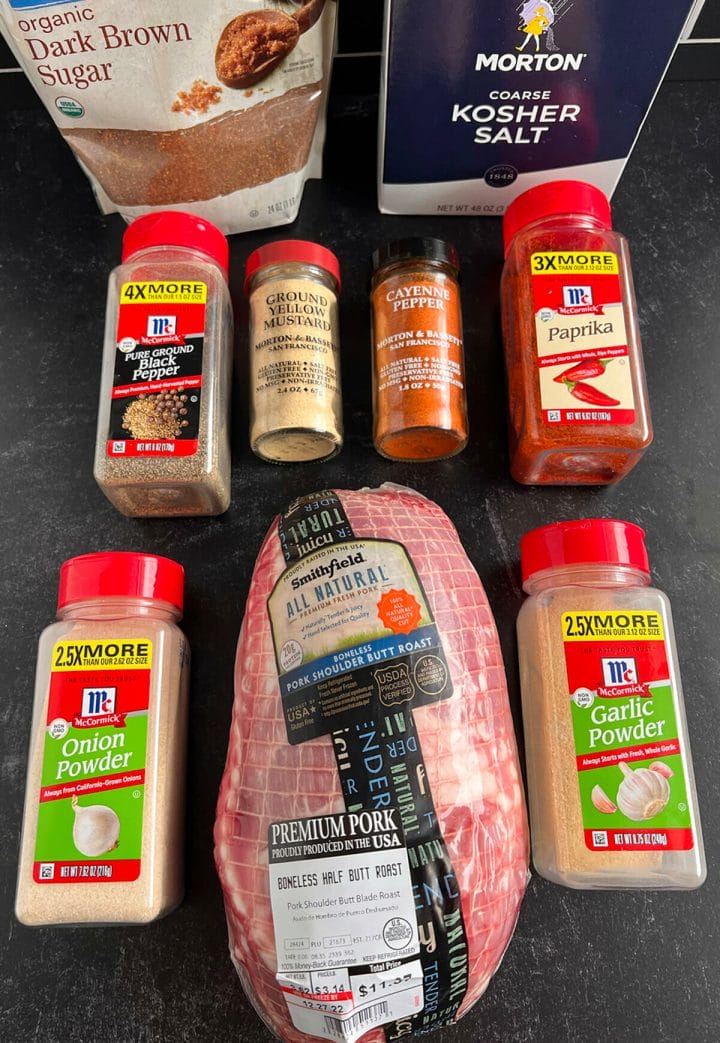
    Ingredients to make pork butt roast

    If you don’t have a roasting pan with a rack, use a large enough casserole or baking dish and roll up some aluminum foil to use as a make-shift rack.

    The ingredients are also very simple an you likely have most already in your kitchen. They include brown sugar (light or dark), paprika, onion powder, garlic powder, ground mustard powder, kosher salt, ground black pepper and just a little cayenne to give everything a nice little boost.

    Of course, the main ingredient is the butt roast. You’ll find butt roasts in many sizes and some are bone-in, and some are boneless. For the very best results when making a butt roast this way, it is recommended to use a smaller sized boneless roast. Boneless roasts of 3-4lbs are quite common and many supermarkets. Roasts larger than 4 lbs are not recommended as the roasting time can greatly increase, drying out the meat. Larger pork butts are best used as a pulled pork. We have a terrific oven roasted pulled pork recipe you can try!

    PREPARATION

    Many smaller pork butts will come with a netting that holds the meat in a nice, compact shape. Go ahead and gently cut the netting away. You can also rinse the meat under cool water. Again, do this gently as you don’t want it falling apart. Then pat the roast dry with a paper towel.

    Some roasts have a fat cap. If the fat cap is very large or thick, you can cut some away with a sharp knife. You’ll want to some on though, it it can greatly increase the juiciness and flavor of the meat.
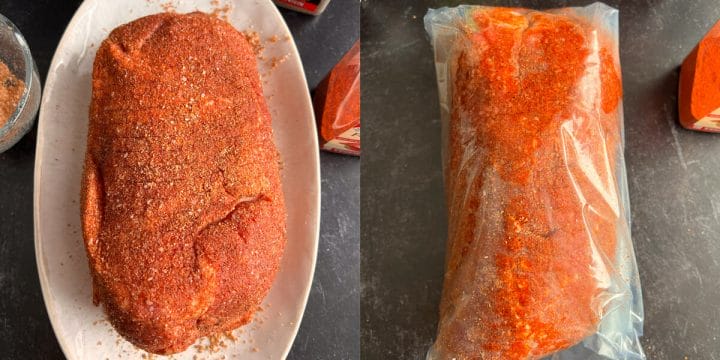
    Seasoning pork butt roast

    Next, we’re ready to apply our seasoning mix.  Liberally apply all the rub and massage it in well. For extra flavor, seal it in a zip-top bag in the refrigerator overnight!

    Now place the roast (fat cap side up if it has it) on the roasting rack. Having the fat side up is important as it will melt into the meat making it extra juicy.
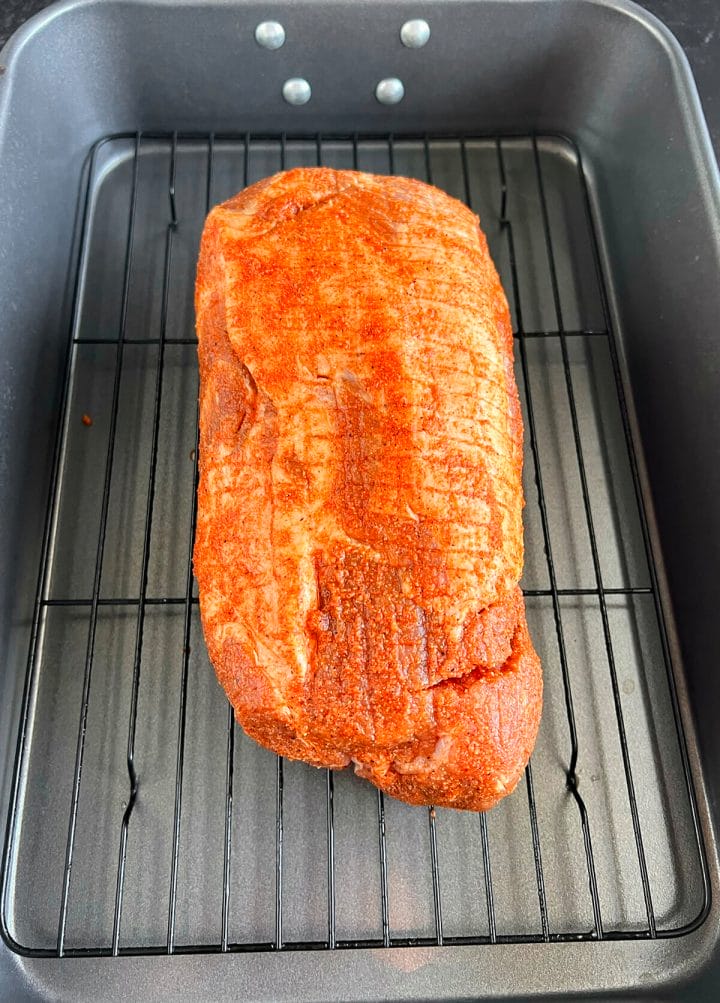
    Seasoned pork butt ready to go in the oven.

    ROAST AT 350°(F) FOR 3-4 HOURS

    Place the roast into a preheated oven at 350°(F). The cooking times can vary, depending on the size and weight of the roast, but for one that is 3-4lbs, we’ll be looking at 3-4 hours.

    The important thing is the internal temperature of the roast. We want an internal temperature of 185°(F). While pork is technically done at 145°(F), a pork butt roast will not be tender at that temperature. Once we start getting above 180°(F), the roast will really start to become tender as the fat and connective tissues start to break down. We don’t want to take this pork roast much higher that 185°(F) as then it starts to become much more supple, and more geared towards shredded pork. Now of course, shredded or pulled pork is totally fine, but we’re looking more for slices of pork roast with this recipe. Use a meat thermometer or instant read thermometer to monitor the internal temperature.
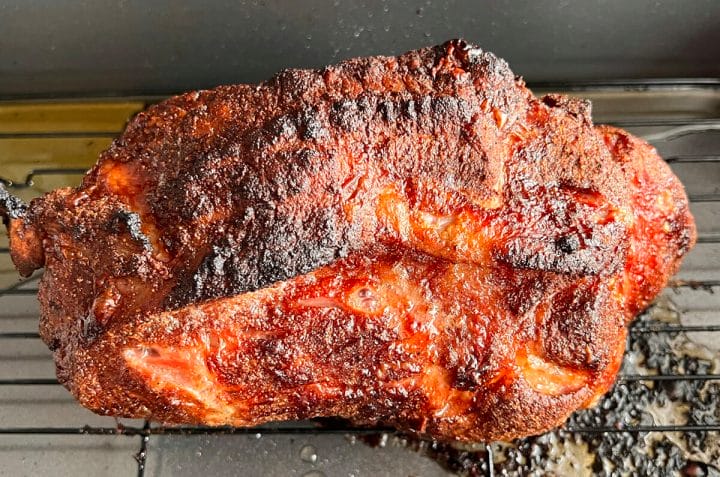
    Oven roast pork butt

    LET IT REST

    Once the pork has reached 185°(F), it’s time to remove it from the oven. But we do not want to dig in right away! We need that meat to rest for at least 15 minutes. This allows all the natural juices to redistribute through the meat. Slicing it too soon will not yield optimum results.

    TIME TO SERVE!

    Once your butt has had a chance to rest, transfer it to a cutting board and begin slicing. I like the slices to be about ¼″ thick. Some of the edges may shred a bit, but that’s fine. You should have a really nice bark on the outside of the roast, while it’s tender and super juicy on the inside.

    Feel free to collect the pan drippings and use it to pour over the served slices. It will have a tremendous flavor all it’s own. And of course, you can also use your favorite BBQ sauce at anytime while enjoying the pork. Slather it right onto the meat or keep it on the side for dipping.
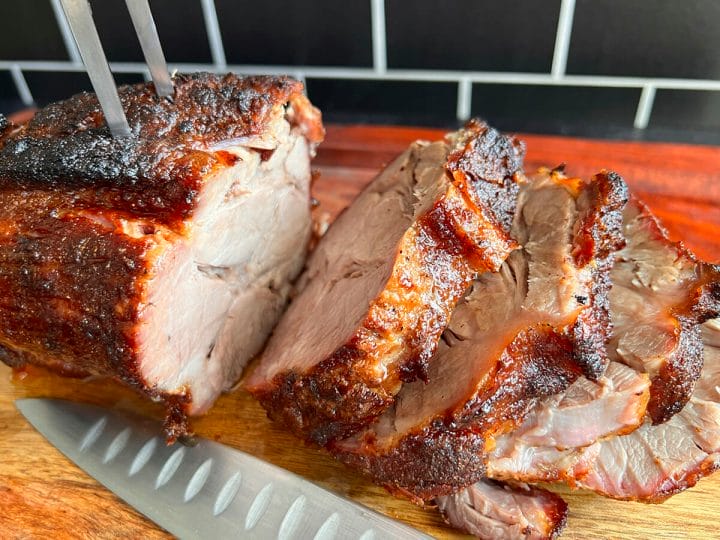
    Oven roasted pork butt.

    FREQUENTLY ASKED QUESTIONS:

    Q: Does the pork need to be seared first?
    A: Nope. By roasting at 350°(F), the roast will form a nice “bark” on the outside.

    Q: Can the pork roast be marinated?
    A: For extra flavor, you can season the roast and place in a large zip-top bag overnight in the refrigerator. The seasoning will act as a marinade and penetrate the flavor deeper into the meat.

    Q: Should the pork roast be covered?
    A: No. We want the outside of the pork to get nice and crusted.

    Q: Can this recipe be made in a slow cooker?
    A: A slow cooker is better for making pulled pork. See our Slow Cooker Pulled Pork recipe for complete instructions.

    Q: Can barbecue sauce be added before roasting?
    A: Barbecue sauce is best added after the pork has been sliced. Our dry rub will take care of all the seasoning needed prior to roasting.

    Q: What’s the best way to reheat?
    A: Place the pork slices in a shallow pan, covered and reheat in the oven at a low temperature, 250°(F) for about 15 minutes. Add a little water or broth to the pork to keep it from drying out. You can also reheat in the microwave. Again, add some liquid to help keep it moist.

    Q: What’s the best way to enjoy leftovers?
    A: Pork sandwiches are a great way to enjoy leftover pork roast. Make sure to use a good, hearty bun and add your favorite BBQ sauce or other toppings.

    GOES WELL WITH…

    Roasted pork can go with just about any side dish. There’s really no wrong answers. But, you’ll find a few things are ideal for sides.

    Macaroni and cheese with pork is a southern BBQ staple. Our Best Damn Instant Pot Mac and Cheese is excellent. Also, BBQ pork goes great with the cool crunch of coleslaw. Try our Homestyle Country Coleslaw for a great and easy recipe. And of course, cornbread. Oh my goodness I LOVE cornbread with any BBQ dish or pork dish. Our Cast Iron Skillet Cornbread is a homemade classic that you’ll absolutely love!

    Ultimate Goal

    Make the most incredible, juicy and tender pork butt roast with just a few simple ingredients and steps. You don’t need any special outdoor equipment, just your oven and a roasting pan.
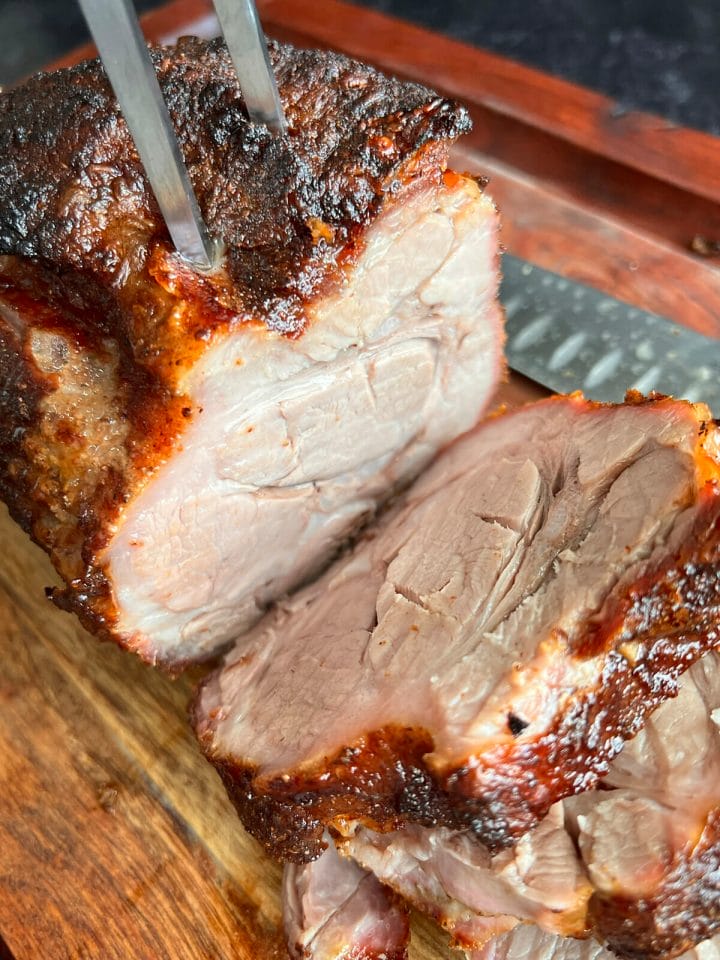
    Pork butt roast recipe

    This homemade BBQ favorite is an excellent choice for any family gathering, special occasion or even a Sunday dinner. Load up the roast with pantry-friendly ingredients, put it in the oven, and let it slow roast to succulent perfection!

    And for those who don’t know, WHAT IS A PORK BUTT ROAST?

    Pork butt, despite the name, is not from a pig’s rear end. The butt roast cut comes from the thicker park of the shoulder area. It has a lot of fat marbling, which makes it the perfect meat for slow roasting.

    You’ll often see many similar cuts of meat from the same area labeled as pork shoulder, Boston butt, or picnic roast. Perhaps even a combination of shoulder and butt. All of these cuts are very popular for pulled pork recipes. For this recipe, we’ll focus just on the boneless butt roast/shoulder butt roast and cook it in a more traditional pork roast fashion.

  • Instant Pot Chuck Roast

    Instant Pot Chuck Roast

    This Instant Pot Chuck Roast is a game-changer! Pressure cooking makes an incredibly tender and flavorful chuck roast recipe that is comfort food at its best. It’s easy to prepare and ready in just over an hour – so it’s perfect for Sunday dinner or even the holidays!

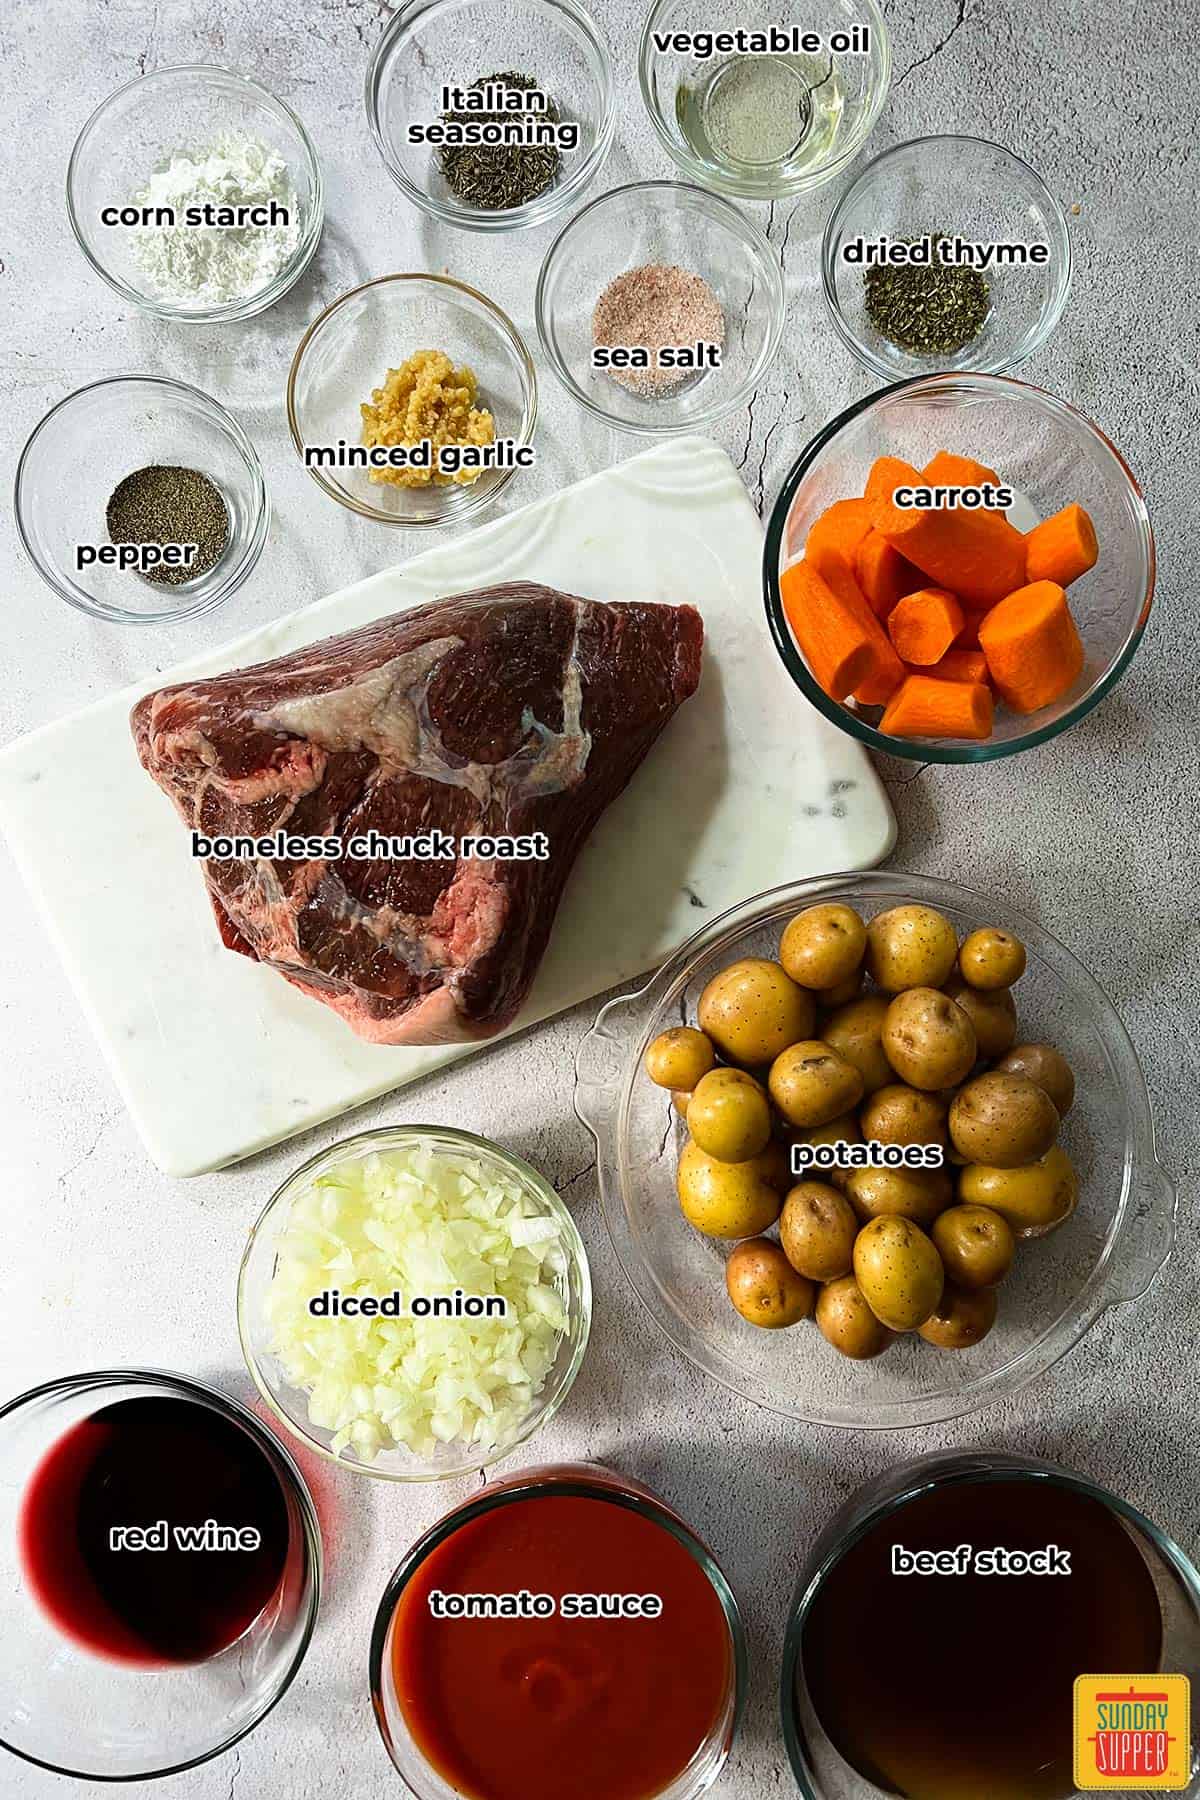
    Ingredients  

    Chuck Roast in the Instant Pot

    • It’s quick and easy to make without compromising on flavor. Your average pot roast might take hours to cook in the oven or slow cooker – Instant Pot Pot Roast takes under 2 hours with minimal prep.
    • The ingredients are simple – you don’t need anything fancy to make this pot roast. It’s a classic pot roast recipe everyone will love, made easy.
    • It’s budget-friendly. Chuck roast is an inexpensive cut of beef, so it’s perfect for making an economical pot roast for a party or even the holidays.
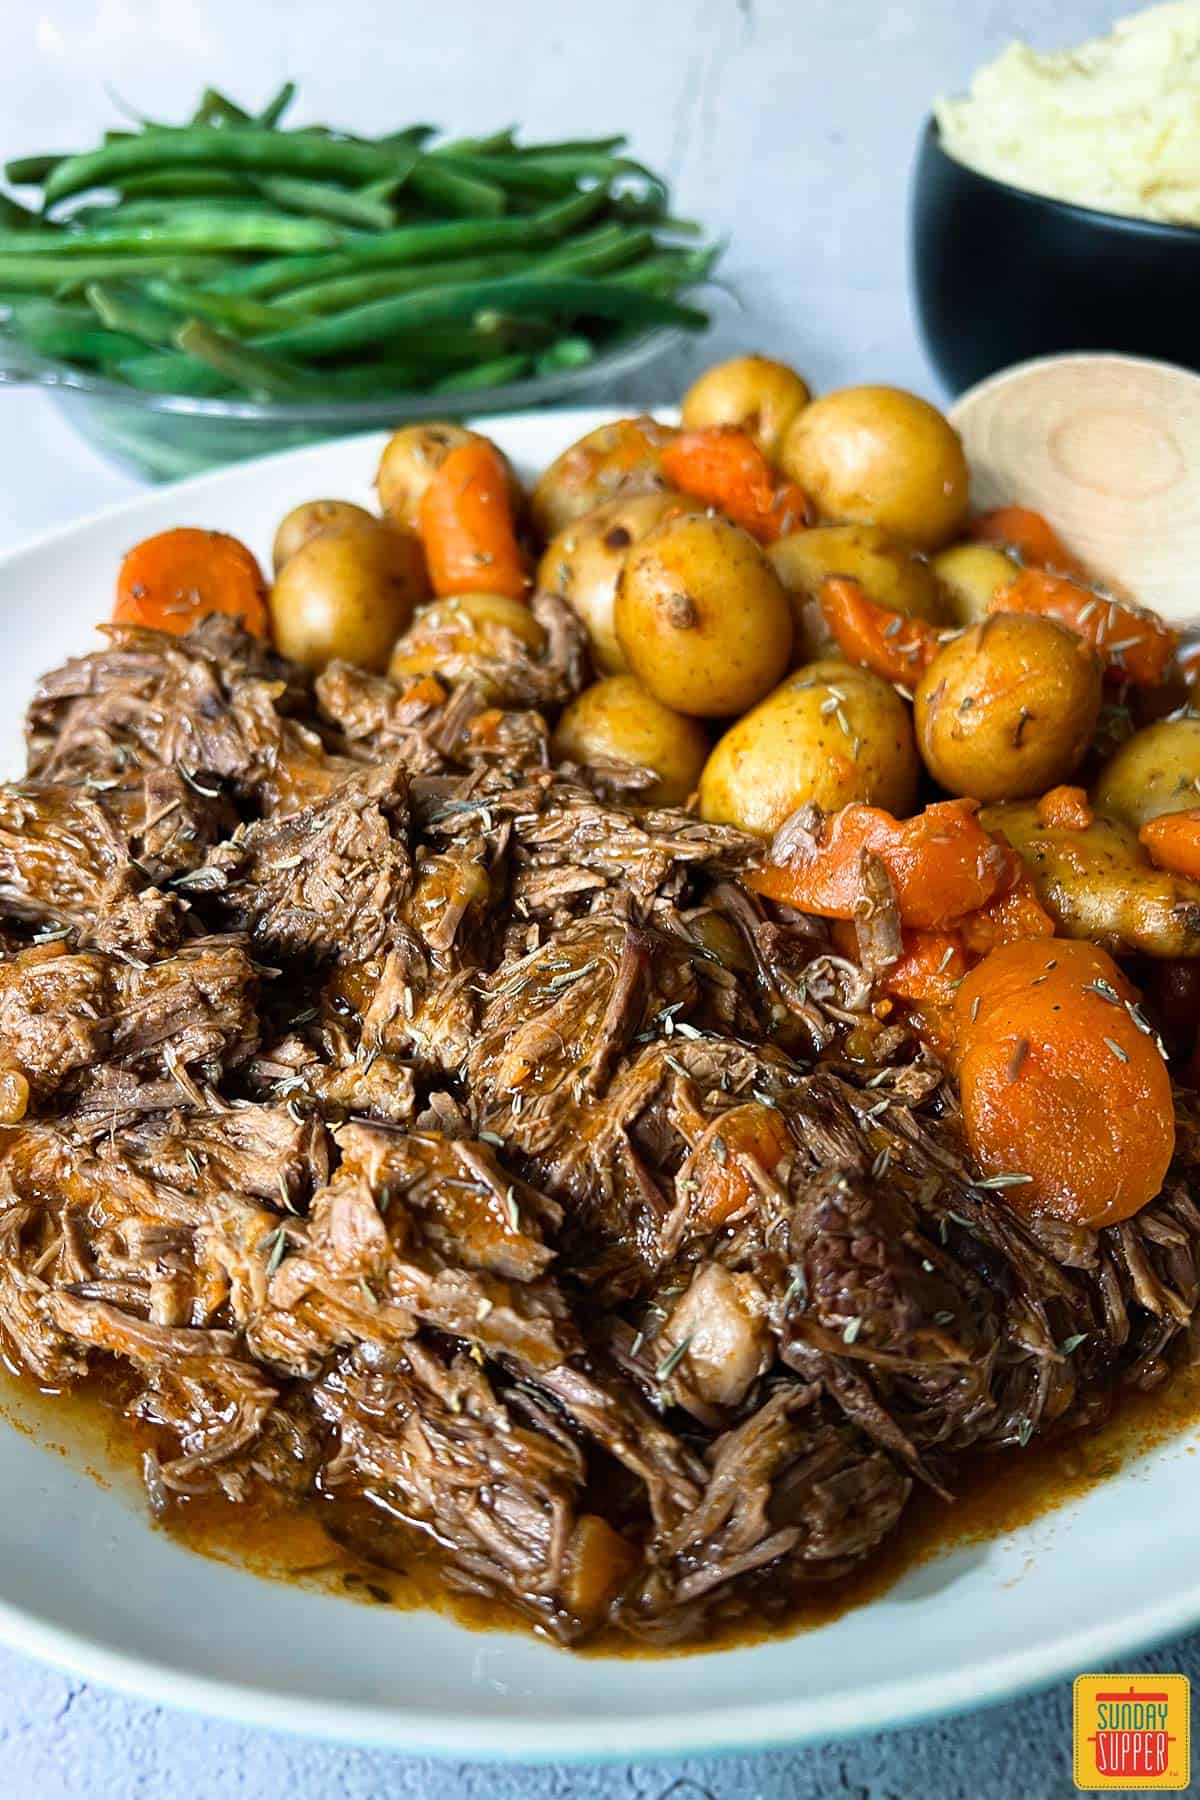
    instant pot chuck roast up close on a plate with potatoes and carrots in front of two bowls of green beans and mashed potatoes

    Instant Pot Beef Roast Ingredients

    • Boneless chuck roast, cut into halves
    • Vegetable oil
    • Garlic
    • Onion
    • Red wine
    • Beef broth
    • Tomato sauce
    • Kosher or sea salt
    • Pepper
    • Fresh thyme
    • Fresh rosemary
    • Corn starch
    ingredients to make instant pot chuck roast labeled in bowls

    Chuck Roast Instant Pot Recipe

    1. Generously season all sides of your roast with salt and pepper. Set Instant Pot onto sauté mode.
    2. Once the Instant Pot is hot, add in half of your vegetable oil. Once the oil is hot, add your roast.
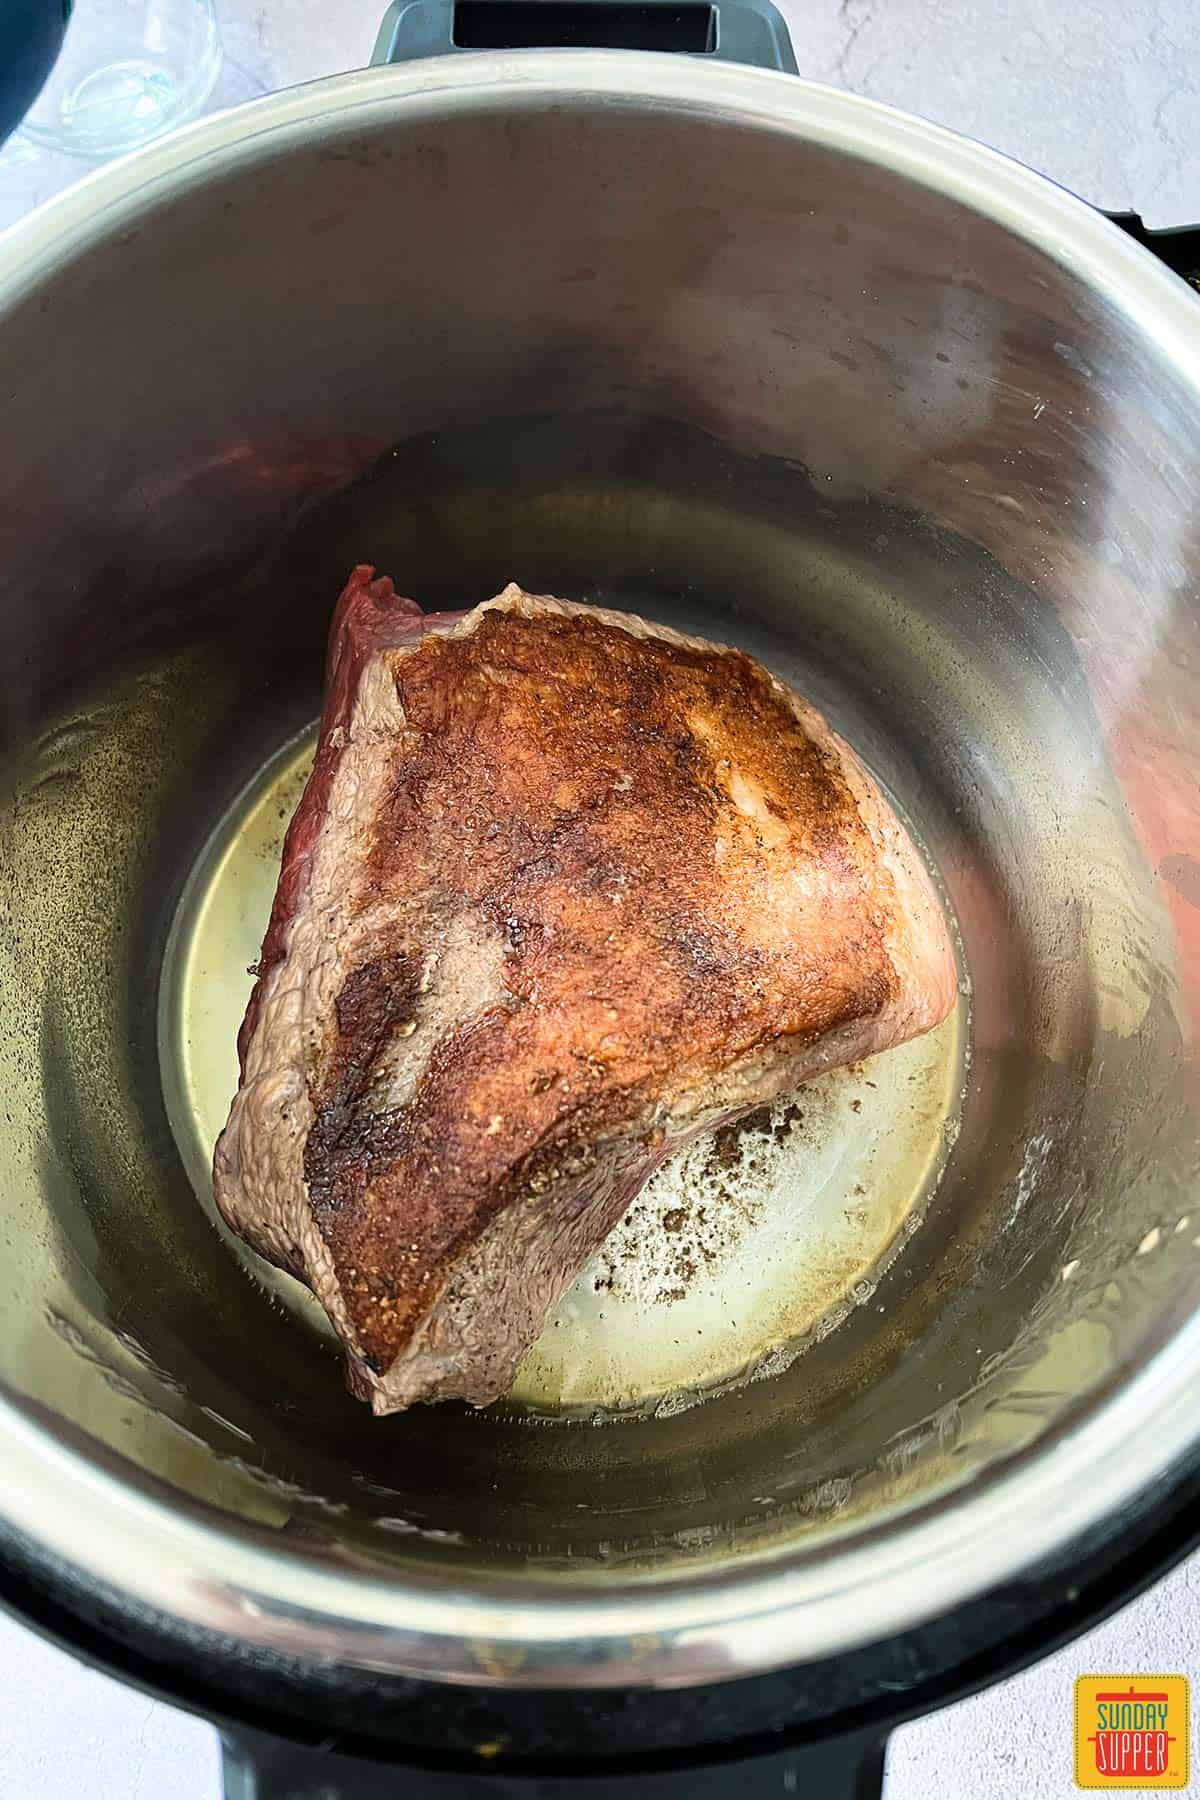
    3. Sear for 4 minutes on the first side, then flip and sear the opposite side for 4 minutes. Remove roast and set aside.
      cooking instant pot chuck roast
    4. Add the remaining vegetable oil to the pot, along with diced onions and minced garlic. Sauté for about 3-4 minutes, stirring frequently.
    5. When soft and fragrant, add in red wine and sauté for 5 minutes, stirring frequently, until the wine reduces to half.
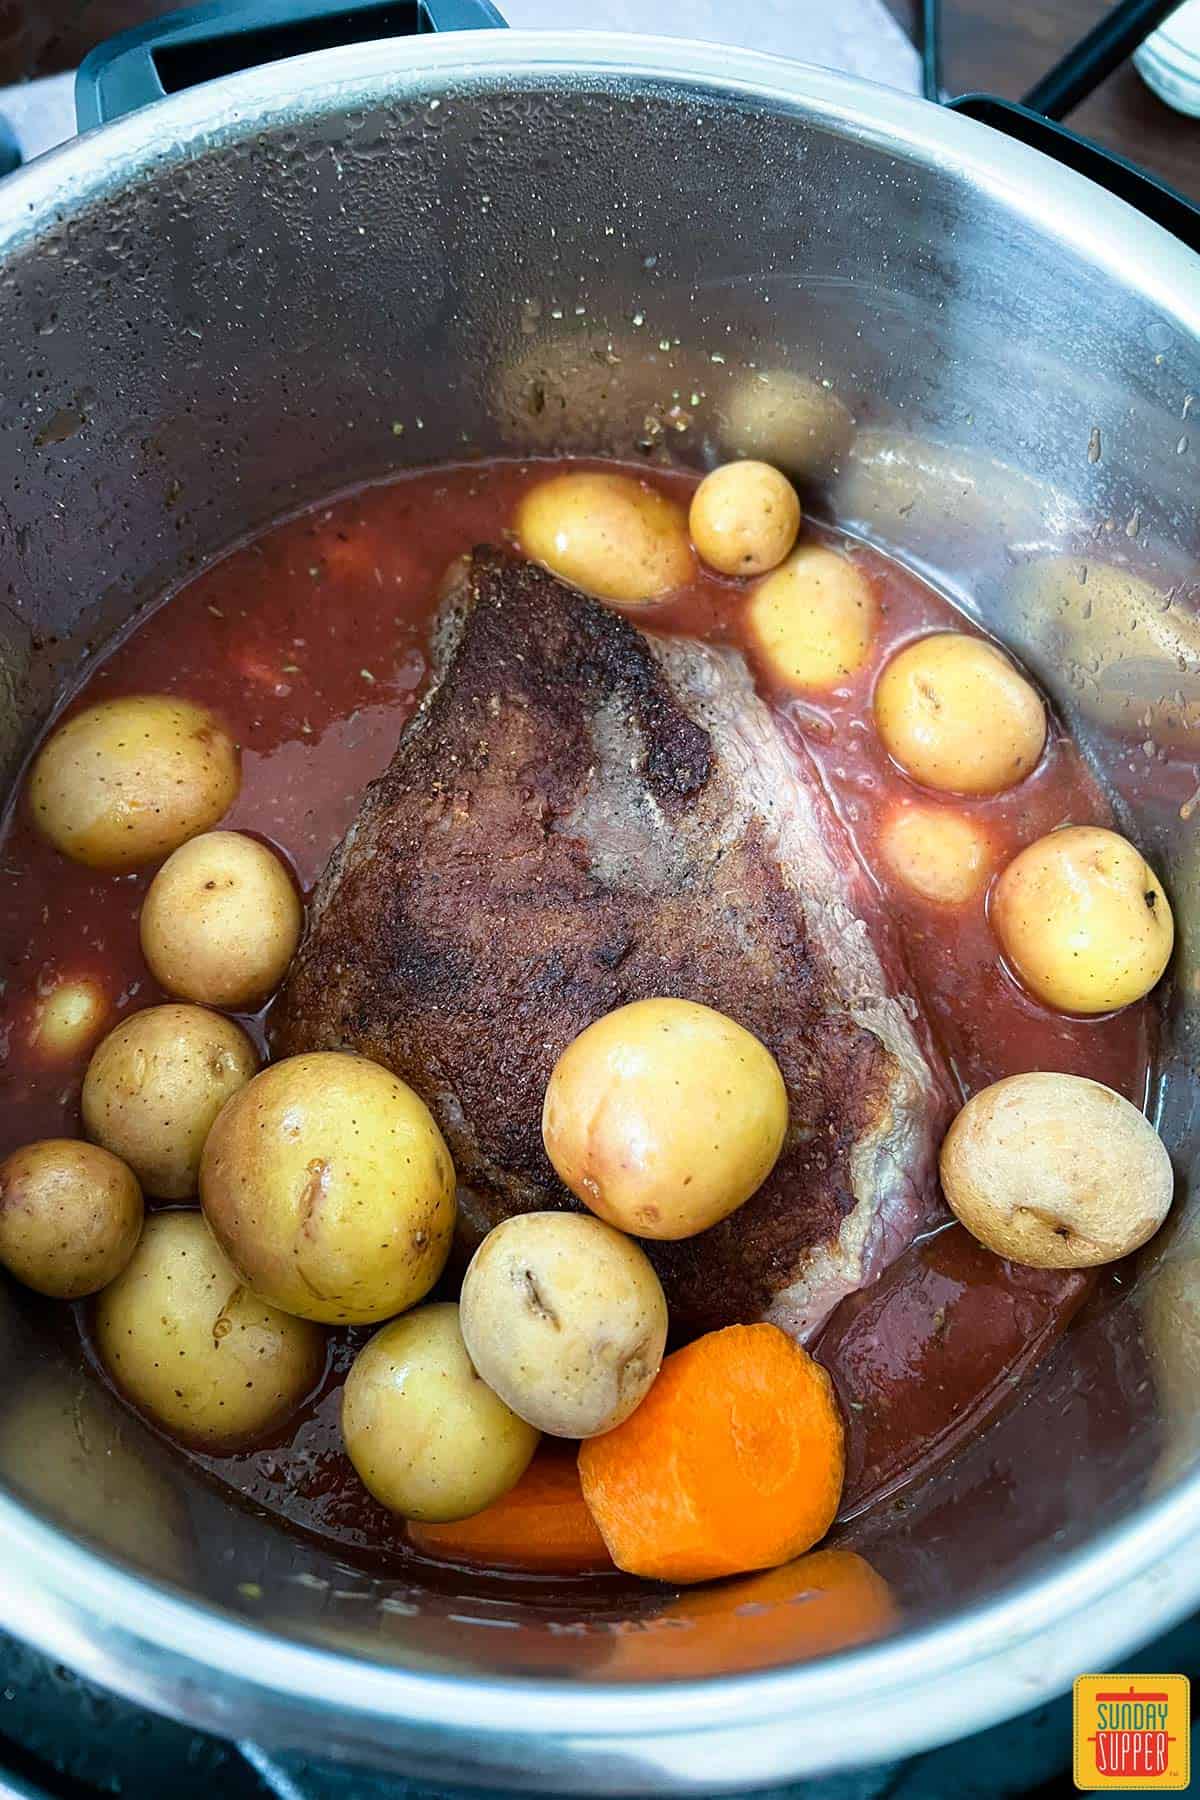
    6. Add in half of your beef broth, tomato sauce, dried thyme, Italian seasoning, salt, and pepper, and give it a good mix. Carefully add your roast back into the pot along with carrots and potatoes. 
      chuck roast in instant pot with potatoes and carrots
    7. Secure the Instant Pot lid and pressure cook on high for 70 minutes. Once 70 minutes is up, let your Instant Pot naturally release pressure for 20 minutes.
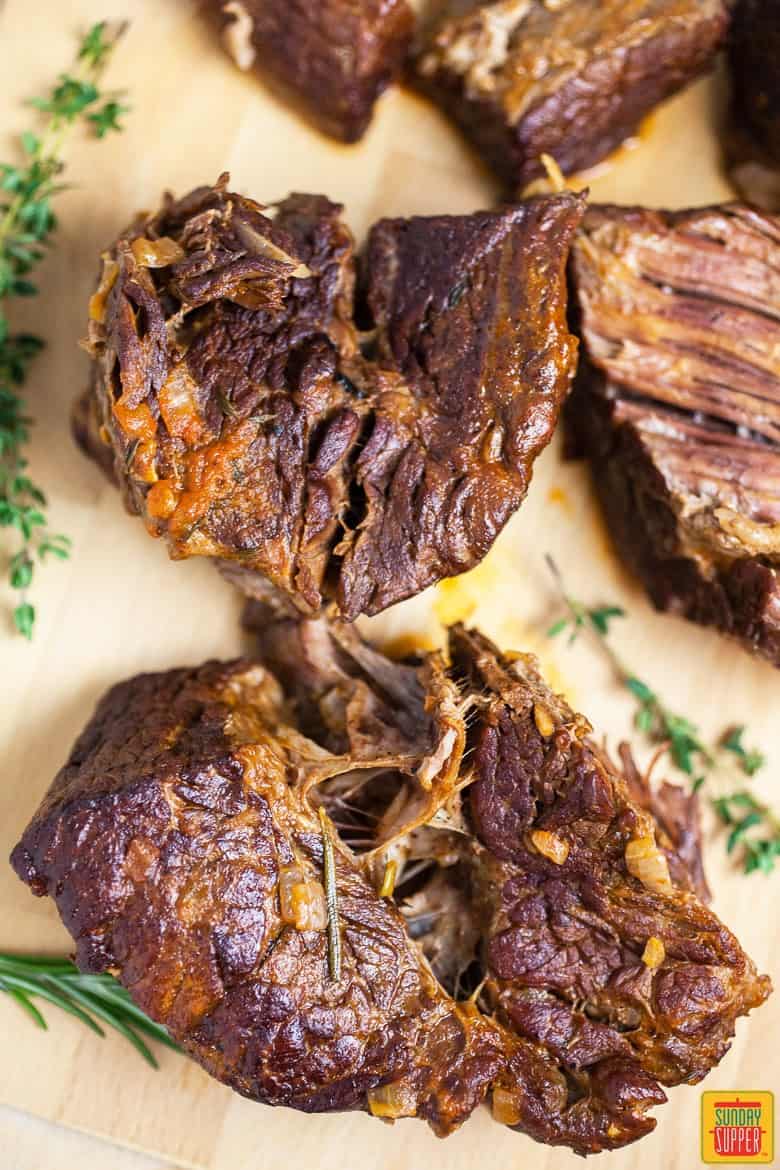
    8. After 20 minutes, you can release any excess steam. Remove the meat from the pot and set it aside. 
      Instant pot pot roast meat on a cutting board
    9. In a small bowl combine cornstarch and beef broth. Slowly add the mixture into the Instant Pot with the drippings from the beef. Stir until the mixture thickens.
    10. Serve gravy over your pot roast, and enjoy!
    instant pot chuck roast up close on a plate with potatoes and carrots in front of two bowls of green beans and mashed potatoes

    Chuck Roast in the Instant Pot Tips

    • It’s important to let the pressure release naturally, so leave it for another 20 minutes after cooking.
    • Feel free to release the vent after 20 minutes. This will release any extra steam and allow you to open the lid.
    • Cutting the roast into halves helps cut down on the cooking time in the pressure cooker and allows you to distribute the seasoning more evenly, giving you a more flavorful dish.
    • Discover more ways to cook chuck roast with our Best Beef Chuck Roast Recipes!

    Instant Pot Chuck Roast FAQs

    How long to cook roast beef in the Instant Pot?

    Cook roast beef in the Instant Pot at approximately 20 minutes per pound, until it is fall-apart tender and easy to shred with a fork. Adjust according to the size of your roast.

    How do you thicken pot roast gravy in the instant pot?

    You can thicken pot roast gravy in the Instant Pot by using a slurry. One of the best ways to thicken a sauce is to simply make a mixture of liquid and cornstarch, also known as a cornstarch slurry. You can do this with water and cornstarch or broth and cornstarch.

  • Smoothie Ideas

    Smoothie Ideas

    by ASHLEY FEHR

    How to Make a Smoothie: my formula for the thickest, creamiest, most delicious fruit smoothie every time! Tons of options for your liquid, your fruit and your add-ins!

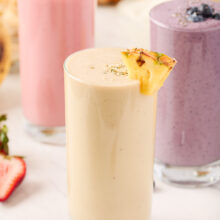
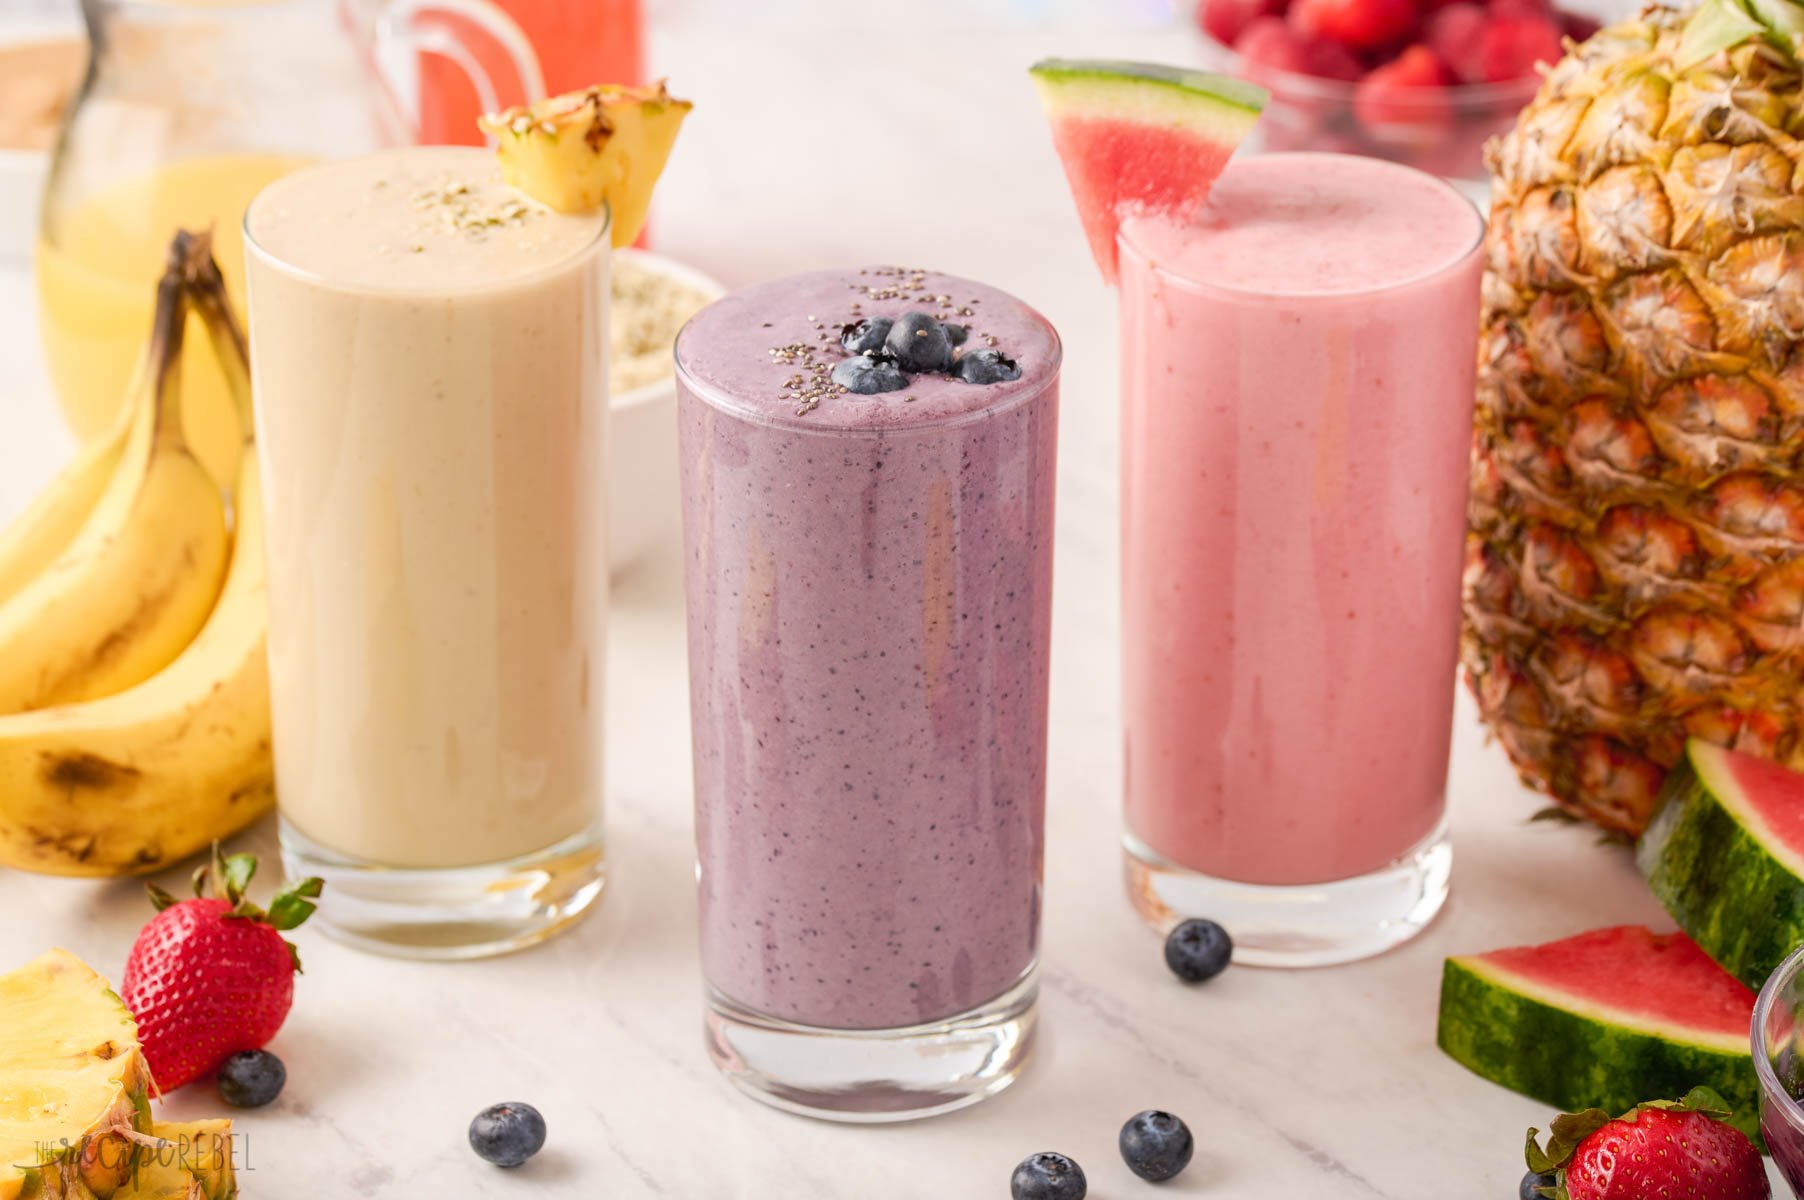
    three different smoothies in glasses with pineapple smoothie in the front

    PREP TIME 5minutes mins

    COOK TIME 0minutes mins

    TOTAL TIME 5minutes mins

    CUISINE American

    COURSE Breakfast, Drinks

    SERVINGS 2

    CALORIES 142cal

    Ingredients

    • ▢¾ cup milk or juice (dairy or non-dairy, high fat or low fat)
    • ▢½ cup plain Greek yogurt (or flavored) about 125 grams
    • ▢1 frozen banana (cut into or frozen in chunks) about 115 grams
    • ▢1 cup frozen berries (strawberries, blueberries, or watermelon, cherries, pineapple, mango — options are endless!)
    • ▢add ins and extras as desired (protein, nut butter, oats and other grains, extracts, etc)

    Instructions

    • Add ingredients to the blender in the order listed (from softest to firmest).
    • Blend until smooth, stopping and stirring as necessary.
    • If your blender is struggling, add a small splash of liquid and stir, then blend again. If you like your smoothie thicker (or colder!), add a handful of ice and blend again.

    Notes

    Add-in Ideas:

    • Nut Butters: give it a boost of nutrition and nutty flavor with a scoop of peanut butter, cashew butter, almond butter, or sunflower seed butter.
    • Seeds: add in a sprinkle of flax seeds, chia seeds, or hemp hearts.
    • Grains: add a scoop of quick oats or even cooked brown rice or quinoa.
    • Protein: make it more filling with a scoop of your favorite protein or collagen powder.
    • Make it creamy: Cream cheese and cottage cheese make an incredibly thick and creamy smoothie.
    • Veggies: a handful of fresh spinach or kale, half an avocado, or even a handful of frozen cauliflower is a great way to add some extra nutrition. Cauliflower and avocado also create an extra smooth and creamy texture!
    • Sweeteners: prefer it sweeter? Try adding a drizzle of honey, agave, pitted Medjool dates, or simple syrup.
    • Extracts: add a dash of vanilla, almond or maple extract to add some extra flavor.
    • Spices and Powders: try Acai powder, maca powder, spirulina, cinnamon, nutmeg, you name it.

    Nutrition Information

    Calories: 142cal | Carbohydrates: 25g | Protein: 9g | Fat: 1g | Saturated Fat: 1g | Polyunsaturated Fat: 1g | Monounsaturated Fat: 1g | Trans Fat: 1g | Cholesterol: 7mg | Sodium: 58mg | Potassium: 525mg | Fiber: 3g | Sugar: 17g | Vitamin A: 222IU | Vitamin C: 47mg | Calcium: 180mg | Iron: 1mg

    More Recipes You’ll Love

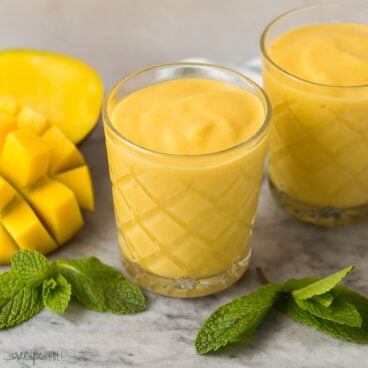
    two mango smoothies in glasses with fresh mango and fresh mint

    DRINKS

    Mango Smoothie


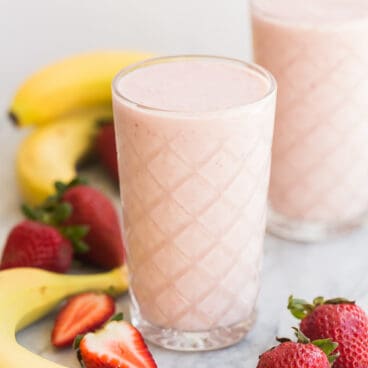
    strawberry banana smoothie in clear glass

    BREAKFAST

    Strawberry Banana Smoothie


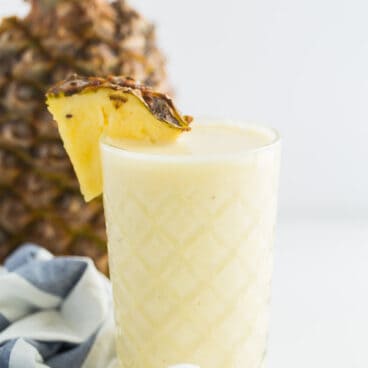
    pineapple smoothie in glass with pineapple slice

    BREAKFAST

    Pineapple Smoothie


    BREAKFAST

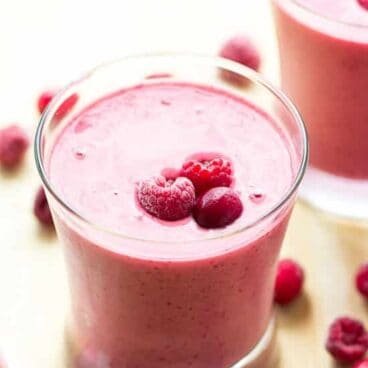
    Cranberry Raspberry Smoothie

  • Creamy Chicken and Rice Bake

    Creamy Chicken and Rice Bake

    Prep Time 5 Min

    Total Time 50 MIN

    Serves 4

    Topped with yummy melted cheese, this easy one-pot chicken dish is a great recipe that is sure to please everyone.

    Ingredients

    Metric Imperial 1 can (284 mL) CAMPBELL’S® Condensed Cream of Mushroom Soup

    1 cup water

    3/4 cup uncooked regular long grain white rice

    1/2 tsp onion powder

    1/4 tsp ground black pepper

    2 cups frozen vegetable

    4 skinless, boneless chicken breast halves

    1 cup shredded Cheddar cheese Email Ingredients List + Nutritional Value

    Directions

    Mix cream of mushroom soup,water,rice,onion powder and black pepper in shallow 2 qt (2 L) baking dish. Stir in vegetables (if frozen,thawed under running water).Top with chicken breasts. Sprinkle chicken with additional pepper,if desired. Cover.

    Bake at 375°F (190°C) until chicken is cooked through and rice is tender – about 45 minutes. Sprinkle cheese over chicken. Remove chicken and stir rice before serving.

    Recipe Tips

    Feel free to experiment with different cheeses and dairy products. Try this recipe with parmesan cheese, cream cheese, or even sour cream.

    This recipe can also be completed using chicken broth, chicken soup, or chicken stock.

    Other potential ingredients include brown rice, garlic powder, and green beans.

    Creamy Chicken and Rice Bake

  • Cheddar Bay Biscuit & Chicken Casserole

    Cheddar Bay Biscuit & Chicken Casserole

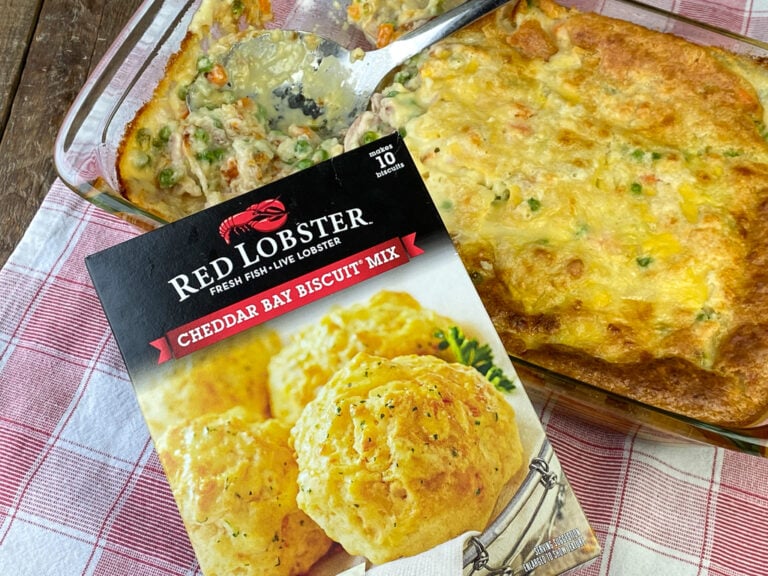
    An easy dinner idea using rotisserie or other cooked chicken, Cheddar Bay Biscuit Mix, creamy filling, and of course cheese. So delicious.

    CourseMain Course

    CuisineAmerican

    AuthorCatherine’s Plates

    Equipment

    • cutting board & sharp knife
    • large mixing bowl
    • medium mixing bowl
    • 9 x 13 baking dish
    • small dish & pastry brush

    Ingredients

    Biscuit Topping

    • 1 box Red Lobster Cheddar Bay Biscuit Mix
    • 3/4 cup water
    • 1/2 cup shredded cheddar cheese
    • 2 TBS butter, melted

    Mixture

    • 2 cups rotisserie or other cooked chicken
    • 3 (10oz) cans cream of chicken soup
    • 1 cup sour cream
    • 1 cup cheddar cheese, shredded
    • 2 tsp minced garlic
    • 1/4 cup milk
    • 2 TBS melted butter
    • 2 1/2 cups mixed vegetables thawed (peas & carrots, corn, green beans)
    • 1/2 tsp salt
    • 1/2 tsp black pepper
    • 1/2 tsp garlic powder
    • 1/2 tsp onion powder

    Instructions

    • Preheat oven to 425 degrees. Spray a 9 x 13 baking dish with non-stick cooking spray. Set aside.
    • In a large bowl mix together cooked chicken, cream of soups, sour cream, cheddar cheese, milk, garlic, melted butter, thawed vegetables, salt, black pepper, garlic powder, and onion powder.Pour mixture into prepared baking dish.
    • In medium bowl place Red Lobster Cheddar Bay Biscuit mix. Stir in water and 1/2 cup shredded cheddar cheese. Spoon biscuit mix on top of cream mixture and smooth out evenly.
    • Bake in preheated oven for 16-18 minutes until golden brown, biscuits are cooked through, and mixture is heated through.
    • In small dish mix together 4 TBS melted butter & herb seasoning pack 

    https://catherinesplates.com/cheddar-bay-biscuit-chicken-casserole/

  • So Long Saloon’s Raspberry Black Bean Dip

    So Long Saloon’s Raspberry Black Bean Dip

    The following are the quick & easy steps to replicate the delicious raspberry bean dip from So Long Saloon in Manhattan, Kansas.

    In Manhattan, Kansas, there are a lot of interesting places to explore and things to try in town. A must-stop is the So Long Saloon’s to try their raspberry black bean dip. Living so far away, finding this recipe to avoid having to drive 7 hours one way to get it, has been absolutely critical for me. Thanks to Samantha Albers of Kansas State University and their wonderful write-up on Spoon University on July 9th, 2017, we have the eight simple steps for So Long Saloon’s raspberry black bean dip at home.

    Raspberry Black Bean Dip

    • Prep Time:10 mins
    • Cook Time:25 mins
    • Total Time:35 mins
    • Servings:7
    • EASY
    • 1 15-ounce can black beans loosely rinsed and drained
    • Pinch each salt and black pepper
    • 1 tsp cumin
    • 2/3 cup diced red or white onion about half an onion
    • 1 clove garlic minced
    • 5 Tbsp raspberry sauce or jam
    • 1 8-ounce package cream cheese
    • 1/3 cup shredded pepper jack cheese
    • 2 Tbsp olive oil
    • Cilantro for topping optional
    • Chips or crackers for serving
    beans, chili, black beans
    Samantha Albers
    • STEP 1
    • Preheat oven to 400° F (204° C)Samantha Albers
    • STEP 2
    • In a small saucepan, heat beans along with cumin and a pinch each of salt and pepper. Once warmed, taste and adjust seasonings and set aside.coffee, beans, cereal Samantha Albers
    • STEP 3
    • Add olive oil to a 10-12 inch oven-safe skillet over medium heat. Add onions and a pinch of salt. Stir. Cook until soft and fragrant (about five minutes), stirring frequently.vegetable, rice, salt, onion Samantha Albers
    • STEP 4
    • Add garlic and cook for two more minutes. Add to a mixing bowl with cream cheese and stir.vegetable, cereal, rice, risotto, saute Samantha Albers
    • STEP 5
    • Remove the skillet from heat and add cream cheese-onion mixture back to the skillet. Place in the center and make a well (or spread evenly for more distribution).chocolate, cream, cake, sweetSamantha Albers
    • STEP 6
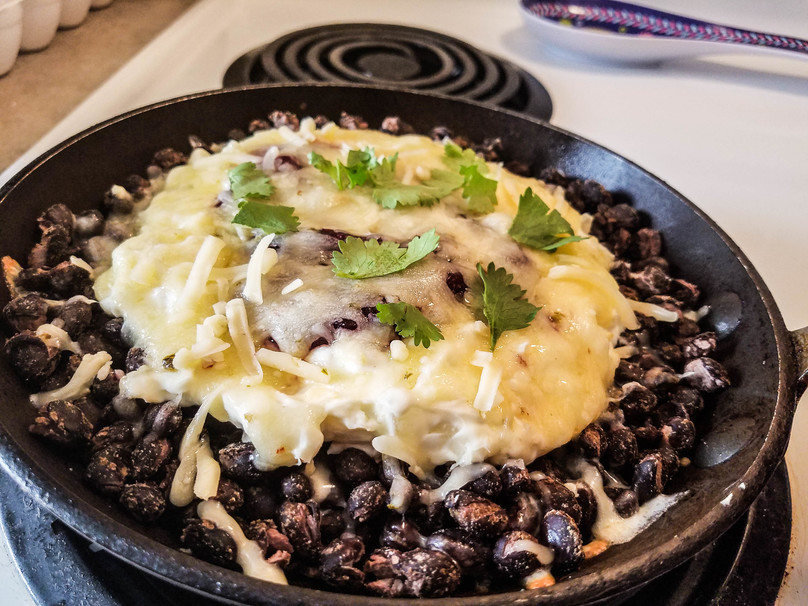
    • Add beans around the outside or on top of cream cheese. Pour raspberry sauce or jam in the center.cake, chocolate, raspberry, cream Samantha Albers
    • STEP 7
    • Sprinkle cheese evenly over the top (optional but recommended). Bake for 12-15 minutes or until warmed and bubbly. Cheese should be melted.cheese, beansSamantha Albers
    • STEP 8
    • Remove from oven and top with additional cheese and cilantro (optional). Serve immediately with chips or crackers.chili, cheese, beefSamantha Albers

    Important Side Notes:

    This recipe serves six to eight people (if you are willing to share).

    You can swirl everything around before serving to combine flavors or let people scoop into it with chips and get a bit of each ingredient.

    Leftovers can keep covered and refrigerated for several days — just reheat in the microwave or oven.

    chicken, oil
    Samantha Albers

    This recipe is a sure and easy way to enjoy one of the most famous dishes made in Aggieville. But for those who have never been there, Manhattan has many great opportunities to enjoy a wonderful atmosphere and vibrant nightlife. So even if you opt to make this at home, I’d still consider visiting for the original version.

  • How to Make a Smoothie

    How to Make a Smoothie

    written by ASHLEY FEHR

    PREP TIME 5MINUTES MINS

    TOTAL TIME 5MINUTES MINS

    SERVINGS 2

    Published on April 19, 2022 / Last updated on November 1, 2022

    How to Make a Smoothie: my formula for the thickest, creamiest, most delicious fruit smoothie every time! Tons of options for your liquid, your fruit and your add-ins!

    three different smoothies in glasses with a variety of fruit in the background

    Whether it’s a Strawberry Smoothie, a Peanut Butter Banana Smoothie, or an Apple Crisp Smoothie, smoothies make a great breakfast, snack, or even dessert.

    But, as simple as they are to make, they’re also surprisingly easy to mess up. They can be too thick, too thin, too sweet, not sweet enough, too chunky, too icy…yeah, you get it.

    Well, I’m going to show you just How to Make a Smoothie! This is my formula for making the perfect one every time with just the right amount of liquid, fruit, yogurt, and add-ins.

    I’ve also included plenty of variation ideas so you can customize it just how you like!

    What Should I Put in My Smoothie?

    The great thing about a fruit smoothie recipe is that the customization opportunities are virtually endless. Here’s a quick run through of what I usually put in my smoothies:

    • Milk or Juice: you can use dairy milk, non-dairy milk, juice, or even coconut water — really any liquid goes! You can even use cold tea.
    • Greek Yogurt: yogurt is a great way to kick the protein up a notch and to make a deliciously thick and creamy texture. Dairy-free, plant-based yogurt works well, too, and you can skip it if you need (it just won’t be as thick).
    • Banana: I love to keep frozen, sliced banana on-hand. The frozen banana makes it extra creamy and acts as a natural sweetener.
    • Berries/Other Fruit: any frozen fruit work great in smoothies! Pineapple, mango, and berries are our favorites. You can even use watermelon like in this refreshing Watermelon Smoothie!
    • Add-Ins: you can customize it with so many different add-ins. Protein powders, nuts or seeds, oats, extracts, sweeteners, even avocado!

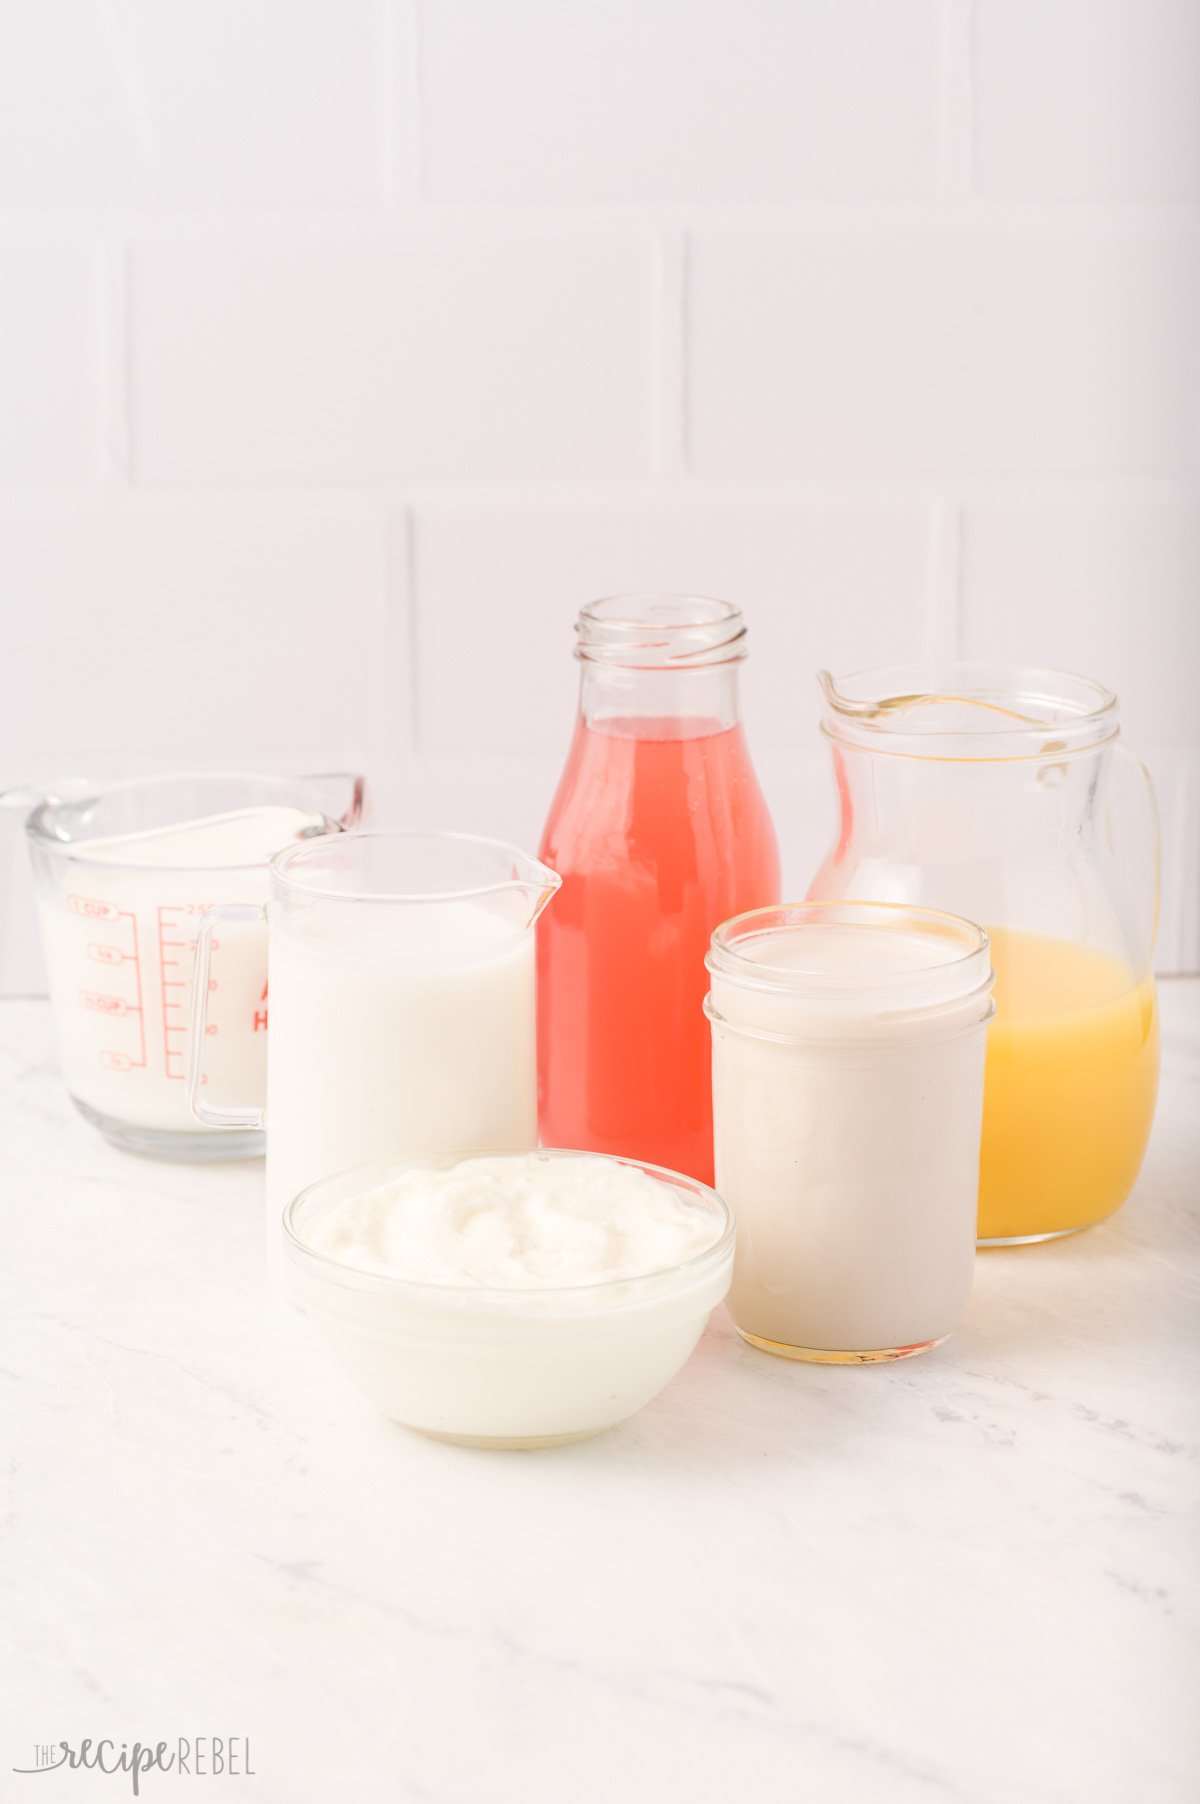
    Smoothie liquids:

    We’ve gone over the basics above, but here are a few more fun options:

    • Chocolate milk or chocolate almond milk
    • Cold coffee or tea
    • Pineapple or mango juice
    • Oat, almond, soy or coconut milk.
    • Kombucha or kefir — for some fermented goodness!
    some liquid options for smoothies including juice and milks

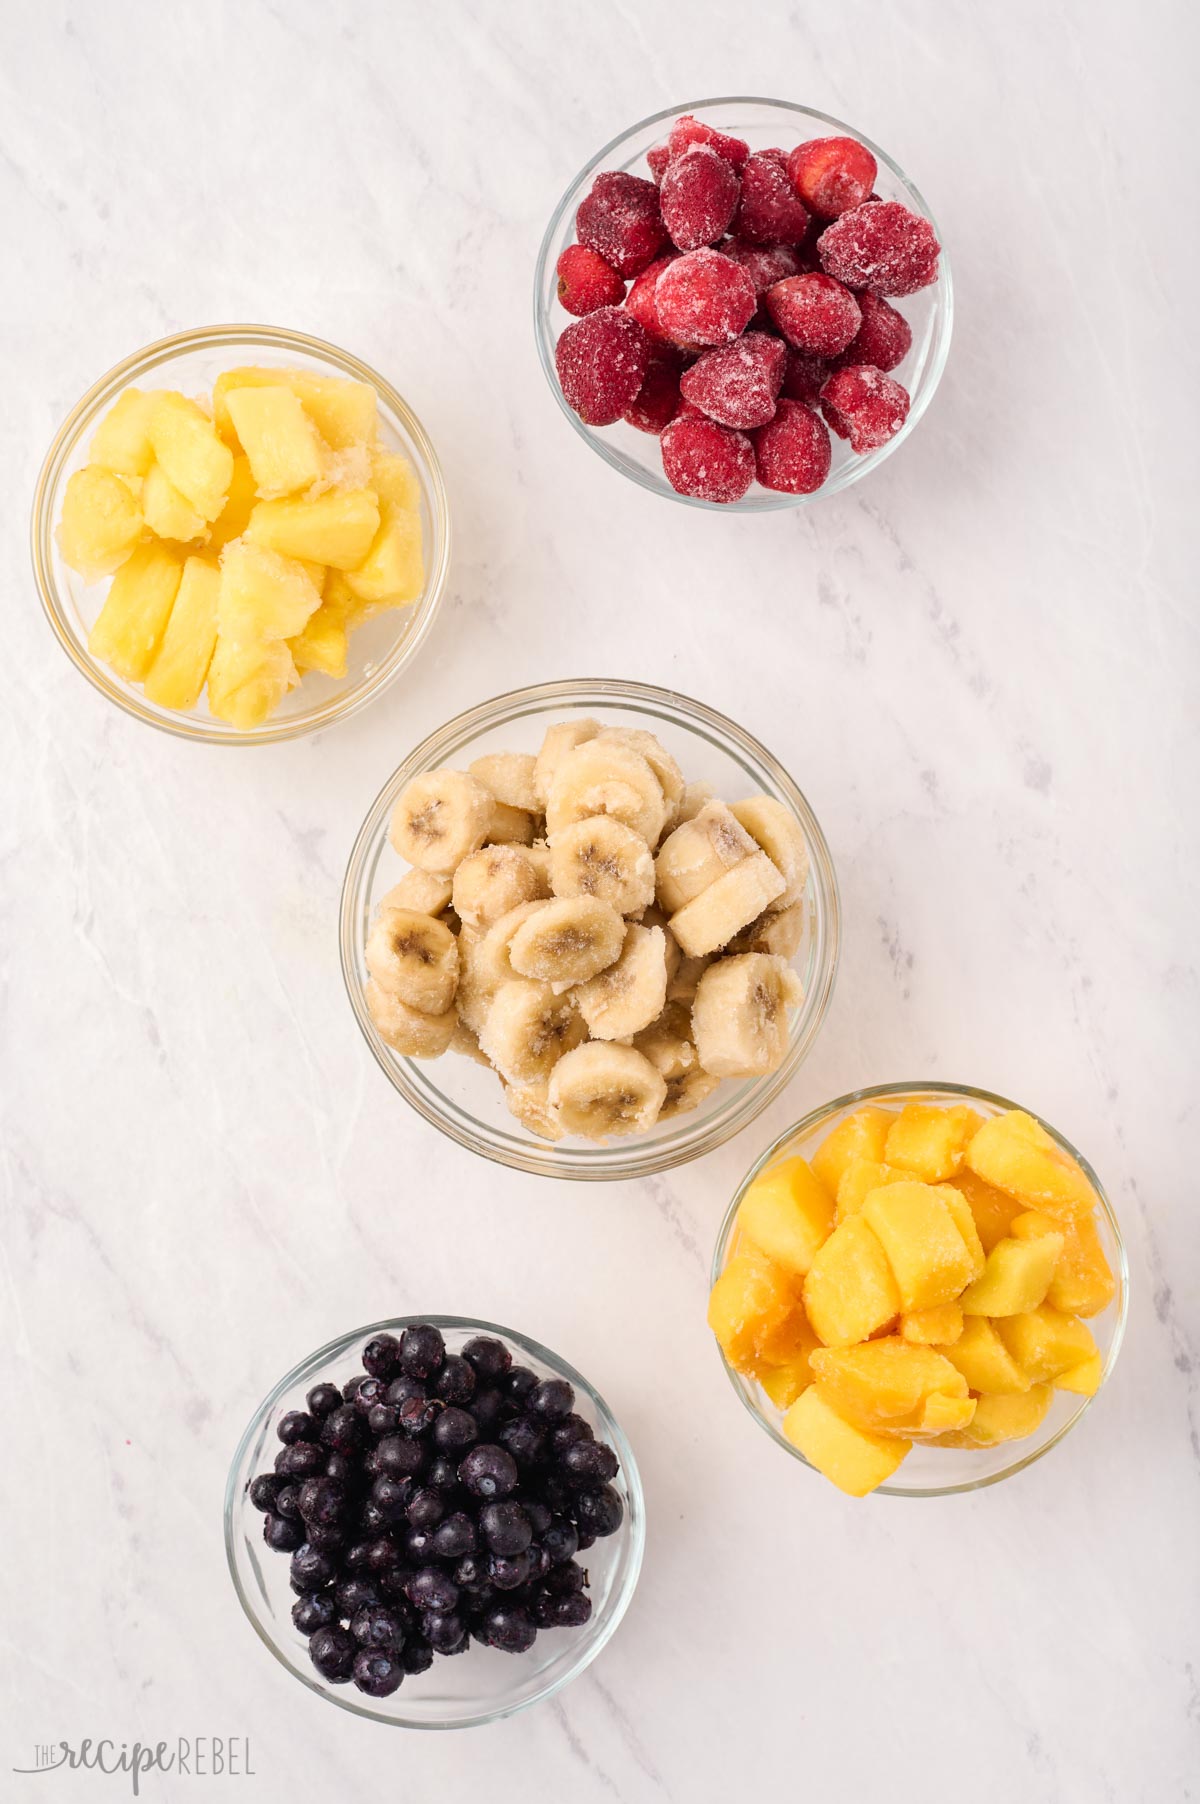
    Smoothie fruits:

    Frozen is best because they create a thick and refreshing smoothie! If you have fresh fruit, try to balance it out with a frozen banana or a cup of ice.

    • I use frozen banana for almost all of my smoothies! It makes them rich and creamy.
    • Apples (not peeled) or oranges (peeled)
    • Berries — they are full of antioxidants and fibre! (this Blueberry Smoothie is one of our favorite berry smoothies!)
    • Pineapple, mango, kiwi — these are fun tropical flavors (they pair well with coconut milk — like in this fun Tropical Smoothie!)
    • Peaches, cherries or other stone fruits (grab a bag of frozen and skip paying the high price when they are out of season)
    frozen fruit options for smoothies in glass bowls

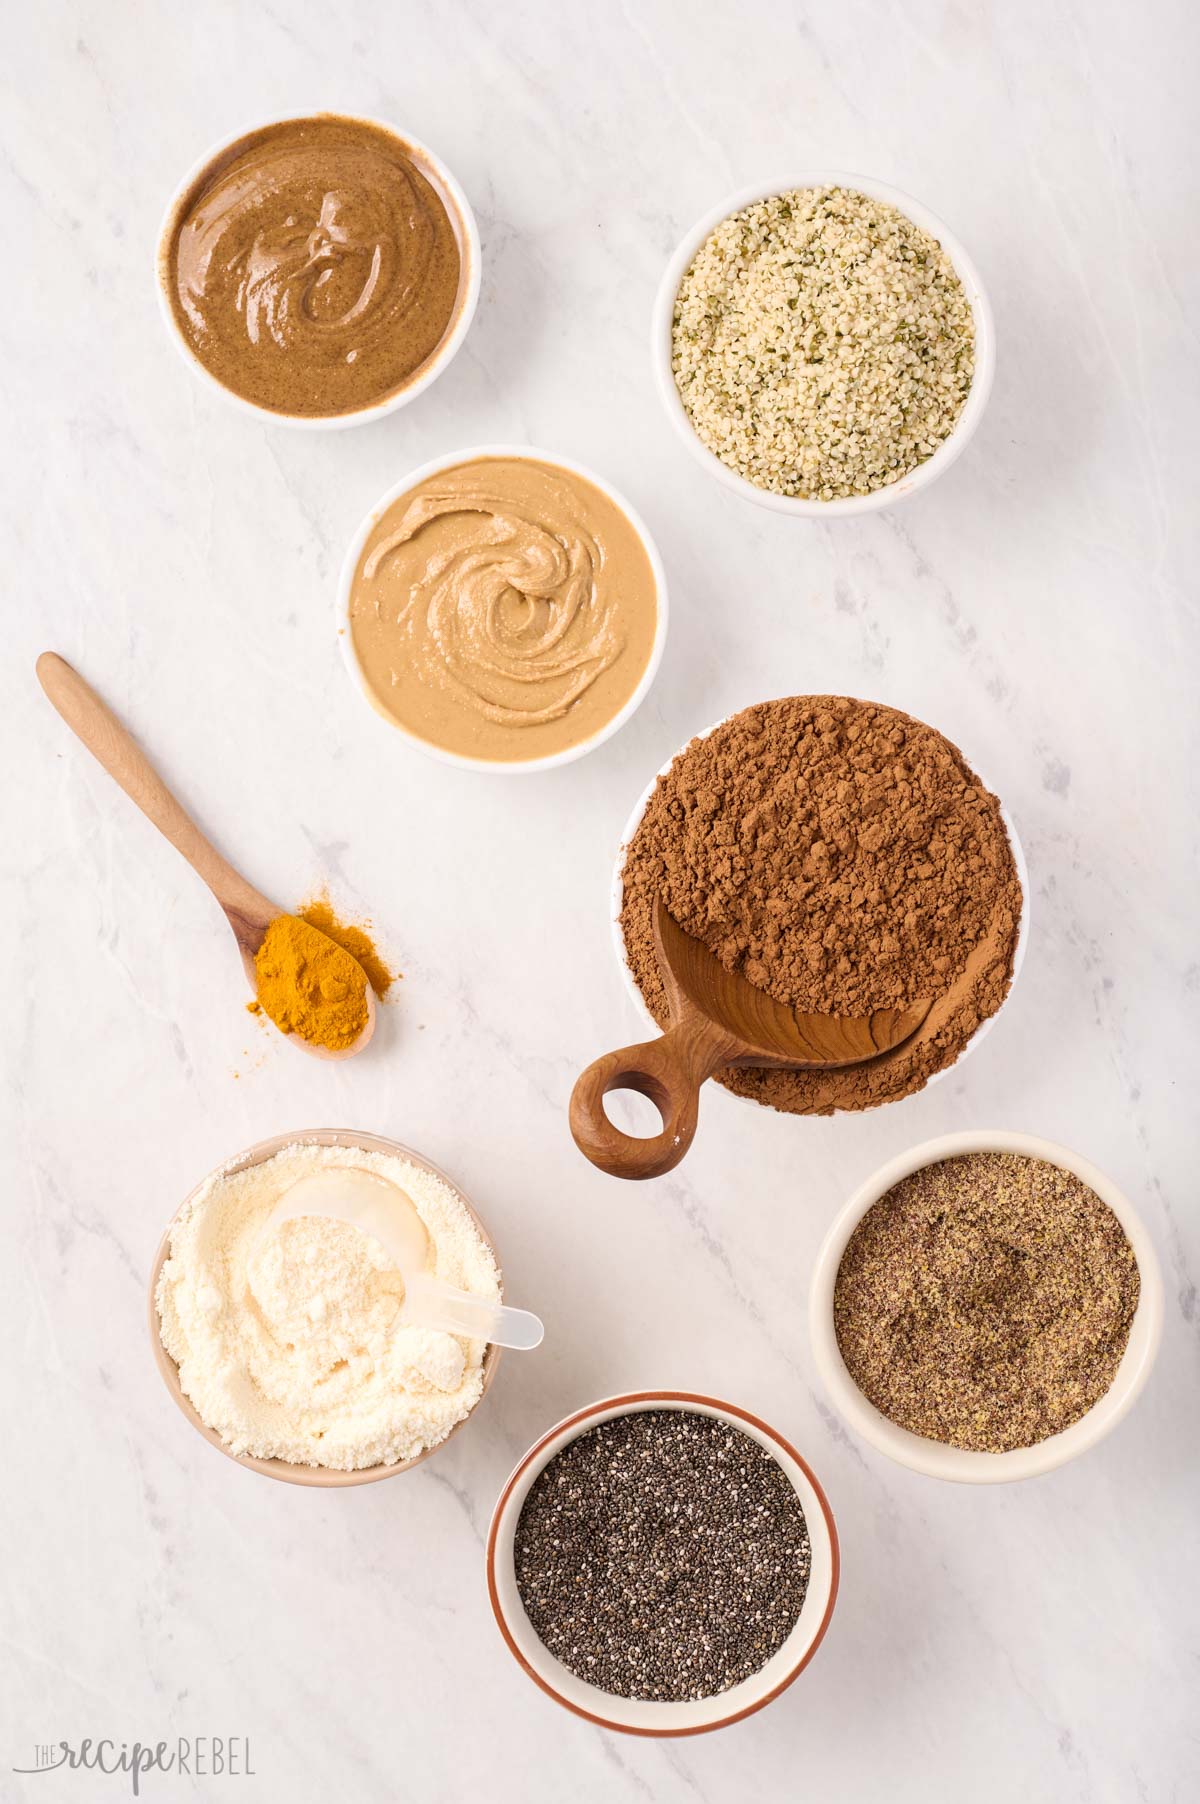
    Smoothie Add-In Ideas

    • Nut Butters: give it a boost of nutrition and nutty flavor with a scoop of peanut butter, cashew butter, almond butter, or sunflower seed butter.
    • Seeds: add in a sprinkle of flax seeds, chia seeds, or hemp hearts.
    • Grains: add a scoop of quick oats or even cooked brown rice or quinoa.
    • Protein: make it more filling with a scoop of your favorite protein or collagen powder.
    • Make it creamy: Cream cheese and cottage cheese make an incredibly thick and creamy smoothie.
    • Veggies: a handful of fresh spinach or kale, half an avocado, or even a handful of frozen cauliflower is a great way to add some extra nutrition. Cauliflower and avocado also create an extra smooth and creamy texture!
    • Sweeteners: prefer it sweeter? Try adding a drizzle of honey, agave, pitted Medjool dates, or simple syrup.
    • Extracts: add a dash of vanilla, almond or maple extract to add some extra flavor.
    • Spices and Powders: try Acai powder, maca powder, spirulina, cinnamon, nutmeg, you name it.
    nut butters seeds grains and powders options for smoothie mix ins

    How to Make a Smoothie

    This healthy snack comes together in a quick 5 minutes! Here’s how:

    1. Add ingredients to the blender: Add all of your ingredients to a high powered blender in order from softest to firmest.
    2. Blend: Blend until smooth, stopping to stir if needed.
    3. Adjust as needed: Check the flavor and texture, adjust as needed, then serve right away!
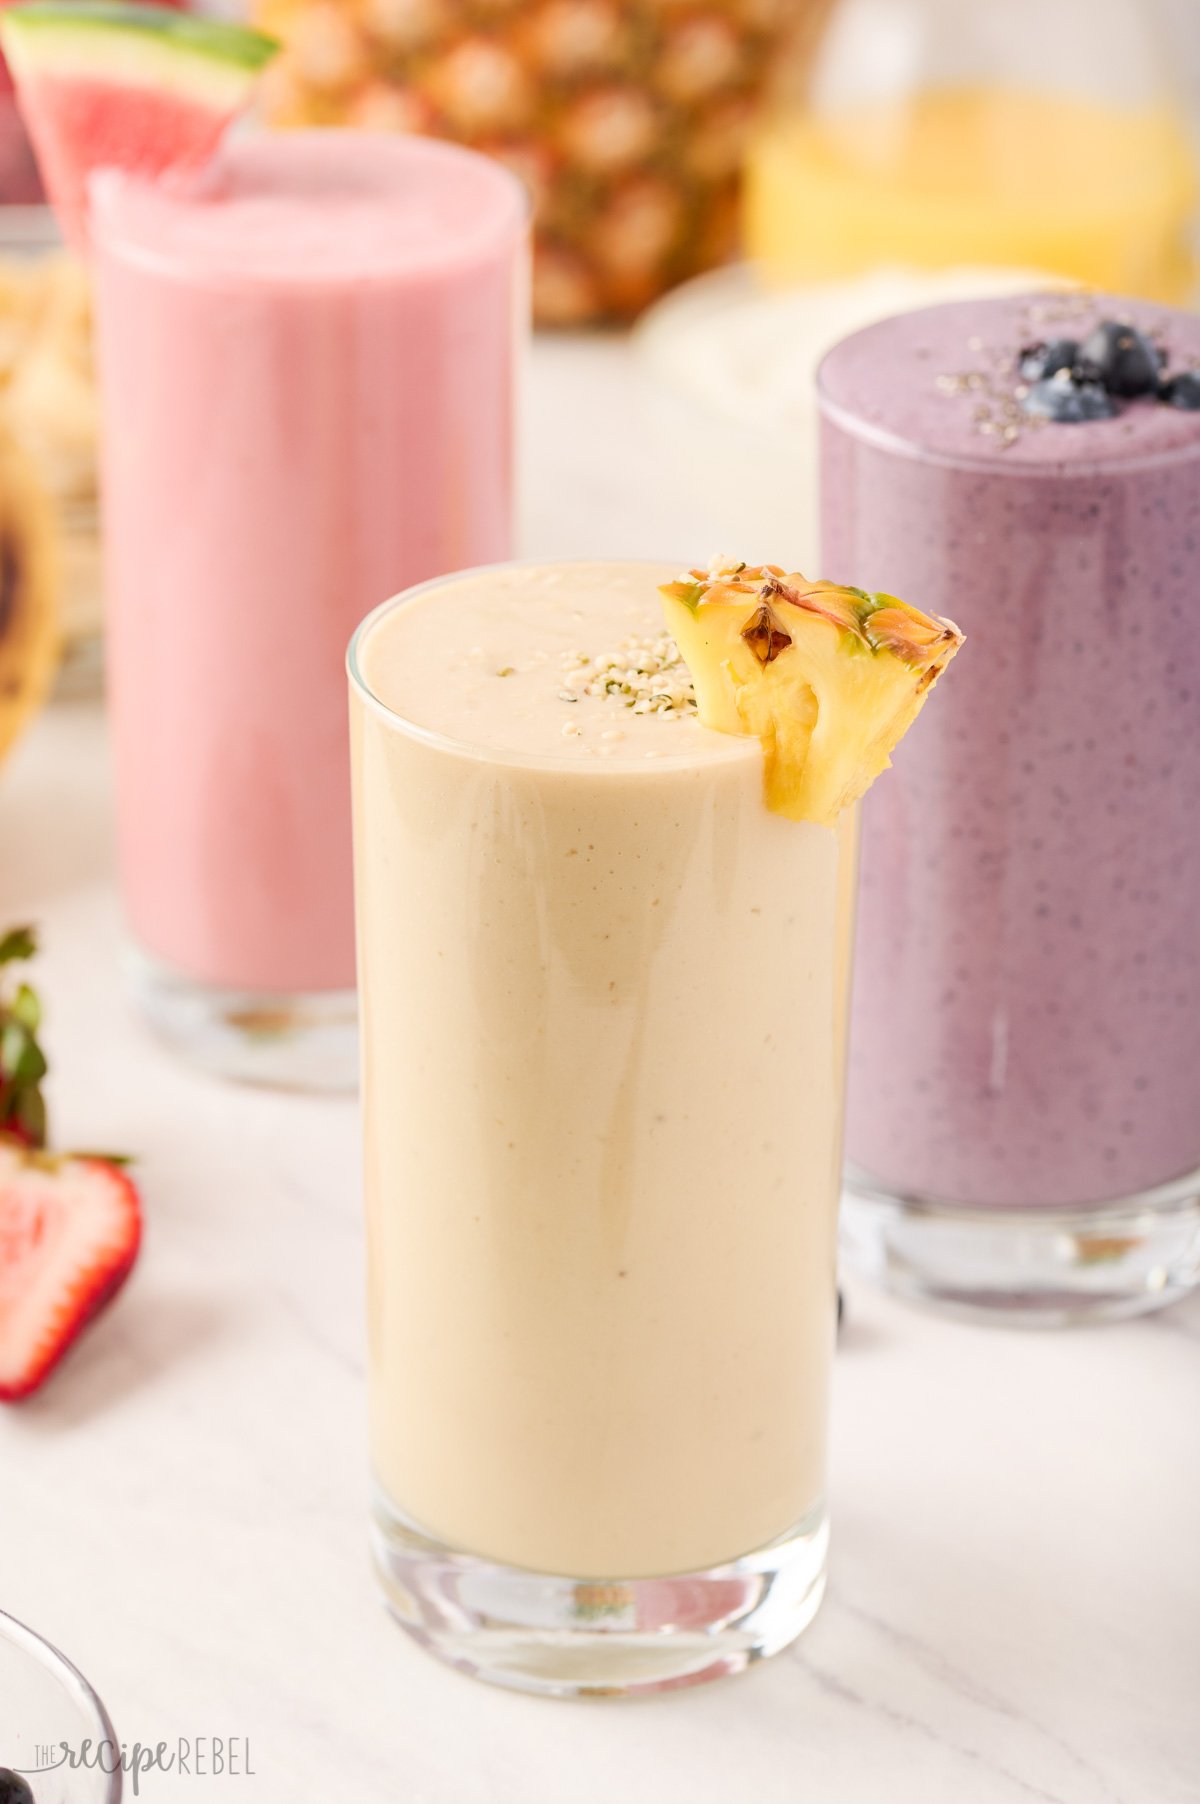
    three different smoothies in glasses with pineapple smoothie in the front

    Healthy Fruit Smoothie FAQs

    What fruits are best for smoothies?

    You can pretty much use any fruit you like in a smoothie. Try strawberries, blueberries, raspberries, banana, mango, peaches, cherries, pineapple, watermelon, you name it. For the best results, use frozen fruit. It makes for a creamier smoothie!

    Are smoothies best with milk or water?

    I definitely recommend using milk for your smoothie. It creates a creamier texture and better flavor. Dairy milk, almond milk, and coconut milk are all great options.

    Do you put ice in a smoothie?

    If you’re using frozen fruit, no. It isn’t necessary to use ice in a smoothie. Frozen fruit is the best way to get a cold and creamy smoothie without watering it down. If all you have is fresh fruit, or you like your smoothies super cold, it is fine to add ice.