Category: Maintenance

This qualifies as cleaning or routine care to avoid needing replacement

  • The Spring Home Maintenance Checklist

    The Spring Home Maintenance Checklist

    Nicky Becky • Feb 04, 2021

    Cleaning and Maintenance Tips To Keep Your House In Top Shape After Winter’s Assault

    Kefauver Lumber True Value spring home improvement checklist

    When the weather starts to warm up, you can’t wait to spend more time outside. But once you’re outside, you may quickly realize that the ice, snow, and sleet of winter have taken their toll on your home. When the sun is out and the birds are chirping, it’s easier to see that paint has chipped or concrete has cracked. Warm weather not only signals the arrival of picnics and bike rides, but it’s also the start of the home maintenance season.

    Even if everything on your property looks great, it’s important to make time to complete routine cleaning and maintenance to keep everything running smoothly, and to prevent repairs (and repair bills) in the future. To get you started, we’ve created a home maintenance list that helps you develop checklists for every part of your home. While the lists in this article may look long, most inspections can be completed in an afternoon.

    To save money, you can complete most of the simple maintenance and repair tasks in this article with a little research and a few smart purchases from Kefauver TrueValue Lumber in Forest Hill, Maryland. We’ve provided some links to good tutorials throughout. And if you need extra help, our experienced staff can help you find the materials and tools you need to keep your home in shape.

    Your Roof and Gutter Spring Checklist

    Let’s start at the top of your home. After all, your roof and gutters have been working hard all winter, protecting your home from Maryland’s snow, sleet, and ice. So, it’s no surprise that this is the one of the first parts of your house to inspect once the weather warms up. Here’s a checklist to help you get started.

    Clean Your Gutters

    Gutters keep water off your doors and windows and funnel runoff away from your foundation. If your gutters can’t provide proper drainage, it won’t take long before your home is damaged. That’s why it’s critical to check for loose or leaky gutters thoroughly. Make sure all your downspouts are positioned to keep runoff away from your home’s basement, crawl space, and foundation.

    When the weather warms up, grab a ladder, and find a partner to hold the ladder safely. Using heavy-duty gloves to protect your hands from any metal, roof shards, or glass, use your hands to clear debris from the gutters. Then use a hose to run water through downspouts to check for blockages. If your downspout is blocked, you may need a professional to clear it safely, without damaging the gutter system. To find out more about clearing blocked downspouts, check out this tutorial from This Old House.

    Inspect Your Roof

    Even small issues on your roof can lead to big problems down the road. Drips in the attic can quickly lead to mold. Improper damage can send water into your insulation. That’s why it makes sense to set aside time every spring to give your roof a complete visual inspection. If you’re nervous about heights, have a steeply pitched roof, or are concerned about your fitness or balance, play it safe and hire a licensed roofer to perform the inspection. When you inspect your roof, look for cracked or loose roof tiles, exceptional wear or tear, worn spots, warps, curling, or even missing tiles. Clear off any buildup of pine needles, branches, or other debris. Check for mildew or moss (and be careful not to step on it. It can be very slick.) And of course, look for big problems like sagging rooflines. If you haven’t cleaned your gutters yet, it’s easy to check their cleanliness from the roof, so it may make sense to make a quick evaluation of your gutters as long as you’ve made the trip up.

    Your Windows and Doors Spring Checklist

    Did you winterize your windows and doors last fall? If you put up storm windows or insulation, now is the time to remove that extra layer of protection. You’ll also want to give your doors and windows a little extra attention this spring to ensure they’re in good working order. Open windows and doors, with good screens in place, are a great way to cool or ventilate your home during Maryland’s pleasant spring and summer weather. When you spend a little extra time getting your windows and doors in shape, and you feel the benefits all year long. Here’s a checklist to help you keep on track.

    Secure the Seals Around Doors and Windows

    When the weather gets warmer and colder, the seals around your doors and windows expand and contract. Cold weather often causes the seals around your doors to loosen, harden, and even crack. Once the warm weather arrives, take time to carefully inspect these seals to determine if they’re still sound. Be sure to check the inside and outside of every window. If your second- or even third-story windows require a ladder, play it safe and get a partner to help you secure your ladder during inspections. If you can get a third partner involved, it’s smart to check the interior and exterior windows at the same time. That way you can open and shut windows and examine issues from both angles.

    Test Weep Holes

    Not sure what a weep hole is? They’re the little holes located on the bottom of an exterior window frame. Vinyl windows often have vented slots on the bottom of the exterior frame. Weep holes allow rain that works its way into the frame to drain away from the house. These holes can become clogged, which will cause water to back up and eventually damage the frame.

    To make sure your weep holes are doing their jobs, spray a little water on the window with a hose. If the holes are unclogged, you’ll be able to see a stream of water exiting from the holes. If the water doesn’t exit quickly or seems to come out in spurts, a bit of compressed air should help unblock it. Some homeowners use a stiff wire, like a wire hanger, or even a toothpick to clear simple blockages. Once you’ve cleared the hold, repeat the hose test, to make sure you’ve removed the blockage. If you’re unable to fix the issue, it’s smart to call in a window expert to remedy the obstruction before any significant damage occurs.

    Check Your Wood Trim

    If you’ve got a great old Maryland home, you probably have a lot of wooden trim. Take advantage of spring weather to check your trim carefully for water damage, mildew, or other kinds of rot. Gently probe any wood trim around your doors and windows, and carefully examine the wood for signs of mildew, and to check the condition of your paint.

    If you come across small patches of rot, remove the rotted wood, and use a polyester filler to fill or rebuild the damaged areas. Use a putty knife to gently pack it in and then smooth the patching compound. Work in layers, adding a bit at a time, and letting each layer dry. Polyester filler dries quickly, in about 10 minutes, so work fast on your patching. Once you’ve repaired your wood, touch up with paint.

    If you find your painted wood trim has mildew, wipe it clean with a sponge and diluted bleach (about ¾ cups per gallon.) Stubborn mildew may require multiple cleanings. Once you’ve removed the mildew, rinse the trim clean with a hose to remove any residual bleach.

    Re-Caulk Your Exterior

    Take a close look at your windows and doors to check the caulking. Check the seals on your storm doors and exterior doors. On wooden windows, check the caulk and the glazing around all of the panes. Finally, inspect windows and doors for air leaks. If you can rattle them when closed, they are probably leaking air.

    Caulking usually exists throughout your home, whenever two different building materials meet. Pay extra attention to caulking on exterior corners, in areas where the foundation meetings siding, stone, or brick, around spigots, and where chimneys and siding or brick meet. Also look for gaps around hoses, pipes, or wires that enter your home. Even mail slots may have caulking.

    Fixing caulking issues will depend on the type of problem identified. Kefauver’s in Forest Hill has a variety of easy-to-use caulking and weather stripping products to help you repair these kinds of issues. Our experienced associates can help you find the right product for your project.

    Re-Glaze Your Wooden Windows

    If you have wooden windows, the panes are held in place with a hardened putty used to create a weathertight seal. On all old window, the glazing needs to be replaced periodically. You can test the glazing’s integrity by gently tapping on each pane. If you detect rattling, it’s time to re-glaze. Luckily, re-glazing is a simple home repair that can be completed quickly, once you know how. For tips on re-glazing, check out this tutorial from Popular Mechanics.

    Paint Your Doors

    Doors get a lot of wear over the winter. And because we see them up close, every day, they seem to wear out fastest than the rest of the home. Painting your doors is a great spring project. After all, the best time to paint outdoors occurs when the temperature gets above 50 degrees, before the humidity and heat of the summer.

    For the best results, remove the door from the hinges, and remove the hardware. Clean the door thoroughly, and scrape or sand off buildups or chipped areas. Give the entire door a light sanding and carefully clean up any dust with a tack cloth. If you’re staining your door, and want an exceptionally smooth finish, look into wood conditioners.

    Use a brush to paint in around the door’s windows and panels and use a high-density foam roller for larger areas. Use two or three light coats instead of one heavy coat, to minimize or even eliminate brush marks.

    Your Attic and Chimney Spring Checklist

    If you’re lucky enough to have an attic or chimney, you probably don’t think about them much, but it makes sense to do a little maintenance each spring to keep them in tiptop shape. We’ve put together suggestions for a few smart steps to take to keep both your chimney and your attic in good working order.

    Clean the Chimney

    Once you’re done with the chimney at winter’s end, it’s a good time to check for signs of damage. While you’re checking your roof, spend a little extra time to inspect the chimney. If it’s made of brick or stone, make sure the joints are clean, structurally sounds, and free of cracks. For stucco chimney, check the plaster for chips, cracks, or discoloration. If you see white buildups or white discoloration, you could have water damage. If you see any structural issues, address them now, in warm weather. These kinds of problems will only worsen over time.

    If you have a wood-burning stove or fireplace, spring is an excellent time to have the flue cleaned and inspected by a certified chimney sweep. A chimney sweep should be able to look at any structural issues you’ve identified and recommend remedies.

    Inspect the Attic

    Visit your attic in daylight and check for any light peeking in through cracks or crevices. Even small cracks in your roofline can cause significant issues if not fixed promptly. If you discover large cracks, call in a professional since these may be signs of problems with the foundation or the structure

    Using a flashlight, check the ceiling signs of moisture, leaks, or rot. If you have whole house fans, beat the summer rush and inspect the belts now. If you haven’t had a professional look at your attic fan in the last few years, make an appointment so you can avoid any issues at the height of summer.

    If you have an older home, you may have attic vents that move air out of the kitchen, laundry or bathrooms, directly into the attic. Make sure these vents are in good working order and pumping the air outside, where it belongs.

    If your attic has insulation, make sure the insulation has weathered the winter and remains dry and in good condition. Finally, take a look around and look for signs of birds, bats, bugs, or rodents. Inspect for droppings and call an exterminator if you detect issues. If they’re in the attic, they’re also able to get into other parts of your home.

    A Spring Checklist for the Driveway and Foundation

    While driveways, sidewalks, and foundation are often ignored, they are some of the most critical parts of your home and property. These concrete and masonry elements need care and maintenance, just like every other area of your home.

    Fix Cracks in the Driveway and Other Paved Surfaces

    When you have asphalt, macadam, or concrete driveways, spring is the time to check for issues. Spend some time outside carefully checking your concrete slabs and pavement for cracks or signs of movement, shifting, sinking, or buckling. Make sure any water on these slabs will move away from your home’s foundation. If you see cracks, it’s easy to repair them with a crack filler or silicone caulk from Kefauver’s True Value in Forest Hill. Click here for a good tutorial on filling concrete cracksClick here for a tutorial on filling asphalt or macadam cracks.

    Test Your Spigots, Outside Faucets, and Garden Hoses

    While Maryland has winters that are milder than our northern neighbors, winter freezes can still damage outside spigots or faucets. Once the weather warms up, test your faucets for damage by placing your thumb over the opening. If it easily stops the flow of water, the pipe inside the home is cracked or damaged and will need to be replaced. If you didn’t store your hose for the winter, now is the time to check it for cracks or rot.

    Inspect Your Foundation

    Spring is a good time to check your foundation for cracks, before summer foliage obscures it. Even if you’re not able to see the entire foundation, inspect the sections that are exposed, paying special attention to better views that may be obtained in the garage or basement. Look for long cracks or shifts that may indication damage from freezing and thawing. Foundation cracks are not a DIY job, so if you suspect trouble, call a professional to avoid big issues down the road.

    Clean Paved Surfaces

    Winter salts and oils can do a number on paved concrete, asphalt, or macadam. A hose, a scrubbing broom, and some bio-degradable detergent will do the trick for most winter build-up. If you’re noting green or blueish stains, you’ve got mildew. Use a weak bleach solution (3/4 cups bleach to one gallon water) or try a power washer on concrete (but not on asphalt or macadam.) If your concrete is turning brown, you’ve got rust that have resulted from the iron in lawn fertilizers or even from the stones used in your concrete. Click here for tips on removing rust from concrete.

    Your Plumbing and Basement Spring Checklist

    The plumbing and basement of your home are some of the hardest working elements in your house. While they seem to keep on working with minimal effort, if you keep ahead of some simple maintenance for these areas, you may save big bucks down the road.

    Keep Your Window Wells Clean

    It’s easy to neglect the window wells in your home but keeping them clean and free of debris will not only ensure drainage works properly, it may also prevent water damage in the future. You can put window well maintenance on your monthly to-do list from March through November, or you can get window wells covers. You’ll find lots of options at Kefauver’s Lumber in Forest Hill.

    Make Sure Your Sump Pump Works

    Because basements are below grade, they are prone to leaking when the water table rises, or even after a big storm. Sump pumps are installed in basements to take care of minor flooding. Because we enjoy a wet climate and a high water table, sump pumps are common in Maryland basements. To keep yours in good working order, test it out at least once a year. Check yours by pouring water into the basin to see if it starts pumping the extra water out. If you have an older pump, you may want to conduct this test twice a year. If your sump pump fails the test or you have performance issues, call a plumber to fix the pump or replace it. A good sump pump can save a homeowner thousands in damages, so it’s important to keep it in good working order.

    Drain Your Water Heater

    Drain your water heater once a year to reduce sediment build up. Over time, sediment will collect at the bottom of your water heater, interfering with the heater’s performance, and often resulting in irreparable damage. To remove sediment from your tank, start by turning off the water supply, and then turn off the water heater. Attach a drain hose to the spigot on the tank and have several 5-gallon buckets handy.

    Before you start draining the water heater, move to a kitchen or bathroom sink, and turn on the hot water, using all the hot water available. This will drain most of the hot water (so you’ll have less to deal with.)

    Return to the water heater. Place the hose in a bucket, and open the drain valve, allowing all the water to drain from the tank. The water will be hot, so be careful. Once all the water is out, turn the water supply back on to the tank, allowing it to fill partially before turning it back off. This will wash up remaining sediment. When water off, drain the tank again. Repeat this process a few times until the water runs clear. For a complete tutorial form the DIY network, click here.

    Check Your Foundation

    An unfinished basement can offer a lot of clues to the state of your home’s foundation. Check your walls and floors for new cracks or leaks. If your walls have shifted in any way, consult a reputable contractor to assess whether the shift is a normal part of home settling or a structural problem that needs a remedy.

    Your HVAC and Garage Spring Checklist

    Unless you take a walk around the exterior of your home, you probably don’t see your HVAC much, yet it’s responsible for making every part of your home comfortable and livable. When it comes to the garage, you might want to just shut the door and forget about it, but spring is the perfect time for a thorough inspection. Here are some guidelines to help you make sure your HVAC and your garage are ready to serve your family throughout the coming year.

    Pay Attention to Your HVAC

    Summers can get pretty hot in Maryland, so it’s smart to get your HVAC checked in the spring, before the rush of summer repairs. You can do some things on your own. Others will require a professional. For example, it’s relatively easy to clean or replace your HVAC filter. Most homes will need to do this more than once a year. If your filter is noticeably darkened when you change it, you’ll know you waited too long. Dirty filters tax your HVAC system, making them work harder, cost more, and break more often.

    Call in a professional to do a yearly check-up. They should check the thermostat and controls, clean the compressor, lubricate the parts, and check the condensate drain. They should also be able to report on the general condition of the unit, and let you know how many years you have before you’ll need to replace the unit. Since HVAC units are pricey, you may want a few years to save up for your next one.

    To keep your HVAC working at its best, make sure it has good airflow. While it’s tempting to camouflage your HVAC unit with shrubs, keep shrubs and plants at least 3 feet from the unit, and avoid planting shrubs or flowers nearby that shed leaves or blooms, since these may clog up the fan.

    Balance Your Garage Door

    A balanced garage door works better, is safer to operate, and extends the life of your remote opening system. To test the balance of your garage door, start with a closed door. Once it’s shut, you can disengage the remote door opener by pulling the opener release handle near the unit, near the ceiling, at the center of your garage. Once the remote is off, manually open the door halfway, and then let go. If the door is a balanced door, it will remain half opened. If the door falls down, the door’s tension needs to be increased. If the door continues to move up, the door spring has too much tension. Balancing a spring is dangerous (since mistakes may result in falling garage doors) so call in a professional.

    Maintain Your Garage Floor

    Keeping your garage floor clean not only looks great, but it also helps you identify issues in your foundation and structure. While no one wants to clean out their garage, once a year you should remove everything from the garage, and hose down the surface. You may want to use a mild detergent, or diluted bleach (3/4 cups bleach to one gallon of water.) Removing salts, solvents, or oils will help you keep your garage floor in better shape, longer.

    Before you move everything back in, check for cracks in the garage floor and in the places the garage floor joins to the home’s foundation. Small cracks may be the result of quick freezing and warming and may be easily fixed with products from Kefauver’s in Forest Hill. Larger cracks may point to broader issues in your home’s foundation and should be inspected by a professional.

    Your Spring Checklist for Appliances

    Your home is full of appliances, but many homeowners don’t pay attention to them until they break down. However, it takes just a few hours to work through your spring maintenance list for major appliances. Spending this short amount of time on spring maintenance and cleaning will pay off in the long term by saving you money on energy bills and future repairs.

    Check Your Water Pressure

    We all like plenty of water pressure when we take a shower, but high water pressure can actually harm pipes, connections, and appliances. Not to mention it’s a water waster, and expensive. Checking for high water pressure is easy with a few simple tools from Kefauver’s. Click here for a tutorial.

    Clean Your Dryer Vent

    No matter how fancy your dryer might be, some lint will get past the link trap, and will build up in the dryer vent. To clean the vent, remove the hose from the back of the dryer. Use a wet/dry vac or even a strong vacuum to pull debris out of the hose. Very clogged hoses may require the use of a special cleaning kit with power drill attachment that consists of a brush on a long flexible rod. You can find these types of cleaning kits at Kefauver’s in Forest Hill.

    Check the Hose to the Washing Machine

    Make sure your washing machine hose is in good shape. Check for any signs of moisture or leaking on or around the hose. Hoses with cracks or brittleness should be replaced since these are signs of future leaks.

    Vacuum Your Refrigerator Coils

    Depending on your model, your refrigerator coils are on the bottom or back of your fridge. Dusty coils are less efficient and make your refrigerator work harder. Happily, cleaning coils is easy (though moving your refrigerator so you can reach the coils may be a challenge.) Simply use your vacuum hose or brush attachment. Bendable coil-cleaning brushes, made to fit into tight areas, will help you do a more thorough job.

    Freshen Up Your Disposal

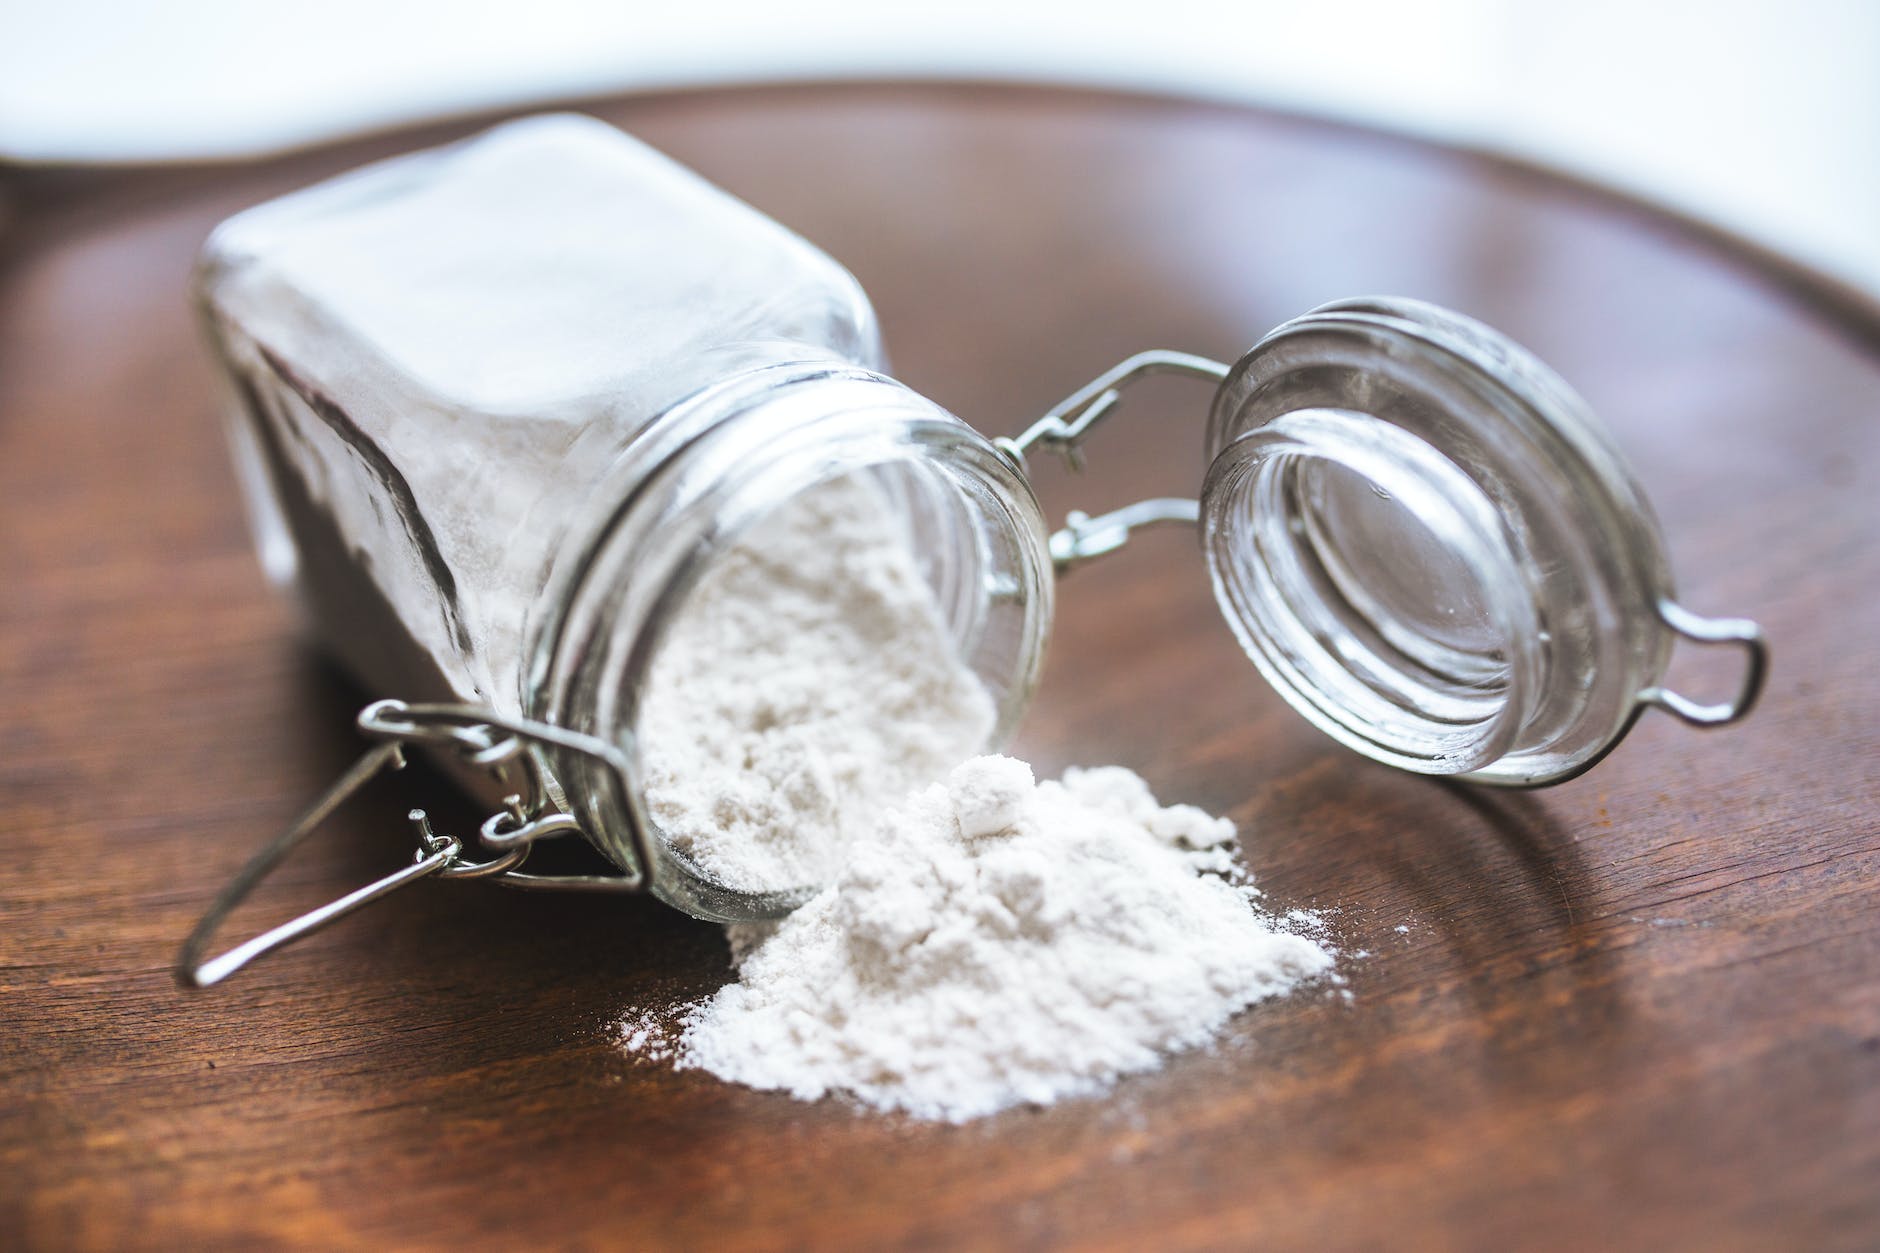
    The disposal can get smelly but cleaning can be quick and easy. Feed a tray of ice cubes in for a loud, but effective, cleaning. Add a half a cup of baking soda if the smell remains. The small, cleaning pellets made for disposal cleaning do a great job. And if all else fails, drop a few leftover lemon rinds down your disposal every few weeks.

    Check Your Fire Extinguishers

    Okay, these are not technically appliances, but as long as you’re making the rounds, give your fire extinguisher a quick test. First, make sure you have enough fire extinguishers, and that they are easy to access. Secondly, make sure the pressure gauge is in the green range. Take the extinguisher outside and give it a quick test.

    Smoke and Carbon Dioxide Detectors

    Again, these are not technically appliances, but if it’s springtime, it’s time to change the batteries. Many people use daylight savings time as a reminder to change the batteries.

    Your Spring Checklist for Lawn and Garden

    While you may have been able to ignore your lawn and garden during the winter, spring reminds us that it’s time to get outside and get your yard in shape. Depending on how elaborately you landscape your property, working on your lawn could become a full-time job in the spring. That’s why we’ve narrowed down our recommended lawn and garden maintenance list to include just a few must-do items, that even non-gardeners should complete.

    Tune up the Lawn Mower

    If you take care of your lawn mower in spring, not only will your lawn look better, but you will also extend the life of the machine. Start by turning the mower over and checking for any winter guests such as mice, wasps, or bees. Remove any nests or debris. Consider taking the blade to a local sharpener to give you a cleaner, easier mowing experience. Empty any gasoline left in the mower from the previous year and replace it with fresh fuel. Most mowing machines require oil—make sure you change the oil once for every 20-30 hours of use. If your mower has an air filter, now’s the time to change it, and give it a new spark plug while you’re at it. Get a full lawn mower tune-up list here.

    Move Firewood

    If you have a wood-burning stove or fireplace in your home, you know that spring is the end of the wood burning season. As the weather warms up, it’s time to move any firewood stored near your home. Even if you use wood for outdoor grills or firepits, firewood is best kept at least 18 inches off the ground at least 2 feet from the nearest wall or structure. This will keep the wood dry and reduce the chances of infestation by pests. It will also reduce the likelihood of pests in wood damaging adjoining walls or fences. If you have a tarp or open-walled pavilion or shed, consider covering your firewood to keep it dry.

    Add More Mulch

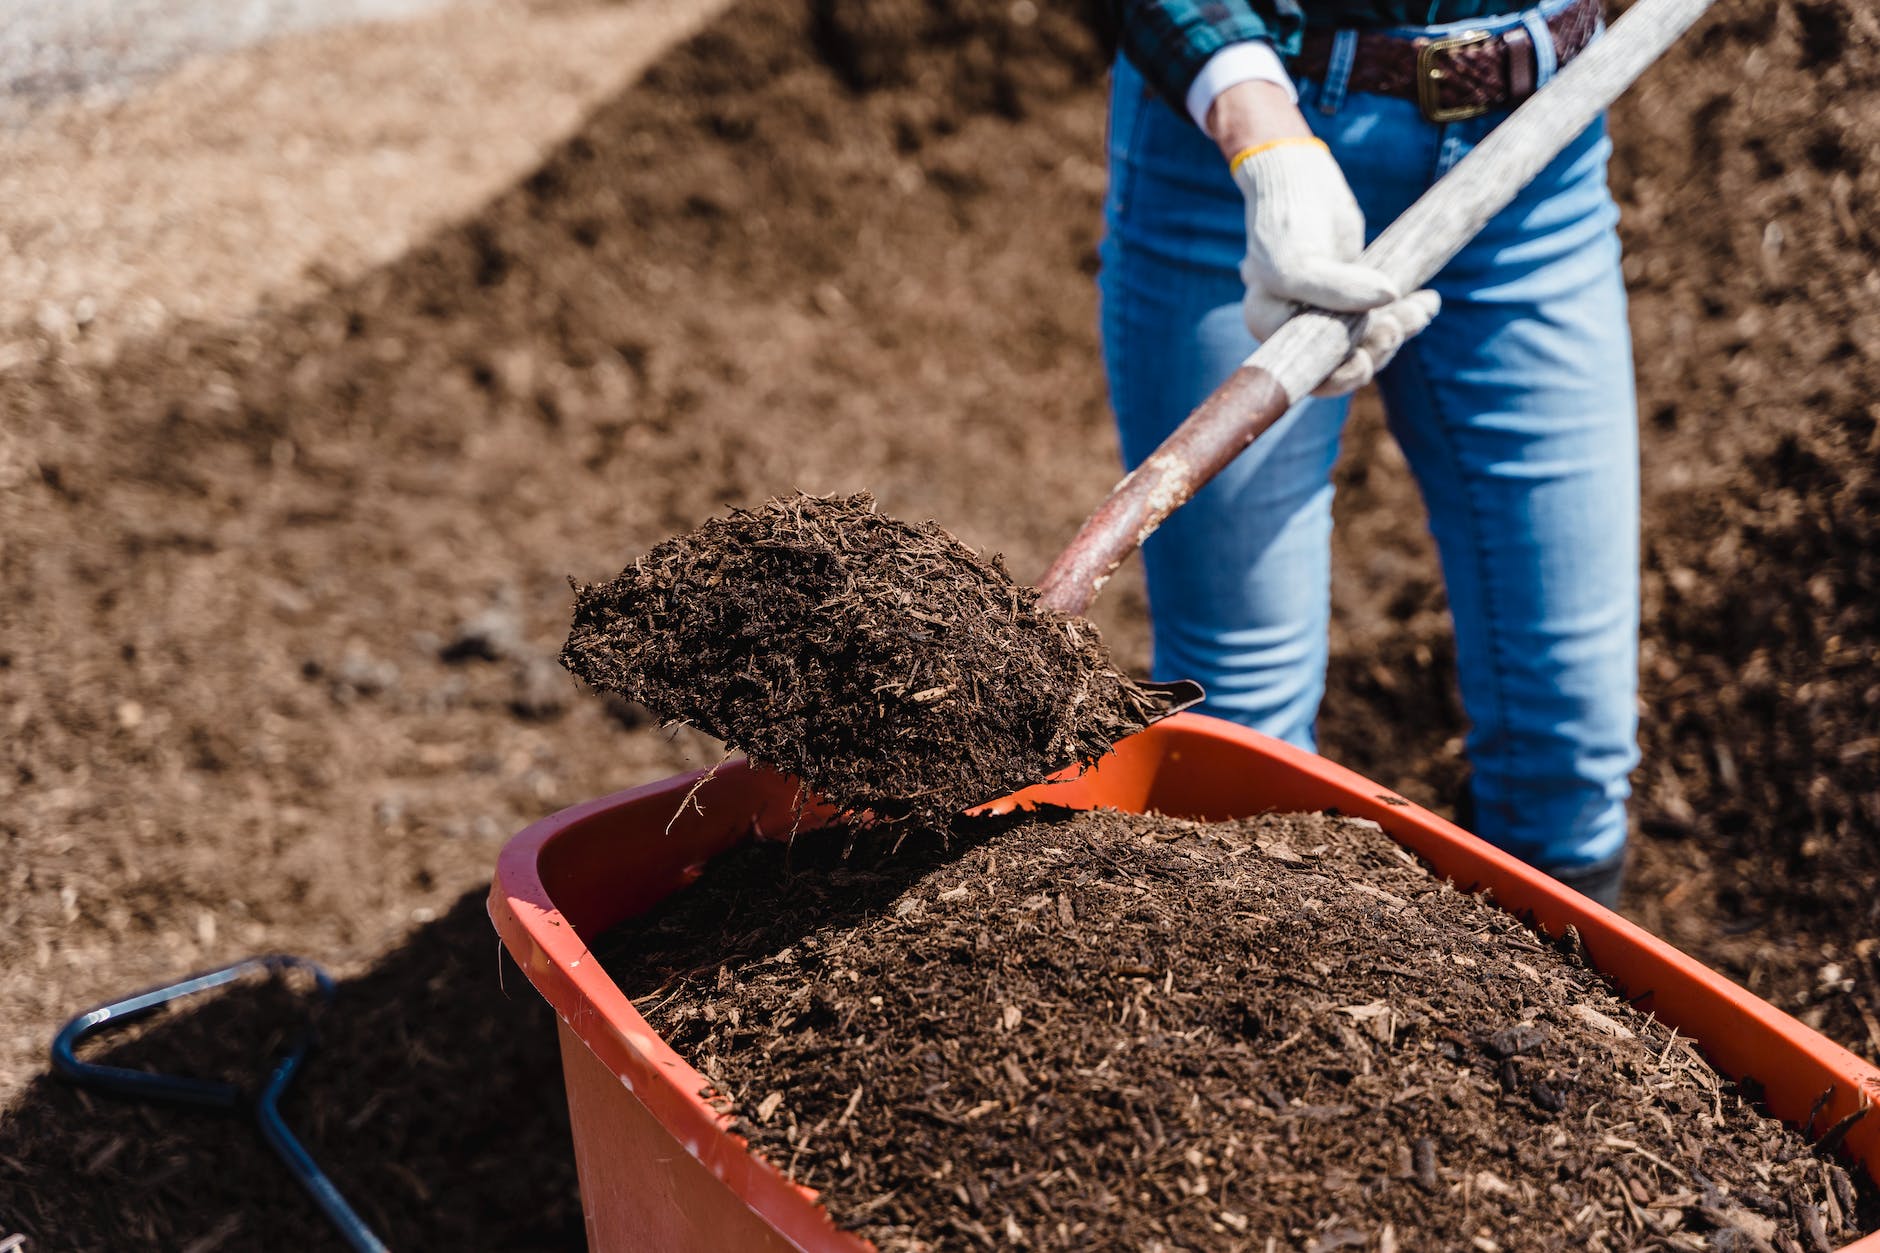
    Mulch is an easy and attractive way to reduce weeds and add nutrients to the soil. By placing mulch around trees or on borders, you’ll also reduce the need to trim grass, making mowing more manageable. If you’re not sure about the best way to mulch, these tips from the Weekend Gardener might be helpful.

    Your Spring Checklist for Your Grill and Deck

    You know its spring when you walk out on your deck or start up the grill. We’ve provided a handy checklist to help you prepare for deck season and a summer full of great grilling.

    Now We’re Cooking with Gas Grills

    Even if you’re a die-hard griller who uses the gas grill all winter long, spring is a great time to give your grill a complete tune up. Look for food drippings and grease buildup on the exterior, which can attract pests, and scrub these spots with a soft brush and soapy water. For stainless steel exteriors, you may want to use a household cleaner created for stainless steel. Once you’ve cleaned your grill’s shell, rinse and wipe dry.

    Before you start the grill up, check the hose. Make sure it’s clean on the outside before turning on the grill. Heat your grill and give the grates a good scrubbing. It’s smart to get a new brush every year at Kefauver’s in Forest Hill. Use a softer brass brush for porcelain enamel-coated grill grates. Save the steel grill brushes for stainless steel grates. If you have a non-stick grate, consider a nylon grill brush, and reserve cleanups for cool grills.

    Check the hose from your propane to the burners. If there’s any build-up on the hose, clean it off before starting your grill. If you see any wear or cracks, replace the hose. Be sure to start of the season with a clean grease trap.

    Next, take a few extra minutes to clean the burner assembly. First, turn off the gas, disconnect the lines, and disconnect the burner unit. Remove the unit, and clean gently with soapy water. Replace and reattach the gas lines.

    When in doubt, use products labeled for use with grills.

    Doublecheck Your Deck’s Structure

    Once the weather warms up, the deck will become one of your favorite spots. That’s why it’s important to make sure your deck is safe and structurally sound. In addition to keeping the top of the deck looking great with staining and sealing, it’s important to take a close look at the support structure. Examine the ground support to see if any posts are unsteady or show signs of rot. Look at every connection to check if it’s secure. Check for properly-fastened ledger boards and replace any missing on damaged hardware. If you’re concerned about the stability of your deck, have a reputable contractor inspect it, and make repairs necessary before allowing your friends or family on the deck.

    Time to Seal or Stain Your Deck

    Cleaning and staining your deck make your deck look good, but they also preserve the wood, and extend the life your deck. When choosing cleaning and staining options, you’ll find hundreds of options. Research your choices carefully to make sure they’re right for the type of wood on your deck.

  • Items we’re considering Planting

    Items we’re considering Planting

    Plano8b – 15°F to 20°F8a – 10°F to 15°F8a – 10°F to 15°F
    From: Texas Plant Hardiness Zones

    Considering:

    Blue Cascade Distylium

    Distylium ‘PIIDIST-II’ PP#24

    Exciting, New, Blue Broad-leaf Evergreen that Flowers in Winter!

    • Beautiful Blue-green foliage
    • Delicate, deep Red flowers January to March
    • Dense, Cascading, Layered Habit adds depth to your landscape!
    • Drought, Heat and Deer tolerant

    Texas Sage

    • Also Known As: Rain Sage, Barometer Bush, Purple Sage, Texas Ranger, Cenizo
    • Botanical Name: Leucophyllum frutescens
    • Plant Type: Shrub
    • Light Requirement: Full Sun, Partial Shade
    • Water Demand: Low
    • Landscape Use: Hedge, Border – Mixed, Rock Gardens, Screen – Visual, Deer Resistant, Salt Tolerant
    • Ornamental Value: Lavender, Blue, White, Purple, Pink
    • Native/Adapted: Native
    • Wildlife Value: Bees, Butterflies, Hummingbirds
    • Season: Spring, Summer, Fall
    • Deciduous/Evergreen: Evergreen
    • Plant Form: Upright
    • Plant Spread: 5′
    • Plant Height: 6′

    Description

    Silver, gray, and green foliage varieties. Very drought tolerant. Requires excellent drainage.

    The Texas sage is a fairly slow-growing plant, and may take up to 2 years to become fully established and bloom reliably. Once established, the Texas Sage is extremely drought tolerant, requires very little supplemental water, and will bloom after a good rain storm. (Don’t try to trick it into blooming by watering heavily–it won’t work.) After a week or two, the blooms will fall off, but the silver gray-green leaves stay year round. This plant can eventually grow to around 6 feet tall. The older it gets, the more intensely it blooms. Bees really like this plant when it’s in bloom.


    Salvia ‘Blue Brazilian Sage’

    Salvia guaranitica

    Licorice-scented anise sage has cobalt blue flowers on long spikes that bloom from midsummer to fall. Fantastic for the mid-regions of the border or where easily observed, for hummingbirds have chosen this as their favorite of all the salvias we offer.

    WHEN TO SET OUTSIDE

    After last frost.

    PLACEMENT & CULTIVATION

    I can hardly imagine a garden without salvia; the genus has many irreplaceable floral gems. They are easy to grow and trouble-free, many are quick to bloom, and they grow well in gardens or containers. They offer a never-ending parade of flowers—at least until frost—and the antics of visiting hummingbirds. Those pesky deer avoid it, perhaps stayed by the unpleasant aroma of the bruised leaves. Pinch back once plants reach 6″ tall to encourage bushiness and place in a site protected from wind, as salvia branches tend to be brittle. Stake early and deadhead frequently or cut for bouquets.

    Final Spacing: 2′

    Water Requirements: Medium Water Use

    Watering Details: About 1″ per week.

    Soil pH: Not particular about pH

    Fertilizer: Mix about 4″ of compost into the soil prior to planting. If soil is especially poor, it may be beneficial to feed once a month with an organic water-soluble feed or granular fertilizer.

    Diseases & Pests: Prevent powdery mildew by spacing plants apart for increased air circulation. Aphids can be washed off leaves with a strong stream of water or insecticidal soap applications.

    When to Cut for Bouquets: Cut when about 1/2 of florets are open.


    Love at First Sight Hybrid Tea Rose

    Ships in 0-2 Weeks | Ships in Spring

    • Flowering Date Late spring to fall
    • Hardiness Zone 5-9
    • Height 36 – 42 inches
    • Restricted States AE AK GU HI PR
    • Sun ExposureFull Sun, Partial Shade
    • A rare flower form in American gardens
    • Clean, disease-resistant foliage
    • Uniquely compact hybrid tea—ideal for small gardens

    This is the hybrid tea for smaller gardens and patio planters. While most reach about 5–6′ tall, this one stops at about 3′ tall. The flower form follows a growing trend in modern European rose gardens—the ball–shaped bud opens into a less–pointed bloom than the typical high–centered hybrid tea bloom. It’s a little more rounded, and the extra curve is striking. This style is still very new in American gardens. Subtle bicoloring—red on the front of each petal that pales on the reverse—further enhances the rare shape. You’ll be proud of your elegant fresh bouquets. Love at First Sight™ is a modern, improved cultivar, and its much cleaner foliage makes it especially disease-resistant. That includes resistance to black spots—the disease rosarians detest. The blooms also carry a slight perfume and attract beneficial pollinators through summer. Rosa ‘WEKmedatasy’ PPAF

    PRODUCT DETAILS

    • Botanical Name Rosa ‘WEKmedatasy’ PPAF
    • Flowering Date Late spring to fall
    • Flower Color Red
    • Flower Form Petal count of 50.
    • Foliage Type Dark green.
    • Form Rose
    • Growth Rate Moderate once established.
    • Hardiness Zone 5-9
    • Height 36 – 42 inches
    • Planting Instructions Plant at the same level as the soil so the graft of the plant is even with the soil level. Don’t bury the graft. Full sun is best for quicker flowering and higher quality plants.
    • Pruning Prune to shape. Remove any dead or damaged branches. Self-cleaning petals drop and new buds appear without pruning. Shape plants at any time
    • Restricted States AE AK GU HI PR
    • Shipping Season Spring
    • Ship As #1 BAREROOT
    • Soil Requirement Well drained, humus enriched soil
    • Spacing 36 – 48 inches
    • Spread 36 – 48 inches
    • Sun Exposure Full Sun, Partial Shade
    • Watering Requirement Roses prefer a thorough watering but do not like ‘wet feet’. Water early in the day to avoid wet conditions into the night which can cause issues with fungus and disease.
    • Winter Care Mulch heavily around the base of the plant. Remove promptly in early spring.
  • Household Hazardous Waste

    Household Hazardous Waste

    Properly Disposing of Hazardous Waste

    Please call Environmental Waste Services Customer Service at 972-769-4150 to schedule a free chemical collection at least 24 hours prior to your scheduled household chemical collection day. The collection will be scheduled for the next available date. Household chemical collections are scheduled by zip code. Learn more about scheduling and collection criteria.

    Chemical Reuse Center

    The City of Plano Environmental Waste Services division operates a Household Chemical Reuse Center where Plano residents may obtain reusable household products, collected through the residential chemical collection program, and approved for reuse, for free.

    https://www.plano.gov/415/Household-Hazardous-Waste

  • Electric Work Recommendations

    Electric Work Recommendations

    Kelle Horie of Russell Creek • posted 1 hr ago

    I am looking for an electric company or electrician that is excellent, honest and reliable to do an entire inspection of my electrical wiring in my house. I have some outlets that don’t work, but my house was built in 1981 and I feel it needs to be check out for safety purposes. Any recommendations?


    Carla Washington of Silhouette• posted 1h

    Chris Bible with City Squad Electrical is AMAZING! he is so honest and will tell you if you don’t need to fix something. We have been using him for 10 years. Very good prices and great reviews too. (214) 415-4549

    224 W Campbell Rd, Richardson, TX 75080


    Sheryl Sears of Twin Creeks East of Alma • posted 1h

    ZHS Construction – 469.450.4591


    Melanie Hill Anderson of Biltmore • posted 1h

    I highly recommend Julio Echeverria with Eb Electric (ask For Julio). I’ve worked with and referred them for years!


    Blanca Benavides of Parker Road Estates • posted 50m

    Call Matthew Beachy at Beachy Electric 979-574-5752. He has done our house, inside and the outside.

  • 6 of the Most Important Tips I’ve Learned from Renovating 3 Kitchens in 5 Years

    6 of the Most Important Tips I’ve Learned from Renovating 3 Kitchens in 5 Years

    Dana McMahanBY Dana McMahan a freelance writer who is a chronic adventurer, serial learner, and whiskey enthusiast based in Louisville, Kentucky.

    Updated Jan 18, 2021 on https://www.thekitchn.com/tips-serial-kitchen-renovator-23115816

    Installing a kitchen in a new house.
    Credit: AMR Image | Getty Images

    Renovating a kitchen is kind of like getting a tattoo. It can be painful while it’s happening, but the end result is so worth it that you forget the bad parts. I’ve done three total-tear-out kitchen renovations in the last five years (plus three more non-gut-job remodels in the last six), with another one currently underway in a sagging Victorian I’ve been fixing up with a friend. We had to sit tight for a few weeks after demolition day while we lined up financing, so that gave me some time to think about what I’ve learned in those renovations that I can put to work on this one. 

    For more content like this followHOW TO

    First, a quick look at the from-scratch operations. First was the attic kitchen in my Airbnb where I turned the former hoarder’s space into a vintage-vibed, cute and cozy space for travelers. Then I did a dramatic do-over of the kitchen in my own home, transforming a cramped space in Crayola colors to a glam, black-walled space I’ve been happy to cook in for the last two years. And in 2020 I flipped my first house, swapping a dated and dirty kitchen for a clean, bright space that helped me get an immediate full asking price offer. 

    What hard-won wisdom am I taking to my newest project? 

    1. You can do it on a budget (with some work and some compromises).

    Kitchen renos are notoriously expensive. And it can be so very easy to decimate any sort of budget. Ooooh, pretty tiles! Oh, fancy appliances! And wait, look at that yummy countertop! It adds up so (so) fast. But I had a very limited budget on the Airbnb and the flip house, and a smaller than average (and strict!) budget on my own kitchen, and I managed to stick to budget every time. It takes effort — price comparisons, shopping deals online and off — but that effort pays off when you score amazing bargains. And for every splurge there has to be a counterbalance (thrift and vintage go a long way on that front). 

    https://www.instagram.com/p/CHfkM8PlRnD/embed/captioned/?cr=1&v=8&wp=330&rd=https%3A%2F%2Fwww.apartmenttherapy.com&rp=%2Fbest-tips-renovating-kitchen-frequent-renovator-37182254#%7B%22ci%22%3A0%2C%22os%22%3A13906912.799999952%7D

    2. Skip the gimmicks.

    Is the brass faucet in my home kitchen gorgeous? Yes. Would I do the touch-sensor option again? Never ever. It sounded good — never have to touch raw poultry and then your faucet again. But guess what? When the batteries die, you can’t turn on your faucet. Guess when that happens? The absolute worst times (think: sink full of dirty dishes). It’s also confusing to guests and just generally an annoyance. Before I ever buy tech for the sake of tech again, I’ll spend some time thinking about just how useful it actually is.

    3. You need a statement piece.

    Every kitchen needs a star. In my home it was the Ferrari red Bertazzoni range I was lucky enough to find at a steep discount. For the Airbnb it was also a stove, but a vintage 1940s Florence that took four people to carry up the stairs. Both these pieces add serious punch to the kitchens. I was missing that in the flip kitchen, and while it turned out well, if I could do it over, I’d definitely have something with some sizzle. For my current project my friend and I are eyeing an amazing quartzite counter for the island that will make an immediate impression. 

    4. Always (always) scope out reviews on big-ticket items.

    I loved, loved, loved the black stainless look for appliances, but didn’t do my homework. (Why? Maybe I didn’t want to give myself a reason to not make the purchase when I found it for half price online.) And I really wish I had. It scratches if you so much as look at it wrong, and I’m not the only one to regret this purchase. If I’d spent some time reading about black stainless, I would have gone a different route that would have saved some grief!

    5. Don’t cheap out on the flooring.

    It’s so hard, because you can’t splurge on everything. But I made the mistake of shaving costs with a few-cents-per-square-foot vinyl tile when we redid the Airbnb kitchen. And real (!) fast (!) we saw why it was so cheap. Several years later I’m still living with it and still regretting it. Kitchen floors take a beating, and cheap material is definitely one of those penny-wise-pound-foolish purchases. Sure, we saved money in the short term, but the floor is in need of replacing now — and it’s going to be a lot more annoying to redo now versus if we had just done it right during the full-blown renovation. If I could go back in time I’d have figured out a way to get a more durable flooring. 

    6. There’s no such thing as being too clear and specific with instructions.

    We were incredibly fortunate to find original hardwood flooring under the tile of our home’s kitchen on demo day, so when the universe gifted us that, we opted to refinish the floor instead of re-tile it. Some areas needed patching, though, so the floor refinishing crew said they could pull pieces from the area where the island would go. I outlined the island with painter’s tape on the floor to help with the layout planning, but didn’t think to tell them that included the countertop. They cut it ALL out, leaving a gaping hole several feet wide and the length of the island. The patch job is less than ideal, and I could have prevented the issue by specifying exactly how much floor they would have access to. Lesson learned: Go overboard with details in any project scope or instructions.

    This post originally ran on Kitchn. See it there: 6 Things I’ve Learned from Completing 3 Kitchen Renovations in 5 Years

  • Peachtree Spring/Summer Support

    Peachtree Spring/Summer Support

    Assets:

    • Rock
    • 5-gallon bucket with a 3/16″ hole drilled in the bottom
    • 1 Tablespoon of olive oil
    • Water hose

    When not raining for 3+ consecutive days, set the bucket 3′ out from the trunk with the rock in first(keeps it from tipping in the wind or from animals knocking it over), then fill it with water, and lastly add the olive oil (to suffocate any mosquito larva that tries to hatch).

    Every 3 days it is not raining, move the buckets so they are circling the base about at 12, 9, 6, and 3 o’clock. When it is expected to rain, move the buckets so any actual rain that grabs nitrates from the atmosphere when falling can get to those parts of the root.

    This will help the tree bare larger fruit.


    pink medicines on white surface
    Photo by Castorly Stock on Pexels.com

    Health tip:

    For those affected by environmentally triggered allergies, get a wet/dry spa membership, take a gallon of distilled water when you go to the sauna (do this several times a week), and drink that while you hang out there for a while.

    It helps push much of the built-up toxins out of your system!

    I knew this process but had never thought of applying it this way. This is a fantastic tip!


    Many thanks to Jeff Murray for being amazing to our trees & our household!

  • The Art Of Baking Soda Cleaning

    The Art Of Baking Soda Cleaning

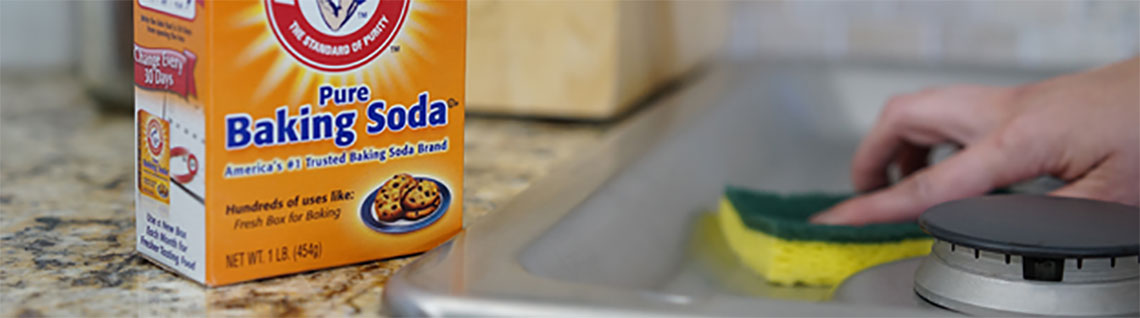
    If you want to reduce the number of chemicals in your household cleaning but don’t want to sacrifice cleansing power, you need to know about baking soda. While baking may be the first thing that comes to mind when you think of bicarbonate of soda, you can use it to easily and inexpensively clean every room of your house

    Baking Soda for Household Cleaning? Indeed.

    You probably already have a box of ARM & HAMMER™ Baking Soda in your home. It’s the staple you reach for when baking quick breads, muffins, biscuits and cookies. Millions of people keep a box of baking soda in the refrigerator and freezer to help keep them from smelling stale. But that little orange box, shaker container, or 3.5 lb. pouch contains a multi-purpose substance you can use to clean and deodorize all kinds of items and areas.

    We’ve compiled a go-to list of household cleaning tips with baking soda so you can tackle all sorts of jobs around your kitchen, bathroom, living room, mudroom and bedroom.

    Cleaning with Baking Soda in the Kitchen

    Your kitchen is the most used room in your home, and there are many surfaces and appliances to keep clean. Whether you’re doing maintenance or deep cleaning, you’ll find a trusted helper in baking soda.

    Cleaning the Sink Drain

    To keep drains fresh, regularly sprinkle a little baking soda in them while running hot water.

    For a deeper clean, a slow-moving drain or mild clog, reach for the baking soda and white vinegar. Here’s how:

    1. Pour a (tea)pot of boiling hot water down your drain.
    2. Dump in about 1/2 cup ARM & HAMMER™ Baking Soda. Let that sit for a 3-5 minutes.
    3. Then, pour a mixture of 1 cup vinegar and 1 cup very hot water down the drain, on top of the baking soda.
    4. If you have a drain plug, cover the drain and let sit for 5-10 minutes. If you don’t have a drain plug, it’ll be fine; the plug just keeps more the reaction below the surface.
    5. Flush again with a pot of boiling water.

    Dispose of a Smelly Garbage Disposal

    If your garbage disposal has gotten a funky smell, pour ¼ cup of baking soda into it and follow with hot water. If your disposal continues to smell bad, repeat or add a ¼ cup white vinegar and let it fizz for 5 minutes, then run hot water.

    Deodorize a Trash Can

    Baking soda is a great trash can deodorizer. As garbage accumulates in the bag, add baking soda in layers to help absorb and neutralize odors. You can also wash and deodorize garbage cans with a solution of 1 cup baking soda and 1 gallon of water.

    Your smelly garbage is no match for the odor-eliminating power of ARM & HAMMER™ baking soda.

    Clean a Dishwasher with Baking Soda

    Yes, the appliance that cleans your dishes also needs to be cleaned, preferably once a month, but you can go longer if you use it less frequently. Over time, food debris, soap scum and grease will build up in your dishwasher and can reduce your dishwasher’s efficiency.

    Here’s how to use baking soda and white vinegar to clean and deodorize your dishwasher with minimal effort:

    1. In an empty dishwasher, place a bowl or dishwasher-safe container containing about a cup of white vinegar face up on the top rack.
    2. Run the dishwasher on a hot, regular-length cycle.
    3. Next, liberally sprinkle baking soda on the bottom of your machine.
    4. Run another short, hot water cycle

    Your dishwasher will smell fresh and the residue from daily use will be in the past. When it accumulates again, you know what to do!

    Deodorize a Refrigerator/Freezer

    Using a Fridge-n-Freezer™ package of ARM & HAMMER™ to absorb odors in your refrigerator or freezer is one of the more commonly known baking soda household cleaning hacks. But did you know you can use a mixture of warm water and baking soda or a warm water/baking soda/white vinegar solution to clean your fridge or freezer shelves and drawers? It works great to help remove a surprise spill or the mysterious stains that appear over time.

    Watch this ARM & HAMMER™ video about how to clean your fridge with baking soda!

    Clean under the Kitchen Sink

    Tiny drips or the musty smell of your drain or disposal can leave your cabinets under the sink smelling less-than-wonderful. Simply place a flow-through box of ARM & HAMMER™ Fresh-n-Natural Odor Absorber to absorb moisture and help eliminate under-sink odors.

    Make a Baking Soda Mopping Solution for Tile Floors

    If your kitchen or foyer are ceramic tile and grout, you can make a solution of ½ cup of ARM & HAMMER™ Baking Soda in a bucket of warm water to help give them a mop. Alkaline baking soda helps break down most food-based and greasy stains and the mild abrasion helps scrub the surface and the porous grout. Rinse with plain warm water and let dry.

    Clean your Oven

    Did you know you can help clean your oven and burner wells with baking soda? Remove caked-on, baked-on food drips from your burner pans or grates, under burner pans, and oven floor, walls, and windows—without using harsh chemicals or exposing your family to fumes. Learn how to use baking soda to get your oven sparkling again!

    Baking Soda Cleaning Hacks for Your Whole Home

    Bathroom Cleaning Tips with Baking Soda

    There are so many places to clean in your bathroom, but here are some baking soda cleaning hacks to help you tackle the entire room.

    Freshen Sinks and Bathtubs

    Sprinkle ARM & HAMMER™ Baking Soda on a damp sponge and scrub away the soap scum and grime from tubs, sinks, tiles and more. As a mild abrasive, baking soda can be used on fiberglass, porcelain, acrylic, ceramic, and cultured marble surfaces. Do not use on stone resin or wood.

    Cleaning the Toilet Bowl with Baking Soda and Vinegar

    Your toilet needs regular cleaning, but you don’t have to use harsh chemicals or lots of elbow grease to do the job. Hack your toilet cleaning with ARM & HAMMER™ Baking Soda and white vinegar to take care of the stains and buildup with minimal scrubbing. Follow these steps:

    1. Sprinkle 1 cup of baking soda into the toilet.
    2. Pour 1 cup of white vinegar into the bowl. It will immediately start to fizz and bubble.
    3. Close the lid of the toilet and let the solution work for 30 minutes.
    4. Lift the lid and scrub the bowl with a toilet brush. The process will be easy thanks to the baking soda and vinegar breaking apart the residue.
    5. Flush the toilet. Vinegar and baking soda are safe for your plumbing and the environment.

    Clean the Bathroom Floor

    Give tile floors in your bathroom a mop with ½ cup of ARM & HAMMER™ Baking Soda in a bucket of warm water, then rinse.

    How to Remove Calcium Deposits from a Shower Head

    Over time, your showerhead can get calcium buildup from hard water and begin to lose water pressure. If you have a gallon size plastic bag, white vinegar and baking soda, you can clean your shower head and remove the residue.

    1. Mix 1/3 cup baking soda with 1 cup white vinegar in the gallon plastic bag.
    2. Secure the bag over your dirty shower head with a rubber band. Make sure the head is completely covered in the solution.
    3. 3. Leave the bag on the shower head overnight.
    4. In the morning, remove the bag, wipe down the shower head and run hot water. Then enjoy your sparking clean showerhead and renewed water pressure.
    5. This method is especially useful for polished metal shower heads because you won’t be tempted to scratch them by using an abrasive sponge or brush. Plus, you don’t have to take the shower head off to clean it!

    How to Clean the Living Room or Family Room with Baking Soda

    Clean the Fireplace

    Everyone loves a warm, crackling fire — but maybe not the smoky buildup and soot it can leave behind on your hearth, surround, or fireplace glass.

    To clean fireplace glass naturally, without leaving a scratch, crumple a piece of newspaper, wet it, then sprinkle some ARM & HAMMER™ Baking Soda on it. Rub the dirty area of the glass, then wipe clean with a damp clean cloth.

    Remove Scuff Marks on Tile or Hardwood

    If you get scuff marks from shoes on your floors, lightly sprinkle baking soda on a damp sponge to help buff out the streaks.

    Remove Odors from Carpet

    Freshen musty odors by sprinkling ARM & HAMMER™ Baking Soda on your carpet. Let it sit for a few minutes, then vacuum it up — you’ll smell the difference. If you get a spill on your carpet, soak up as much of the spill as possible, then clean the stain according to the carpet manufacturer’s directions. Once the area is completely dry, sprinkle ARM & HAMMER™ Baking Soda to cover it, let sit for 15 minutes, then vacuum. Even tough kid and pet messes are no match!

    Alternatively, use ARM & HAMMER™ baking soda-based carpet deodorizer and choose among several fresh scents.

    Using Baking Soda to Clean in Utility Rooms or Mud Rooms

    By the shoes!

    If you’re a family that has a shoe rack or bins labeled by family member to deposit shoes, boots and skates, you know that the shoe area of your garage or mud room can possess the odor of conglomerate feet-funk – and it hits your nose as soon as you enter your home. Keep a spill-proof, flow-through box of ARM & HAMMER™ Baking Soda near the shoe corner, or a box inside each person’s shoe bin to help deodorize and keep the area fresh. You can deodorize your shoes as often as once per week if needed, but only deodorize leather shoes once per month as the baking soda can also absorb oils in the leather.

    Watch the video below to learn the technique!

    Baking soda can also come in handy if your shoes need brightening. Learn how to clean your shoes with baking soda. With these tips, your shoes will look and smell like new in no time.

    Clean and Deodorize Your Washing Machine with Baking Soda

    Washing machines can get a buildup of limescale, soap scum, or mold over time. If your washing machine gets a musty odor or you notice deposits on your clothes, it’s time to clean your washer. Luckily, with baking soda, and sometimes vinegar, this task is easier than you might think.

    1. Measure ½ cup of baking soda and 1 quart of white vinegar. If you just need a deodorizing washer refresh for mild odors, eliminate the vinegar and just use baking soda.
    2. Add both ingredients to the drum of a top-loader or add the white vinegar to the detergent dispenser and baking soda to the softener dispenser, of a front-loader.
    3. Set the water temperature to Hot (90ºC or 194ºF) and on the longest wash cycle.

    Clean the Litter Box!

    If you’re a cat parent, you know your litter box can sometimes get a little ripe. You can sprinkle ARM & HAMMER™ baking soda on top of your litter to help absorb odors and extend the time between changes. Or try ARM & HAMMER™ cat litter deodorizer powder for the deodorizing power of baking soda plus a mild fresh scent.

    Freshen Laundry

    Give towels, bedding, and musty workout clothes a natural fresh scent by adding ½ cup of ARM & HAMMER™ Baking Soda to the rinse cycle of your washing machine. In addition to helping get rid of the sour odor, baking soda helps soften stiff or crusty towels to keep them feeling fluffier and newer.

    Baking Soda Cleaning Tips for the Bedrooms

    Freshen Your Closet

    Put a box of ARM & HAMMER™ Fresh-n-Natural Odor Absorber Baking Soda on a closet shelf or in a locker to freshen up stale odors. This box is spill-proof and has flow-through panels to help deodorize. Replace it once a month for best results.

    The Many Uses of Baking Soda for Household Cleaning

    ARM & HAMMER™ Baking Soda has more than 100 benefits and uses in your home. It’s the only product you can cook, clean, wash and brush with. Put baking soda in your bucket, on your sponge or carpet, and in your shoes, litter box or trash can to clean and refresh your entire home.

    And a bonus: one box of baking soda costs a fraction of the price of one commercial cleanser. It really does have Countless Uses for Pennies a Day!

    Learn more baking soda cleaning hacks from ARM & HAMMER™:

  • Residential Food Scrap Composting

    Residential Food Scrap Composting

    About the Program

    Up to 40% of the food in the United States is wasted and sent to landfill, generating methane emissions as it decomposes. In Plano, food waste collected as part of curbside residential trash services is transported to a transfer station, combined with trash collected from other routes, then takes the approximately 25-mile journey to the landfill. The journey of food waste from its point of generation to the landfill can negatively impact local air quality and increase local traffic.

    The landfilling of food scraps also shortens the lifespan of the landfill. Through small changes in our daily routines, we can help preserve landfill capacity and delay the millions of dollars in tax-funded expenditures associated with new landfill infrastructure.

    With the Residential Food Scrap Composting pilot, Plano residents have the opportunity to reduce the negative outcomes associated with landfilling of organic wastes and turn their food scraps into compost for the enrichment of local soils.

    Only residential food scraps will be accepted in this pilot program. Paper products and compostable dinnerware and silverware cannot be composted as part of this pilot. 

    Enrollment is now open! Don’t miss out and sign up to be a part of the pilot.

    SIGN UP

    1. PARTICIPATION
    2. COST
    3. SIGN UP
    4. STARTING

    Who can participate?

    The pilot program is available to the first 500 residents of Plano to enroll. Spots are still open!

    I already compost. Should I participate?

    Food scraps eligible for composting as part of this pilot include not only scraps found in a traditional backyard compost pile, but also meats, bones, dairy and eggs. This program can provide an outlet for the scraps unsuitable for composting in your backyard pile, as well as spikes in quantities of scraps (e.g., watermelon rinds following a party, fall pumpkins, etc.).

    Participants will receive a sample of finished compost, as well as a voucher for 1 cubic foot of finished compost, from Texas Pure Products as part of their welcome kit.

    a file

    Contact Us

    972-769-4343
    foodcomposting@plano.gov

    News

    Sign up for email updates

    Resources

    What Can I Compost? (PDF)
    Information Session

    The City of Plano Residential Food Scrap Composting pilot program is prepared in cooperation with the North Central Texas Council of Governments and the Texas Commission on Environmental Quality.

    Originally posted here: https://www.plano.gov/2106/Residential-Food-Scrap-Composting

  • Composting Tips & Tricks

    Composting Tips & Tricks

    Whether you’re new to home gardening or a seasoned expert, our collection of 50 composting tips will help. Enjoy!

    1. Grass clippings add necessary nitrogen to a compost pile, but be sure to mix with the “brown” materials that add carbon. Both are necessary for quick decomposition and rich compost. Piles made up of just grass will compact, slow down and start to stink.

    2. Do not compost fats, pet droppings or animal products. They will attract pests to the pile and can spread disease.

    3. Newspaper or plain white paper from the computer is excellent for composting – just remember to shred it first to speed up the process (see Composting Paper).

    4. Got compost? When finished it should look, feel and smell like rich, dark soil. You should not be able to recognize any of the items you put in there.

    5. Worms love coffee grounds!

    6. If adding ashes to your compost bin, do so sparingly. They are alkaline and affect the pH of the pile. In contrast, acidic materials include pine needles and oak leaves.

    7. Plants that have been treated with pesticides and/or herbicides (weeds and lawn clippings) should be avoided. When in doubt, throw it out!

    8. The microbes responsible for breaking down your compost pile need a balanced diet of nitrogen and carbon. Nitrogen comes from green materials such as food scraps, manure and grass clippings. Carbon comes from brown materials such as dead leaves, hay, wood chips and shredded newspaper. A ratio that contains equal portions by weight (not volume) of both works best.

    9. Algae and seaweed make excellent additions to your compost pile. Be sure to rinse off any salts before using.

    10. Composting bacteria work best under neutral to acidic conditions, with pH’s in the range of 5.5 to 8.

    11. Finished compost is usually less than half the volume of the materials you started with, but it’s much denser.

    12. The more you add to your pile at one time, the more it will heat up. In other words, one “super-sized” meal is better than several smaller snacks.

    13. Keep your compost pile in a black plastic bin and in direct sunlight to continue the composting process through winter. Hay bales can be used to further insulate the pile.

    14. Clean wooden pallets make excellent compost bins. Start with one pallet on the ground. Drive two metal stakes into each side. Slide additional pallets over each support and you have a bin ready for compost.

    15. Straw is an excellent source of carbon for your compost pile. However, it may contain weed seeds, so make sure the pile is “cooking” properly.

    16. The ideal temperature range for a worm bin is between 55-77°F. Relatively compact, they can be kept in a basement or insulated garage – even under the kitchen sink!

    17. The perfect size for a compost pile is one that is at least 3′ x 3′ x 3′. It’s not only a manageable size to turn, but it’s ideal for retaining heat while still allowing air flow.

    18. The more “green” materials you add to the pile the less water you’ll need.

    19. Most kitchen waste, including vegetable peels, fruit rinds, coffee grounds, tea bags and egg shells, can be fed to worms. Meat and dairy products should not be used in a worm bin.

    20. Compost decomposes fastest between 120-160˚F. Decomposition will occur at lower temperatures, but it takes much longer. Purchase a compost thermometer to measure the core temperature of your bin or pile.

    21. Purchase a kitchen compost pail and there’s no need to run out to the pile after each meal – just lift the lid and toss-in table scraps. They’re fitted with activated carbon filters to eliminate odors and look great too!

    22. Maintaining a carbon to nitrogen (C:N) ratio somewhere around 30 parts carbon to 1 part nitrogen is ideal for quality composting.

    23. Many nitrogen-rich materials, like grass clippings, lack structural strength and collapse during decomposition. Mix in hedge trimmings, shredded newspaper and other fibrous materials to improve air circulation.

    24. Don’t throw away your kitchen waste in the winter – try an indoor composter.

    25. Compost piles should remain damp but not wet. As you build your compost pile, make sure that each layer is moist as it is added. The surface should also remain damp (think of a wrung out sponge), especially during the summer months.

    26. Redworms do best if the pH is around 7.0, but can tolerate levels from 4.2 to 8.0 or higher.

    27. Does your compost pile smell? It’s probably due to a large number of anaerobic microbes, which are working hard to break down your compost, but creating a smelly situation in the process. To cut down on the anaerobic process, aerate your pile regularly, creating air spaces and limiting the anaerobic microbes while stimulating the less stinky aerobic microbes.

    28. Meat and fish can be composted, but your bin must be animal proof and it will attract flies. In most cases, these materials should be avoided.

    29. Help start a new compost pile with aged manurecottonseed mealalfalfa mealblood meal or compost starter. They are rich in nitrogen and help jump-start the microbes responsible for breaking down organic matter into compost.

    30. A bin that is working well will produce temperatures of 140-170°F.

    31. Anything that was living at one time is great for compost bins. Think of leaves, vegetables and grass clippings.

    32. Compost piles can either be layered – thin layers of alternating greens and browns, or they can all be thrown in together and mixed well. Either way works!

    33. Woody stalks and corn cobs from the garden have a tendency to decompose slowly. Smash them with a hammer or rock to make it easier for the microorganisms in your pile to break them down.

    34. No problem. Worms can be left for a couple weeks, just feed them a little more before you go. If you will be gone for more than 3-weeks, it’s probably a good idea to get a worm-sitter.

    35. For faster results, use a compost turner every two weeks to aerate your pile.

    36. Soak finished compost in water to “brew” compost tea, a nutrient-rich liquid that can be used for foliar feeding or for watering your flowers, herb, vegetables and practically anything else that grows.

    37. Apply finished compost to your garden about 2-4 weeks before you plant, giving the compost time to integrate and stabilize within the soil.

    38. The main reason a 30:1 C:N ratio is recommend in your pile is for odor and pest control. While a 20:1 or even a 10:1 ratio will provide faster decomposition – odors and pest problems will become a real issue.

    39. The best worm to use in a home vermicomposting system is by far the Red Wiggler (Eisenia foetida). In its natural habitat, it consumes large amount of leaves, manure and many other decaying materials. It also produces copious amounts of castings (worm poo), an excellent addition to any garden.

    40. Add too many “browns” to the mix and your pile will take years to break-down. Add too many “greens” and it will turn into a smelly heap.

    41. Exposed piles and bins can become water logged in rainy weather and dried out in hot climates. An enclosed tumbler or covered bin will protect the contents and help with moisture control.

    42. Chop yard and garden waste into smaller pieces (a lawn mower works great!) to speed the decomposition process.

    43. Finished compost can be used to build soil anytime of year without fear of burning plants or polluting water. In the garden, there is no such thing as too much compost.

    44. Worms can be used to convert pet poop into castings, a nutrient-rich soil amendment, and because they eat the odor producing bacteria, there is very little smell. Castings from pet waste should not be used in vegetable gardens.

    45. Lawn clippings and food scraps are about 80% water and need to be mixed with straw, woody waste or cardboard to keep your pile from becoming a slimy mess.

    46. A good potting mix recipe contains equal parts of compost, sand or perlite and garden topsoil. Compost is often too heavy to be used alone in containers.

    47. Low C:N ratios (excess nitrogen) can be raised by adding “brown” materials, such as peanut shells, sawdust or shredded cardboard.

    48. Grab a handful of compost from the center of your pile and squeeze. If you get a few drops of water, that’s perfect.

    49. An easy way to use compost is to mulch with it. Apply it in a thick layer around plants and worms will help mix it with the soil below.

    50. Relax! Even if you do everything wrong, you will eventually make great compost.

    From https://www.planetnatural.com/composting-101/tips/