Category: Favorite Recipe

  • How to Cook Pasta in the Instant Pot

    How to Cook Pasta in the Instant Pot

    Use these easy step-by-step instructions to cook perfectly al dente pasta.

    This recipe was tested in the 6-quart Instant Pot. (When this method was tested in an 8-quart Instant Pot the results were not consistent.)

    Prep: 5 minutes mins

    Cook: 20 minutes mins

    Servings: 4

    Cook Mode

    Prevent your screen from going dark

    Equipment

    • Instant Pot/Pressure Cooker

    Ingredients 

    • 8 oz Pasta, any type or shape
    • 2 cups Water
    • 1/2 tsp Salt

    Instructions 

    • First, determine the cook time for the pasta you are using. See the notes below to determine the right time.
    • Combine pasta, water, and salt in the bowl of an Instant Pot. Give everything a stir. (See note below if cooking long, straight pasta like spaghetti, fettuccini, or linguini.)
    • Close and lock the lid.
    • Set the vent to “Sealing”.
    • Pressure cook on high for the time determined in Step #1.
    • Leave the pasta on natural release for exactly 5 minutes. (Note: Be very careful not to let it sit for any longer or the pasta will overcook.)
    • Use manual release to release any remaining pressure. (Note: Hot and starchy pasta water may spray out of the pressure valve when you release it. Cover the valve with a dish towel as it releases to keep this contained and minimize the mess.)
    • Open the lid and give the pasta a good stir, 20 to 30 times. (This will get rid of any dry spots that remained where the pasta was sticking out of the water during cooking. If adding sauce, stir it in at this point.)
    • Return the lid to the top of the pressure cooker (no need to lock it just set it on top) and leave the pasta for 5-10 minutes more. (Note: This step is the most important because the pasta will continue to absorb any remaining liquid and continue to cook just a bit in the residual heat of the machine. This is the key to pasta that is cooked, but not overcooked.)
    • Serve!

    Notes

    Find the lowest recommended cook time on the pasta box or bag. (If a range is given, use the lowest number in the range. So if the range is 9 to 11 minutes, use 10 minutes. If only one time is given and it’s odd, round down. So 7 minutes becomes 6.) Then use this chart to determine how long to pressure cook on high.
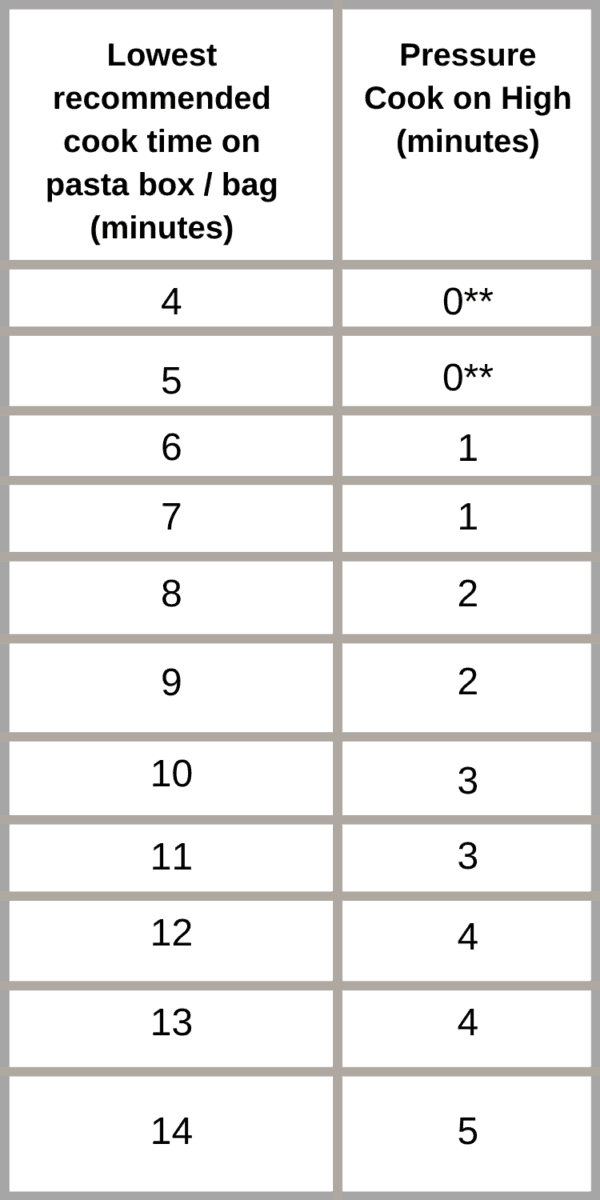
    pasta in the instant pot

    **0 is a real setting on the pressure cooker / instant pot. For small pasta shapes with a short recommended cook time, set the timer to zero minutes. The pressure cooker will fully pressurize but won’t hold for any amount of time.

    Spaghetti, Fettuccini, or Linguini – Long straight pasta shapes like these (and angel hair, bucatini, etc.) need to be treated a bit differently than other pasta shapes.

    1. Break the pasta strands in half before adding them to the Instant Pot so that they can easily be submerged in water.
    2. Pour enough water into the Instant Pot to completely cover the pasta (note: there is no set amount, but only add water until every strand of pasta is submerged). Add salt. 
    3. Do not stir before cooking. (This will help prevent the pasta from sticking.) 
    4. Pressure cook pasta according to the time on the chart. 
    5. Leave pasta on natural release for 5 minutes and then release any remaining pressure.
    6. After cooking, stir the pasta well to loosen any strands that are stuck together.
    7. Drain well. 

    Nutrition

    Calories: 210kcal | Carbohydrates: 42g | Protein: 7g | Fat: 1g | Saturated Fat: 1g | Sodium: 300mg | Potassium: 126mg | Fiber: 2g | Sugar: 2g | Calcium: 16mg | Iron: 1mg

    Nutrition information is automatically calculated, so should only be used as an approximation.
    https://inquiringchef.com/how-to-cook-pasta-in-the-instant-pot
  • Margaret’s Ambrosia

    Margaret’s Ambrosia

    Ingredients

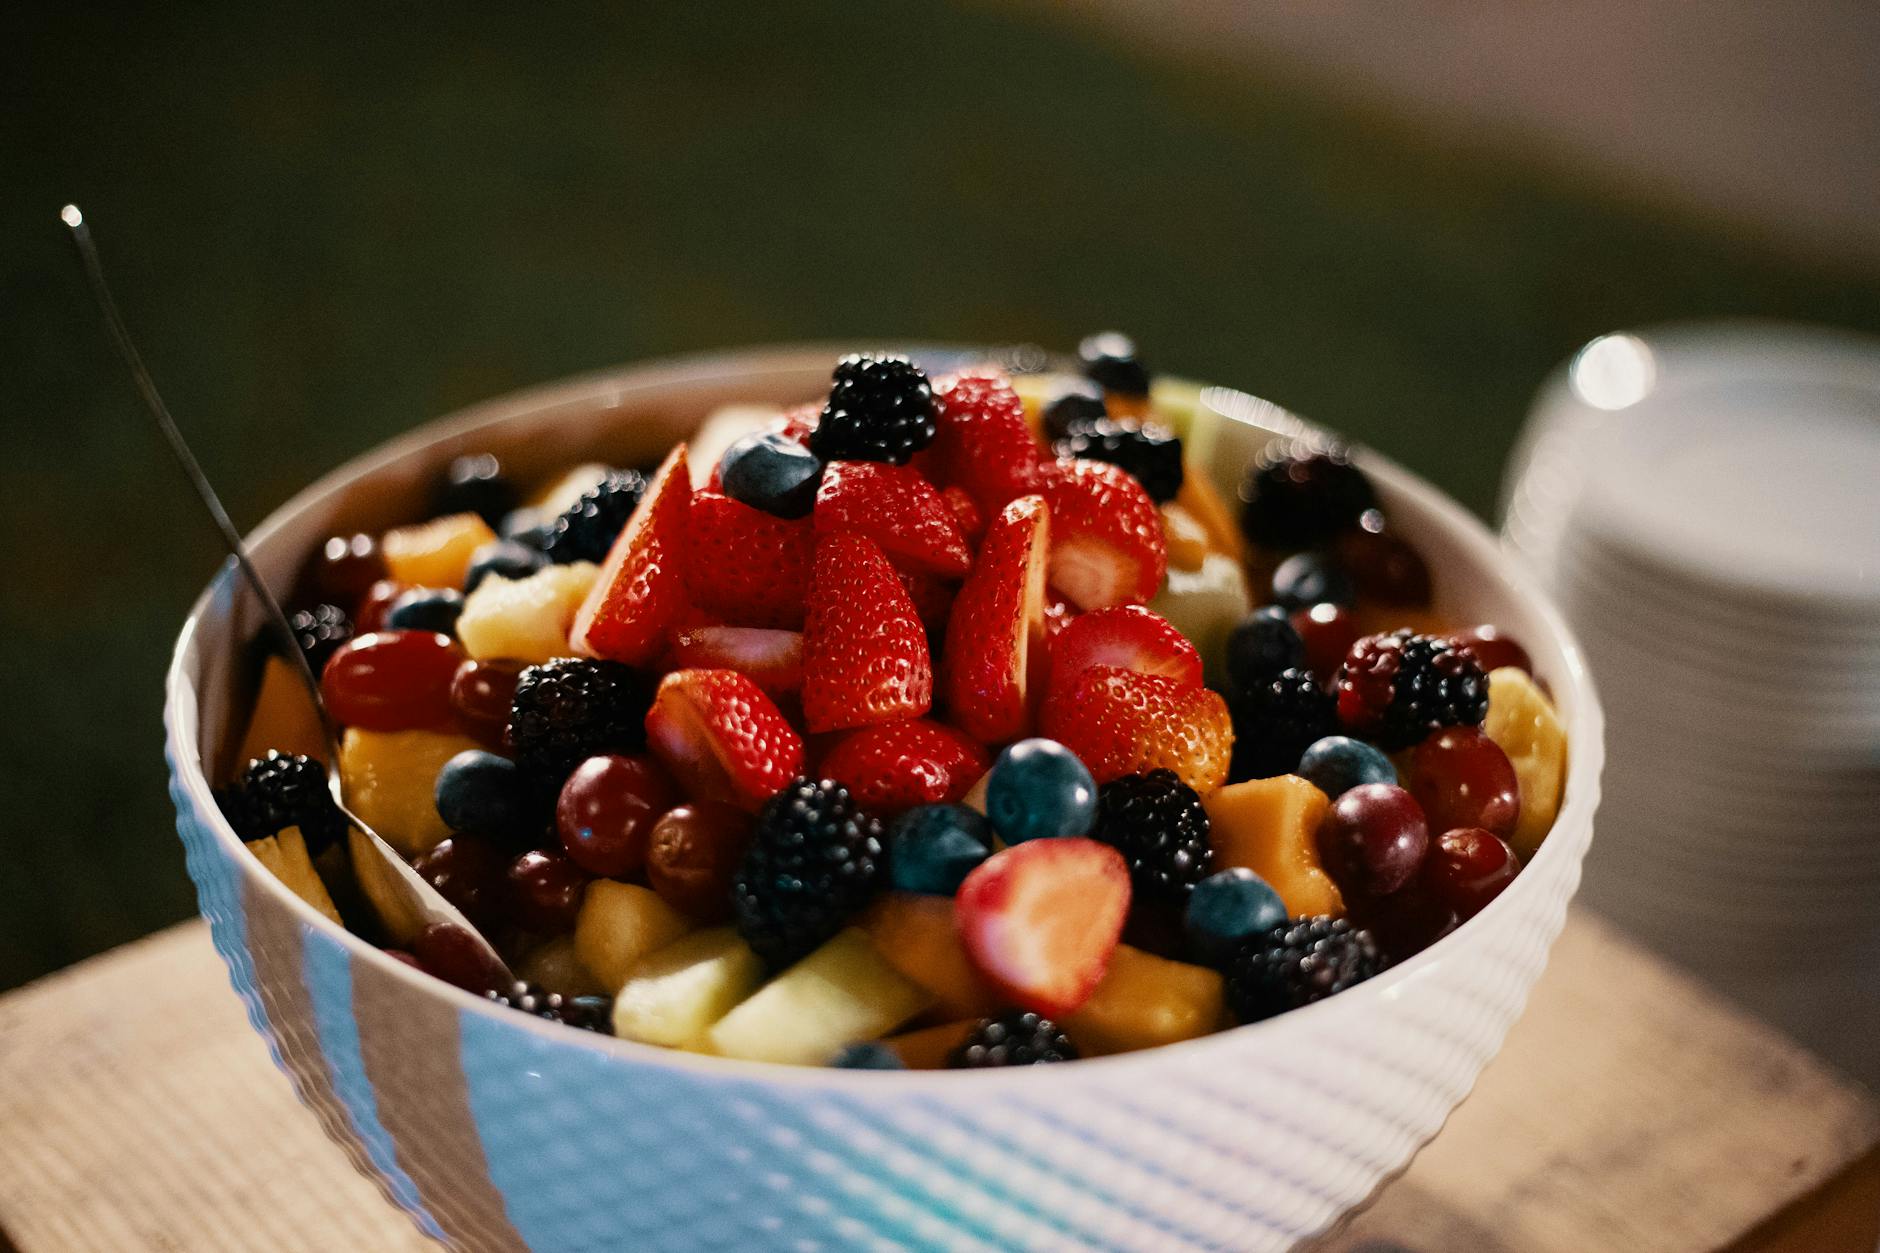
    assorted fruits on bowl
    Photo by Josh Sorenson on Pexels.com
    • Body
      • 2 Pink Grapefruit
      • 2 Navel Oranges
      • 4 Tangerines
        • Margaret uses 1 can of Trader Joe’s mandarin oranges-drained
      • Juice of ½ lime or lemon
        • optional
      • 1 Small can of pineapple tidbits/ or crushed pineapple -drained
      • 1 Cup Miniature marshmallows
        • optional
        • Magaret opts out because she dislikes them
      • 1 ½ Cup Sliced grapes
        • optional
    • Dressing
      • ¾ Cup Coconut flakes optional
      • 1 Cup Vanilla yogurt (I use ‘light’ because I am diabetic
      • 1 or 2 Tbsp. Honey
      • Dash Pie spice/ nutmeg, cinnamon your choice

    Directions

    1. Combine the first 7 ingredients, peeling fruit and cutting with scissors.
    2.  Mix yogurt, honey, spices, and juice in a small bowl and set aside.
    3. Mix about half the dressing with fruit.  To serve transfer to serving bowls and drizzle with remaining dressing
  • Original Iowa Maid Rites

    Original Iowa Maid Rites

    A request for Maid-Rite loose meat sandwich
    Recipe from Muscatine Maid-Rite Diners in Iowa – home of the original loose meat sandwich

    Maid Rite sandwich first served in 1926
    2 pounds ground beef, finely ground
    2 cups chopped onion
    4 teaspoons beef bouillon crystals
    4 teaspoons prepared yellow mustard
    In a large skillet, brown ground beef over medium heat, about 5 minutes.
    Add onion and continue cooking for another 5 minutes.
    Sprinkle bouillon over meat mixture and enough water to barely cover meat.
    Reduce heat to low and simmer uncovered, until water has cooked away, about 30 minutes.
    Stir in mustard and serve hot over hamburger buns.

    #maidrite #LooseMeatSandwich #vintagerecipes #Iowa #americanvintage #vintagerecipes #chefkiki

  • 3-2-1 Ribs

    3-2-1 Ribs

    by Susie Bulloch

    321 ribs are a foolproof way to get fall off the bone tender ribs. The 321 rib method is based on smoking ribs at a certain temperature for 3 hours, wrapping them with liquid for 2 hours, and saucing them for the final 1 hour.

    • PREP TIME: 15 mins
    • COOK TIME: 6 hrs
    • RESTING TIME: 15 mins
    • TOTAL TIME: 6 hrs 30 mins
    • SERVINGS: 2 people
    • CALORIES: 709kcal

    What is the 321 Method for Ribs?

    Smoking ribs using the 321 method is one of the most popular ways for a backyard enthusiast to cook ribs. They result in a truly delectable, fall-off-the-bone rib. While many “BBQ purists” will balk at the 321 method, there’s no denying that this meat is juicy, tender, and delicious. So, if you or your guests like meat that comes clean off the bone with every bite, definitely give the 321 rib method a try!

    So what is the 321 method for ribs, exactly? It’s an easy way to cook pork ribs! In a nutshell, the 321 method for ribs is just what the name suggests:

    3 hours in the smoker

    Start by placing your ribs directly on the grill grates of the smoker for 3 hours to infuse the meat with that good, smoky flavor.

    2 hours wrapped

    Next up, wrap those smoky ribs in foil (usually with brown sugar, apple cider, butter, and other goodies) for 2 hours to add more flavor and keep that rib meat juicy.

    1 hour with sauce

    Last up, remove the meat from the wrapping and smother them in BBQ sauce. Finish them on the grill for 1 hour to set the sauce and ensure that the meat falls right off the bone.

    Baby back ribs being seasoned with Hey Grill Hey Sweet Rub.

    321 Rib Method

    This 321 rib method has gained a lot of popularity with home cooks in recent years because of the flawless results in churning out super tender ribs that fall off the bone every time.

    While competition and traditional BBQ cooks will scoff at fall-off-the-bone ribs, the truth is that most people really like them that way. Judges for KCBS won’t give you a winning score, but they also won’t be hanging out in your backyard critiquing what you and your family are eating. So I say, cook what you like!

    Sticky, sweet, tender, and oh-so-savory, 3 2 1 ribs are probably the most requested meal I receive for potlucks or family dinners. I tend to fall back on these ribs for gatherings because I know that they will deliver that tender, flavorful porky flavor every time. And sometimes consistency is super important!

    One final tip: I highly recommend reading my post on How to Know When Pork Ribs are Done. This will help you determine when to remove the ribs from the smoker in addition to the times suggested.

    INGREDIENTS 

    321 ribs being sauced on the smoker.

    How to Smoke 321 Ribs

    I firmly believe that you should cook food the way you like it, and ribs are no different! Do you like your ribs saucy? Put some extra sauce on them (I like using my Everything BBQ Sauce). Do you like your ribs falling off the bone? Follow this 321 rib method! These are your ribs after all. Make them exactly how you like them!

    Here’s how to cook your ribs using the 321 method:

    1. PREHEAT.
      • Fire up the grill and preheat to 180-200 degrees F. Prepare the ribs for smoking while the grill preheats.
    2. PREP THE RIBS.
      • Use a sharp knife to lift up the corner of the membrane on the back of the ribs. Using a paper towel, grip the membrane and pull firmly to fully remove the membrane. Trim any excess fat off the ribs as needed.
      • Next, season both sides of the ribs liberally with Sweet Rub or Rib Rub.
    3. SMOKE FOR 3 HOURS.
      • Start with exposing the seasoned ribs to 3 hours of heavy smoke over low heat. I prefer fruit woods (apple or cherry) when smoking pork, but other hardwoods (hickory and alder) also work really well with ribs.  
        • Place the seasoned ribs on the smoker and close the lid. Leave them to smoke for 3 hours (The ribs should be somewhere around an internal temperature of 165 degrees F at the end of these 3 hours).
    4. WRAP FOR 2 HOURS.
      • After the initial 3-hour smoke, foil the ribs with a liquid of your choosing (I used apple cider, dark brown sugar, and butter) and cook at 225-250 degrees F for 2 more hours. After the braising period, Iook for great retraction of the meat from the bones. You want the bones to be exposed on the end at least 1/4 to 1/2 an inch.
        • Tear off a large piece of aluminum foil and place it on a large working surface.
        • Transfer the ribs to the foil bone side up so the bones don’t tear through the foil.
        • Sprinkle the ribs with the brown sugar, top with the butter cut into small pads, and then pour in the apple cider.
        • Tightly crimp the foil together to create an airtight seal.
        • Return the wrapped ribs to the grill and increase the temperature in the smoker to 225 degrees F. Let the ribs braise for 2 hours in the foil.
    5. SAUCE AND SMOKE FOR 1 HOUR.
      • Lastly, baste the ribs in your favorite BBQ sauce (my Everything BBQ Sauce or Apple Jalapeno BBQ Sauce are delicious!)  and return them to the grill for a final hour to finish the ribs and set the sauce.
        • Carefully remove the ribs from the grill and place them on a large working surface.
        • Open the foil package (be careful of hot steam) and use tongs to remove the ribs and place them back on the grill, bone side down.
        • Discard the foil and excess cooking liquid. Next, brush the ribs with Everything BBQ Sauce (or your favorite BBQ sauce).
        • Return the unwrapped, sauced ribs to the smoker. Close the lid, and continue smoking for an hour (or less!) or until the ribs reach around 200 degrees F and the sauce is sticky and set.
    6. REST AND ENJOY.
      • Remove the ribs from the smoker and rest for 10-15 minutes. Slice into individual ribs and serve! I like to put extra sauce on the table for guests who enjoy their ribs extra saucy.

    NUTRITION

    Calories: 709kcal | Carbohydrates: 53g | Protein: 38g | Fat: 40g | Saturated Fat: 16g | Cholesterol: 151mg | Sodium: 733mg | Potassium: 749mg | Fiber: 2g | Sugar: 42g | Vitamin A: 645IU | Vitamin C: 2.1mg | Calcium: 194mg | Iron: 5.4mg

    NOTES

    Sweet Rub

    Everything BBQ Sauce

  • Grandma GiGi’s Dilled Meatloaf

    Grandma GiGi’s Dilled Meatloaf

    1 ½ pound ground chuck
    ½ cup chopped onion
    ½ cup soft bread crumbs (1 slice)
    ½ cup bottled dill pickle juice (or use the juice in a jar of dill pickles)
    1 egg
    1 ½ teaspoons salt
    ¼ teaspoon pepper
    ½ cup chopped dill pickle
    ½ cup catsup
    ¼ cup water
    2 tablespoons sugar
    1 teaspoon Worcestershire sauce

    • Mix meat lightly with onion, bread crumbs, dill pickle juice, egg, salt and pepper until well blended. Shape into a loaf in a shallow baking pan. (about 11x7x2)
    • Combine dill pickle, catsup, water, sugar and Worcestershire sauce; pour over loaf.
    • Bake in a moderate oven (350 degrees), basting twice with sauce in the pan, 40 minutes.
    • Continue baking, without basting, 35 minutes longer, or until richly glazed.
    • Let stand a few minutes before cutting.

    Shared by Brian Cooper

  • Zatarains Red Beans and Rice

    Zatarains Red Beans and Rice

    Product Details

    Zatarain’s Red Beans and Rice Mix is a premium blend of long-grain rice, dehydrated vegetables, and spices. Add the flavor of New Orleans to your menu. Provided in user-friendly packages to enhance back-of-house efficiencies, with superior barrier material and precise portion measurement—one pouch equals one full 2″ hotel pan.

    Zatarain’s® Red Beans and Rice Mix brings Louisiana spirit to your guests:

    • Zatarain’s Red Beans and Rice Mix features a premium blend of red beans, long grain rice, carefully dehydrated vegetables and superior spices.
    • Zatarain’s Red Beans and Rice Mix delivers the festive energy and fun flavors of authentic Louisiana-style cooking without the added labor of preparing from scratch.
    • Zatarain’s Red Beans and Rice Mix is kosher.
    • As the nation’s leading provider of New Orleans-style foods, Zatarain’s has been the authority on New Orleans flavor since 1889.
    • There are 8/30 oz. boxes per case. Each box features a superior barrier material and is designed to enhance back-of-house efficiencies, with one pouch yielding one full 2″ hotel pan.
    • Zatarain’s Red Beans and Rice Mix is great as a stand-alone side or as a base in rice bowls, warm salads and in breakfast skillets.
    • All-in-one Zatarain’s Red Beans and Rice Mix saves on prep and space without needing to store extra ingredients.

    Menu Suggestions:

    Zatarain’s® Red Beans and Rice Mix is a delicious side dish or accompaniment to:
    • Sliced smoked sausage or diced ham
    • Fried catfish strips
    • Andouille sausage
    • Combination plate with chicken, shrimp and catfish
    • Cajun pork chops with smoky green beans

    Prep Instructions:

    Bring the heritage and energy of New Orleans to your tables with easy-to-prepare Zatarain’s Red Beans and Rice Mix. Follow these kitchen-simple steps for each method.

    Stove Top

    1. To a large pot, add 12 cups of water, ¼ cup butter or margarine and contents of pouch. Stir thoroughly.
    2. Bring mixture to a boil, stirring occasionally.
    3. Stir, cover and reduce heat to low. Let simmer for 18 minutes (a low bubbling action should be visible).
    4. When rice is cooked, remove from heat and let stand covered for 5 minutes.
    5. Before serving, stir gently to fluff and mix.

    Oven

    1. In a full metal steam pan, add 12 cups of boiling water, ¼ cup butter or margarine and contents of pouch.
    2. Stir thoroughly, and then cover tightly with lid or foil.
    3. Place into a preheated 400°F oven and bake 35 minutes or until rice is cooked.
      • Stir occasionally. Sauce will be thin but will thicken as it stands.
    4. When rice is cooked, remove from oven and let stand covered for 5 minutes.
    5. Before serving, stir gently to fluff and mix.

    Instapot (60 minutes from start to finish)

    1. Add 1 Box of Zatarains’s Red Beans and Rice, 2 1/2 cups water, 2 Tablespoons butter or oil into the instant pot, and stir well.
    2. Manual High pressure 12 minutes.
    3. Natural Pressure Release
    4. Stir & Serve

    Leftover Rice

    Cover and store in refrigerator. Reheat in saucepan with small amount of hot water to steam. For best results reheat in microwave oven.

    Yields:

    4 oz. = Approximately 52 Servings
    8 oz. = Approximately 26 Servings

    Storage:

    To maintain the freshest flavor and color, Zatarain’s® Red Beans and Rice Mix should be stored in a cool, dry place away from exposure to heat, humidity, moisture, direct sunlight, and fluorescent light. Unopened Zatarain’s® Red Beans and Rice Mix packages are shelf stable and can be held for use for up to 730 days.

    Where to Buy

    Please select a package

    ITEM CODEPACKAGE SIZE
    Z095658/30 OZ BOX

    Ingredients

    ENRICHED LONG GRAIN PARBOILED RICE (RICE, IRON, NIACIN, THIAMINE MONONITRATE, FOLIC ACID), RED BEANS, ENRICHED BLEACHED WHEAT FLOUR (WHEAT & MALT BARLEY FLOUR, NIACIN, IRON, THIAMINE MONONITRATE, RIBOFLAVIN, FOLIC ACID), SALT, ONION, MODIFIED CORN STARCH, SOY SAUCE (HYDROLYZED SOY PROTEIN, CORN SYRUP SOLIDS, SALT), RED AND GREEN BELL PEPPER, TORULA YEAST, YEAST EXTRACT, GARLIC, CARAMEL COLOR, SPICES (INCLUDING RED PEPPER), DEXTROSE, AND NATURAL & ARTIFICIAL FLAVOR.

    • OTHER INFORMATION
    • KOSHER
    • BEST SELLER
    • SHELF LIFE
    • 730 DAYS
    ITEM CODEPACKAGE SIZESERVINGS PER CONTAINER
    Z095658/30 OZ BOX12
    • Servings Per Container 1/2
    • per serving
    • Calories 250Fat Cal. 0
    •                  % DV*
    • Total Fat 1g0%
      • Saturated Fat 0g0%
      • Trans Fat 0g0%
    • Cholesterol 0mg0%
    • Sodium 1120mg0%
    • Carbohydrate 50g0%
      • Fiber 6g0%
      • Sugar 1g0%
    • Protein 10 g
  • Mashed Potatoes (Hand Mashed)

    Mashed Potatoes (Hand Mashed)

    Prep Time: 35 minutes mins | Cook Time: 25 minutes mins | Total Time: 1 hour hr

    Need

    • 5 medium(russet)-sized potatoes
      • Cube them in small pieces (1/2 inch)
      • Try to keep chunks uniform size
    • 1/2 cup Butter
      • Leave it to sit out while boiling the potatoes to allow them to soften up
    • 1 1/2 Cup Fluids (to combat dryness)
      • Whole milk
      • Cream
      • Potato Water
    • Optional
      • Salt
      • Pepper
      • Egg

    Preparation

    1. Boil to soft, a fork or knife should slip out after you poke it.
    2. Drain and dry, return to pot, and give it a minute or less to cook off the water
    3. Butter, a generous amount
    4. Mash and mash. Mash until no butter chunks or obvious yellow spots. it looks kinda dry and mealy at this point
    5. Add fluids by drizzle, then mash more, you won’t need to mash for long at this point so I stir and mash interchangeably with the instrument.
    6. Salt and pepper, repeat step 5 to desired consistency

    Remember it is always easier to add than take away!

    • If you overadd the milk I turn the heat up and constantly stir it to dry it out.
    • Can’t say I figured out a way to reduce the amount of salt and pepper I went over except to add more butter or milk so it’s best to gradually add.
    Additional tips to consider foodwishes.com
  • How to Cook Turkey With Sprite

    How to Cook Turkey With Sprite

    By Athena Hessong

    Things You’ll Need

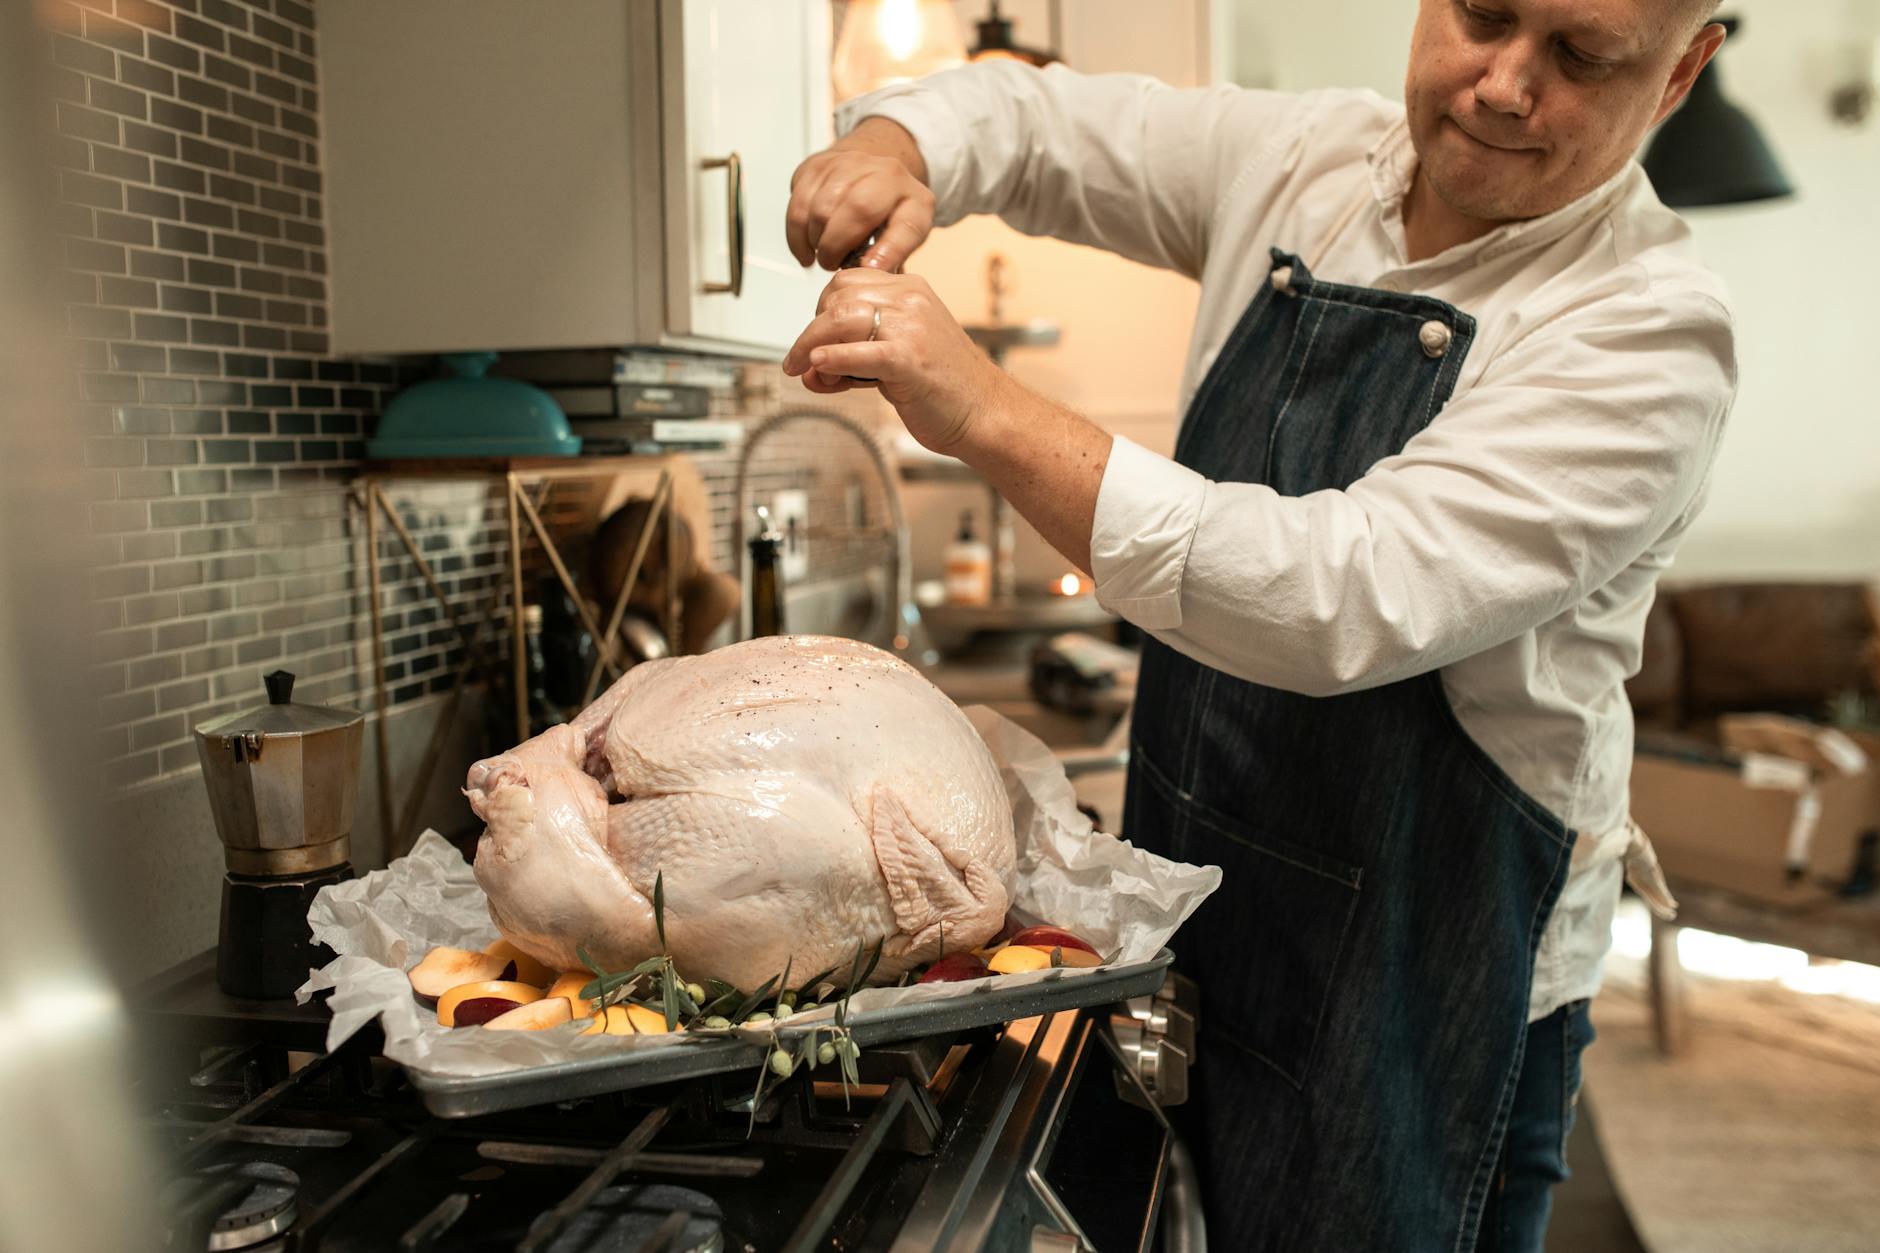
    As a lean meat, turkey often suffers from dryness. Several methods to remedy this after cooking only mask the flavor. No matter how much gravy you pour over a dry turkey, it will still taste like dry meat. Give your next baked turkey a boost of flavor, moistness, and a healthy, golden glow. The secret? Cook your turkey with Sprite or any lemon-lime soda. The sugar, acid, and carbonation combine to create a perfect poultry marinade. Using the cooking bag for this lemon-lime soda turkey saves you from having to constantly baste the bird during cooking.

    Step 1

    Heat the oven to 325 degrees Fahrenheit.

    Step 2

    Set the turkey into the cooking bag set the bag and bird in the roasting pan.

    Step 3

    Brush melted butter over the entire surface of the turkey.

    Step 4

    Pour the entire can of Sprite over the turkey and close the cooking bag.

    Step 5

    Bake the turkey in the preheated oven for 3 to 3 ¾ hours for an unstuffed 10- to 12-lb turkey or until a meat thermometer inserted into the thigh registers 165 F. (see reference 2)

    Tip

    Prepare stuffing in a separate dish from the turkey to ensure both the turkey and stuffing reach 165 F to prevent food poisoning and to decrease the cooking time for the turkey. (see reference 2)

    Check out this related video from ExpertVillage on Youtube

    References & Resources

  • How Long to Thaw a Turkey on One Easy-to-Use Chart

    How Long to Thaw a Turkey on One Easy-to-Use Chart

    Turkey is the undeniable star of the Thanksgiving show, and there are perks to buying a frozen one. According to the USDA, turkeys keep in the freezer indefinitely, although they advise cooking them within a year for best quality.

    The only catch with going frozen? It needs considerable time to thaw before cooking to ensure your Thanksgiving dinner is safe and on time. How long does a frozen turkey take to thaw? That’s the tricky part because it depends on its size and thawing method:

    • If it’s a week or so ahead and there’s no rush, thaw your turkey in the refrigerator.
    • If you’re not a planner and need to defrost a fully frozen turkey fast, use the cold-water method.
    • If you’re in a pinch and your turkey fits in your microwave, use your unit’s defrost function.
    • Worse case, you can roast a frozen turkey, but be prepared for an extra-long cooking time.
    • Whatever you do, don’t thaw a turkey at room temperature.

    For a quick answer, use our simple chart to determine how long to thaw a turkey, even if you’re in a time crunch. Based on USDA guidelines, we offer further details about each of the five thawing methods—two widely recommended, two doable in a pinch, and one definite no-no.

     Turkey Size Thaw In Refrigerator (set to 40 F or below) Thaw In Cold Water (change water every 30 min.)
     4 to 12 lbs. 1 to 3 days 2 to 6 hours
     12 to 16 lbs. 3 to 4 days 6 to 8 hours
     16 to 20 lbs. 4 to 5 days 8 to 10 hours
     20 to 24 lbs. 5 to 6 days 10 to 12 hours

    Thawing in the Refrigerator

    Provided there’s plenty of time before T-day, your best bet is to thaw your frozen turkey in the refrigerator. Keeping it in its original packaging, set your bird on a rimmed container to catch any juices. In a refrigerator set to 40 degrees F or below, it generally takes one day for every 4 pounds to thaw a fully frozen turkey.

     How Long to Cook a Turkey, in One Easy Chart

    Once thawed, your turkey will keep in the fridge for up to two days. If you’ve started (or even finished) using this thawing method but then change plans (life happens!), it’s safe to refreeze your turkey, provided it’s been thawed properly in the fridge and is still in its original, unopened packaging.

    Thawing in Cold Water

    If you forgot about your frozen turkey until the day of, or your turkey hasn’t entirely thawed in the fridge in time, this method might save the day. Since water is a better conductor of heat than air, placing a frozen turkey in cool water to thaw works faster than keeping it in the fridge. Keep your turkey in its original packaging for this method, too.

    To finish a partially defrosted bird, 30 minutes in cold water may be all you need. If fully frozen, allow about 30 minutes per pound to completely thaw, and change the water every 30 minutes to ensure the water stays cool (below 40 degrees F).

    For this method, position your bird breast-side down, and submerge it in an ice chest or sink filled with cool water, making sure water doesn’t leak into the packaging. When thawed this way, you must cook your turkey immediately, and it cannot be refrozen.

     How to Prepare a Turkey for Roasting

    Thawing in the Microwave

    Thawing a turkey in the microwave is not highly recommended but may do in a pinch. Of course, the big question is, “Will it fit?” Check your owner’s manual for the maximum allowable size and, if feasible, the recommended time per pound and power level to use for thawing.

    Unlike the first two methods, microwaving dictates you remove all outside wrapping, and then place your bird on a microwave-safe dish to catch any juices that might leak as it thaws. After using this method, cook your turkey immediately, and do not freeze or refrigerate your microwave-thawed bird.

    Not Thawing at All

    According to the USDA, just because your turkey is still icy on Thanksgiving morning, it doesn’t mean you’re destined to call for pizza delivery. It’s perfectly safe to roast a turkey in its solidly frozen state, although it’ll take at least 50 percent longer to cook than a thawed turkey. If only partially frozen, figure it’ll still take a bit longer to cook.

    Whether starting out fully or partially frozen, it’s especially important to use your meat thermometer because the cook times listed on the turkey’s package no longer apply. When your bird measures 165 degrees F in the innermost part of the thigh, the innermost part of the wing, and the thickest part of the breast, it’s ready.

    Thawing at Room Temperature

    No! Don’t even think about it! No matter how dire the situation, it’s never safe to thaw a turkey at room temperature—not on the kitchen counter, garage, or back porch; not in a grocery bag (paper or plastic); and not in a dishwasher or turned-off oven. You may find authorities that recommend safe ways to defrost a turkey at room temperature, but according to the USDA, it’s a non-starter.

     How to Cook a Thanksgiving Turkey 5 Different Ways—Including Roasted, Deep-Fried, and More

    The USDA states that any package of poultry left thawing on the counter for more than 2 hours is not safe. Even though the center of the package may still be frozen, the outermost layer is considered in the “Danger Zone”—any temperature between 40 and 140 degrees F—where foodborne bacteria multiply rapidly.

    Whether still frozen on Thanksgiving morning or you’re planning a week ahead, we’ll help you determine how long to safely thaw your turkey.

    By Real Simple Editors Updated on October 16, 2023

    Medically reviewed by Kristy Del Coro, MS, RDN, LDN

    Kristy Del Coro is a registered dietitian nutritionist, RDN, and professionally trained chef with more than 10 years of experience in the field of culinary nutrition. Her strong background in nutrition science, sustainable food systems, and culinary education makes her exceptionally qualified to write about food that is good for us and the planet—while not sacrificing flavor.

    Fact checked by Emily Peterson

    From https://www.realsimple.com/food-recipes/recipe-collections-favorites/seasonal/how-long-to-thaw-a-turkey
  • Scalloped Corn

    Scalloped Corn

    Mom’s Version:

    Ingredients

    • Package cornbread mix
    • 1 can creamed corn
    • 1 Can whole kernel corn, drained
    • 2 eggs, lightly beaten
    • 1/2 cup sour cream

    Mix all together and bake at 375 degrees for about 45 minutes, or until done (toothpick test about center comes out clean).
    Let rest for 10 minutes.
    Serve

    Grandma Ann’s Version: