Blog

  • How Long to Thaw a Turkey on One Easy-to-Use Chart

    How Long to Thaw a Turkey on One Easy-to-Use Chart

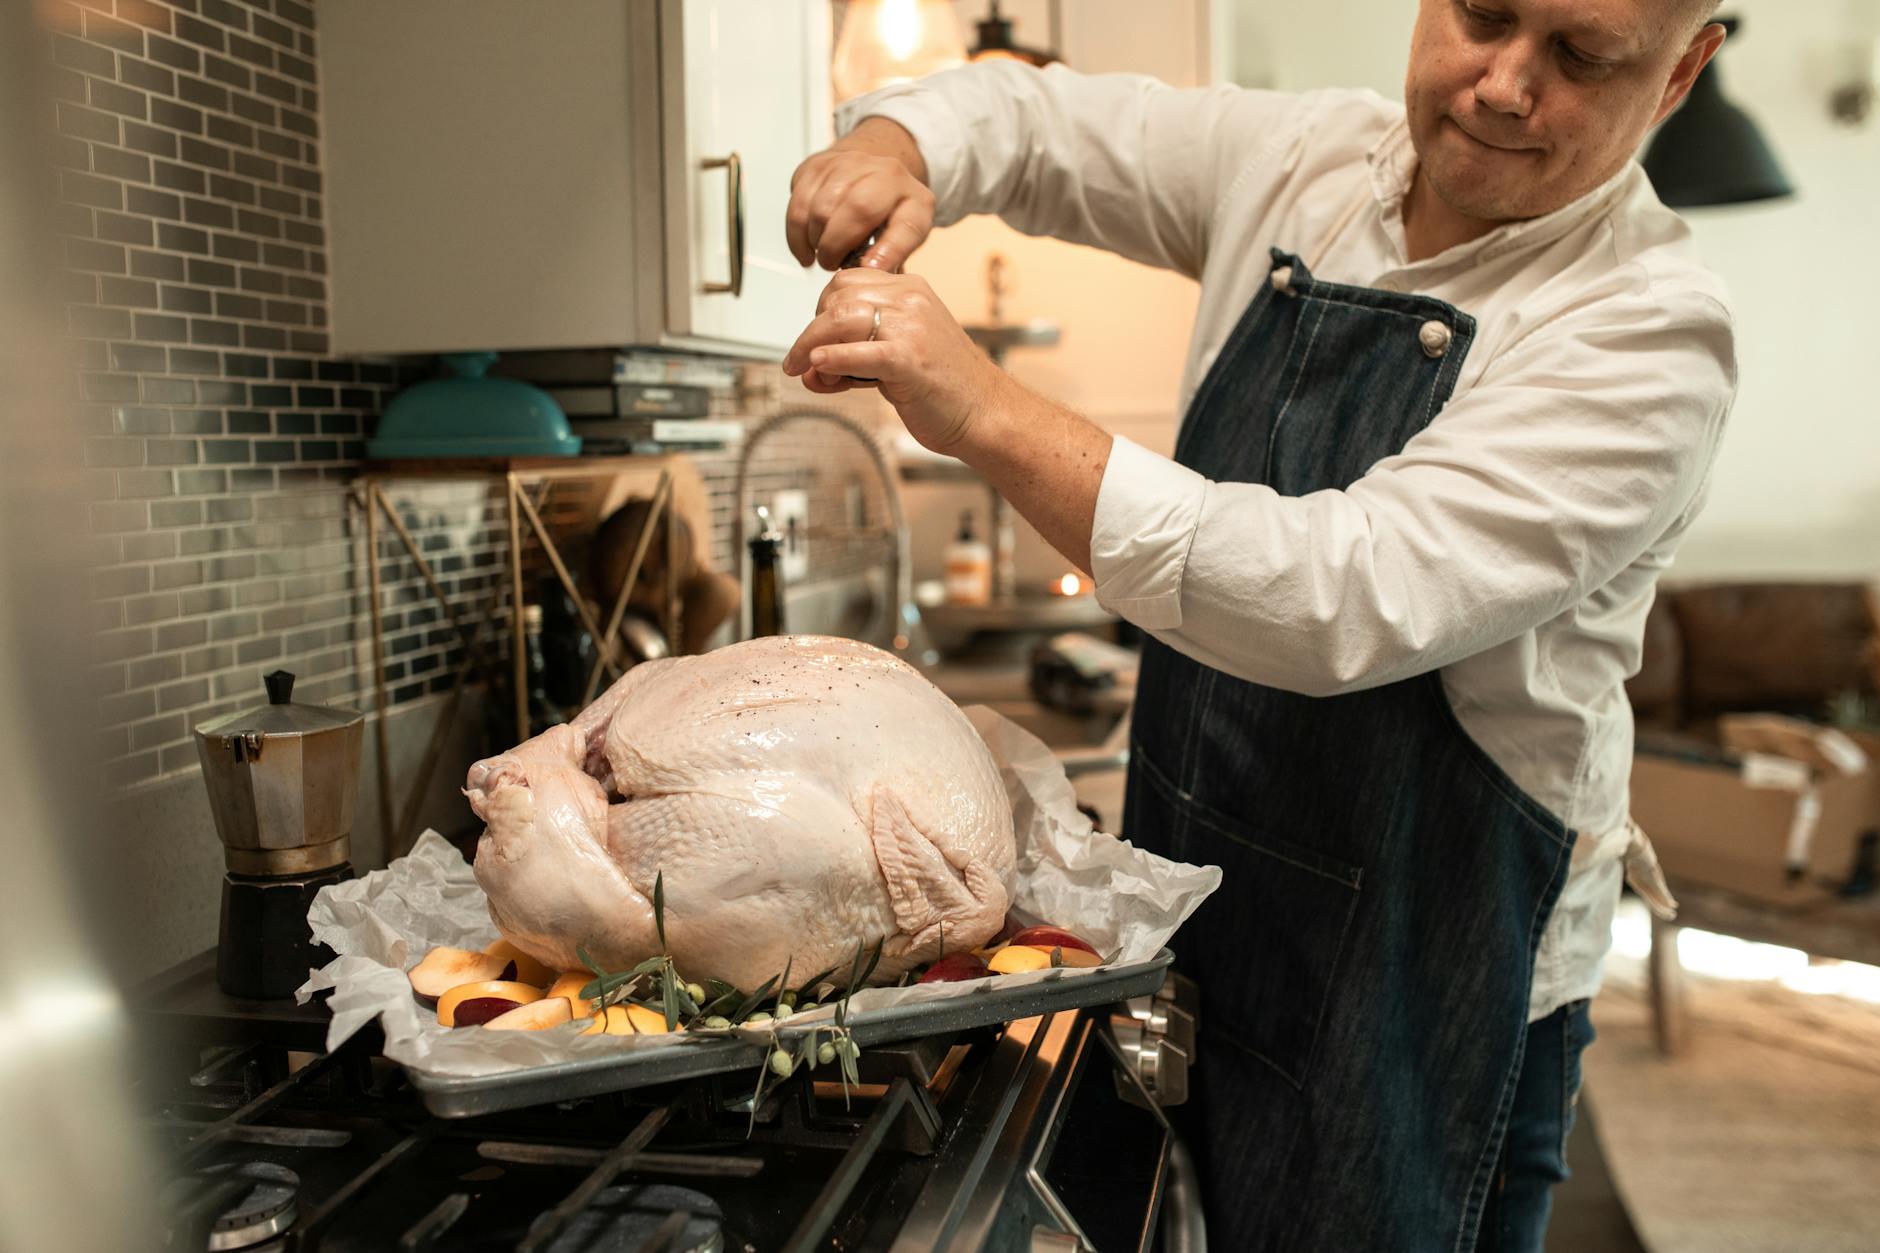
    Turkey is the undeniable star of the Thanksgiving show, and there are perks to buying a frozen one. According to the USDA, turkeys keep in the freezer indefinitely, although they advise cooking them within a year for best quality.

    The only catch with going frozen? It needs considerable time to thaw before cooking to ensure your Thanksgiving dinner is safe and on time. How long does a frozen turkey take to thaw? That’s the tricky part because it depends on its size and thawing method:

    • If it’s a week or so ahead and there’s no rush, thaw your turkey in the refrigerator.
    • If you’re not a planner and need to defrost a fully frozen turkey fast, use the cold-water method.
    • If you’re in a pinch and your turkey fits in your microwave, use your unit’s defrost function.
    • Worse case, you can roast a frozen turkey, but be prepared for an extra-long cooking time.
    • Whatever you do, don’t thaw a turkey at room temperature.

    For a quick answer, use our simple chart to determine how long to thaw a turkey, even if you’re in a time crunch. Based on USDA guidelines, we offer further details about each of the five thawing methods—two widely recommended, two doable in a pinch, and one definite no-no.

     Turkey Size Thaw In Refrigerator (set to 40 F or below) Thaw In Cold Water (change water every 30 min.)
     4 to 12 lbs. 1 to 3 days 2 to 6 hours
     12 to 16 lbs. 3 to 4 days 6 to 8 hours
     16 to 20 lbs. 4 to 5 days 8 to 10 hours
     20 to 24 lbs. 5 to 6 days 10 to 12 hours

    Thawing in the Refrigerator

    Provided there’s plenty of time before T-day, your best bet is to thaw your frozen turkey in the refrigerator. Keeping it in its original packaging, set your bird on a rimmed container to catch any juices. In a refrigerator set to 40 degrees F or below, it generally takes one day for every 4 pounds to thaw a fully frozen turkey.

     How Long to Cook a Turkey, in One Easy Chart

    Once thawed, your turkey will keep in the fridge for up to two days. If you’ve started (or even finished) using this thawing method but then change plans (life happens!), it’s safe to refreeze your turkey, provided it’s been thawed properly in the fridge and is still in its original, unopened packaging.

    Thawing in Cold Water

    If you forgot about your frozen turkey until the day of, or your turkey hasn’t entirely thawed in the fridge in time, this method might save the day. Since water is a better conductor of heat than air, placing a frozen turkey in cool water to thaw works faster than keeping it in the fridge. Keep your turkey in its original packaging for this method, too.

    To finish a partially defrosted bird, 30 minutes in cold water may be all you need. If fully frozen, allow about 30 minutes per pound to completely thaw, and change the water every 30 minutes to ensure the water stays cool (below 40 degrees F).

    For this method, position your bird breast-side down, and submerge it in an ice chest or sink filled with cool water, making sure water doesn’t leak into the packaging. When thawed this way, you must cook your turkey immediately, and it cannot be refrozen.

     How to Prepare a Turkey for Roasting

    Thawing in the Microwave

    Thawing a turkey in the microwave is not highly recommended but may do in a pinch. Of course, the big question is, “Will it fit?” Check your owner’s manual for the maximum allowable size and, if feasible, the recommended time per pound and power level to use for thawing.

    Unlike the first two methods, microwaving dictates you remove all outside wrapping, and then place your bird on a microwave-safe dish to catch any juices that might leak as it thaws. After using this method, cook your turkey immediately, and do not freeze or refrigerate your microwave-thawed bird.

    Not Thawing at All

    According to the USDA, just because your turkey is still icy on Thanksgiving morning, it doesn’t mean you’re destined to call for pizza delivery. It’s perfectly safe to roast a turkey in its solidly frozen state, although it’ll take at least 50 percent longer to cook than a thawed turkey. If only partially frozen, figure it’ll still take a bit longer to cook.

    Whether starting out fully or partially frozen, it’s especially important to use your meat thermometer because the cook times listed on the turkey’s package no longer apply. When your bird measures 165 degrees F in the innermost part of the thigh, the innermost part of the wing, and the thickest part of the breast, it’s ready.

    Thawing at Room Temperature

    No! Don’t even think about it! No matter how dire the situation, it’s never safe to thaw a turkey at room temperature—not on the kitchen counter, garage, or back porch; not in a grocery bag (paper or plastic); and not in a dishwasher or turned-off oven. You may find authorities that recommend safe ways to defrost a turkey at room temperature, but according to the USDA, it’s a non-starter.

     How to Cook a Thanksgiving Turkey 5 Different Ways—Including Roasted, Deep-Fried, and More

    The USDA states that any package of poultry left thawing on the counter for more than 2 hours is not safe. Even though the center of the package may still be frozen, the outermost layer is considered in the “Danger Zone”—any temperature between 40 and 140 degrees F—where foodborne bacteria multiply rapidly.

    Whether still frozen on Thanksgiving morning or you’re planning a week ahead, we’ll help you determine how long to safely thaw your turkey.

    By Real Simple Editors Updated on October 16, 2023

    Medically reviewed by Kristy Del Coro, MS, RDN, LDN

    Kristy Del Coro is a registered dietitian nutritionist, RDN, and professionally trained chef with more than 10 years of experience in the field of culinary nutrition. Her strong background in nutrition science, sustainable food systems, and culinary education makes her exceptionally qualified to write about food that is good for us and the planet—while not sacrificing flavor.

    Fact checked by Emily Peterson

    From https://www.realsimple.com/food-recipes/recipe-collections-favorites/seasonal/how-long-to-thaw-a-turkey
  • Peachtree Spring/Summer Support

    Peachtree Spring/Summer Support

    Assets:

    • Rock
    • 5-gallon bucket with a 3/16″ hole drilled in the bottom
    • 1 Tablespoon of olive oil
    • Water hose

    When not raining for 3+ consecutive days, set the bucket 3′ out from the trunk with the rock in first(keeps it from tipping in the wind or from animals knocking it over), then fill it with water, and lastly add the olive oil (to suffocate any mosquito larva that tries to hatch).

    Every 3 days it is not raining, move the buckets so they are circling the base about at 12, 9, 6, and 3 o’clock. When it is expected to rain, move the buckets so any actual rain that grabs nitrates from the atmosphere when falling can get to those parts of the root.

    This will help the tree bare larger fruit.


    pink medicines on white surface
    Photo by Castorly Stock on Pexels.com

    Health tip:

    For those affected by environmentally triggered allergies, get a wet/dry spa membership, take a gallon of distilled water when you go to the sauna (do this several times a week), and drink that while you hang out there for a while.

    It helps push much of the built-up toxins out of your system!

    I knew this process but had never thought of applying it this way. This is a fantastic tip!


    Many thanks to Jeff Murray for being amazing to our trees & our household!

  • Scalloped Corn

    Scalloped Corn

    Mom’s Version:

    Ingredients

    • Package cornbread mix
    • 1 can creamed corn
    • 1 Can whole kernel corn, drained
    • 2 eggs, lightly beaten
    • 1/2 cup sour cream

    Mix all together and bake at 375 degrees for about 45 minutes, or until done (toothpick test about center comes out clean).
    Let rest for 10 minutes.
    Serve

    Grandma Ann’s Version:

  • Pork Butt Roast

    Pork Butt Roast

    RECIPE


    • Author: RecipeTeacher
    •  Total Time: 3 hours 30 minutes
    •  Yield: 4-6 servings

    The most tender, juicy and succulent boneless pork butt roast made right in your oven. No special outdoor equipment needed.


    INGREDIENTS

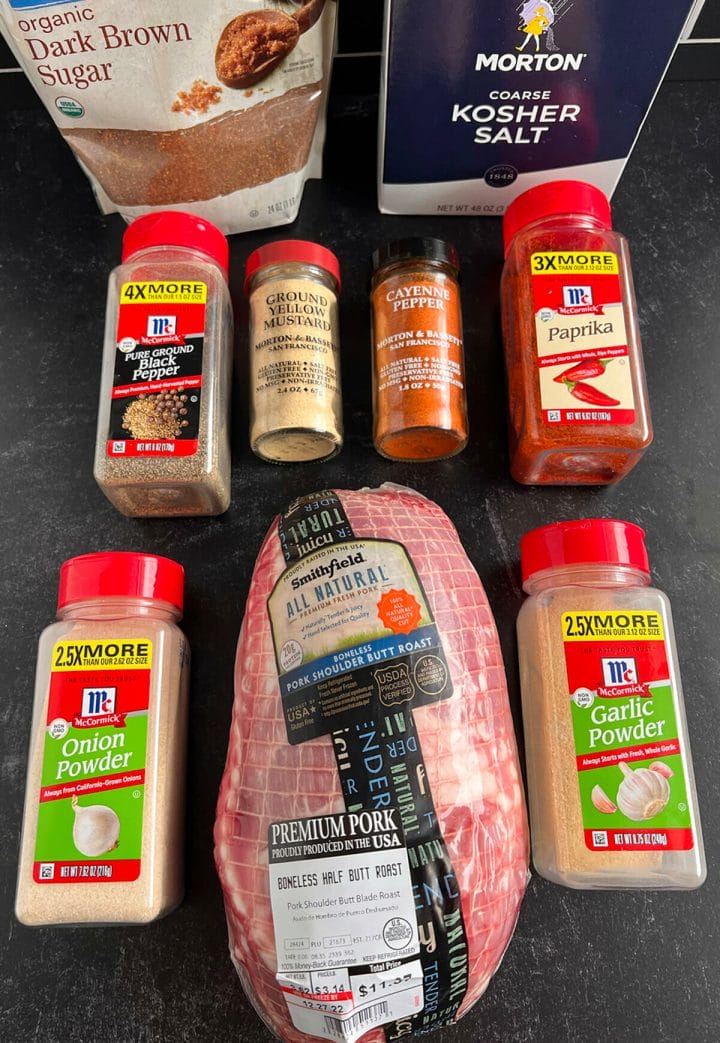
    IngredientsWhere from
    Sweet & Sassy4 teaspoons seasoned salt
    2 teaspoons dark brown sugar
    1 1/2 teaspoons granulated sugar
    1 1/2 teaspoons paprika
    1/4 teaspoon garlic powder
    1/4 teaspoon pepper
    1/8 teaspoon dry mustard
    1/8 teaspoon ground cumin
    1/16 teaspoon ground ginger
    Southern Living
    Sweet with a Bite1/2 cup brown sugar
    1/4 cup white sugar
    1/4 cup salt
    1 tbsp. dry mustard
    1 tbsp. cumin
    1 tbsp. celery seed
    1 tbsp. chili powder
    2 tbsp. paprika
    2 tbsp. onion powder
    2 tbsp. garlic powder
    1 tsp. pepper
    1/4 – 1/2 tsp. red pepper flakes
    Six Clever Sisters
    Some heat1 tbs brown sugar
    2 tsp kosher salt
    1 tsp onion powder
    1 tsp garlic powder
    1 tsp ground mustard
    1 tsp paprika
    1 tsp black pepper
    ¼ tsp cayenne
    Original: Recipe Teacher
    More heat¼ cup paprika
    2 tablespoons firmly packed dark brown sugar
    2 tablespoons kosher salt
    2 tablespoons garlic powder
    1 tablespoon fresh-ground black pepper
    1 tablespoon chili powder
    1 tablespoon cayenne pepper, or more to taste
    1 tablespoon onion powder
    1 tablespoon ground dried chipotle chili pepper
    1 ½ teaspoons ground cumin
    1 ½ teaspoons dry mustard powder
    All Recipes

    This is scaled for a 3–4lb. boneless pork butt roast


    INSTRUCTIONS

    1. Combine all seasoning ingredients in a small bowl and mix well.
    2. Remove netting from pork if present. Trim any unwanted fat from pork butt roast. If it has fat cap, best to leave a little bit on, less than ¼″ thick.
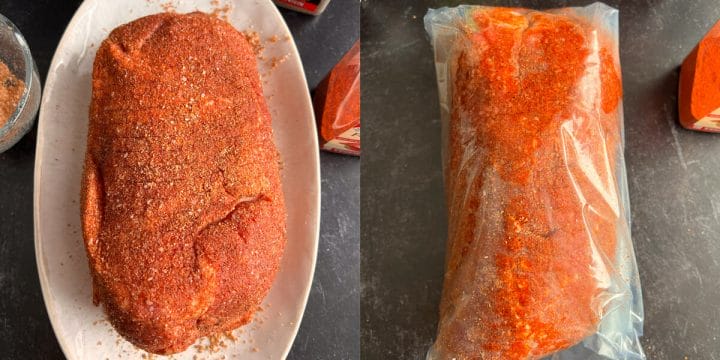
    3. Apply seasoning rub over the meat. Massage and press into meat as best possible.
    4. Place meat in a large zip-top bag, sealed, overnight to marinate.
    5. Preheat oven to 350°(F).
    6. Place seasoned pork but on wire rack of a roasting pan with the fat side up. Place in oven at 350°(F) approximately 3-4 hours. Monitor closely with an instant read meat thermometer. Remove from oven when center of meat reached 185°(F). (This is more important than the time and the indicator that it’s done)
    7. Remove roasting pan with pork butt from oven and let rest for at least 15 minutes before transferring meat to a cutting board to be sliced.
    • Prep Time: 10 min
    • Cook Time: 200 min
    • Category: Dinner
    • Method: Oven
    • Cuisine: American

    EQUIPMENT AND INGREDIENTS

    The only equipment you’ll need is a roasting pan. A roasting pan is an oven safe pan which has a wire rack upon which the food sits. The pan collects the liquids from the meat and the rack helps promote even roasting on all sides – which is important, especially when cooking times exceed a couple of hours.

    Ingredients to make pork butt roast

    If you don’t have a roasting pan with a rack, use a large enough casserole or baking dish and roll up some aluminum foil to use as a make-shift rack.

    The ingredients are also very simple an you likely have most already in your kitchen. They include brown sugar (light or dark), paprika, onion powder, garlic powder, ground mustard powder, kosher salt, ground black pepper and just a little cayenne to give everything a nice little boost.

    Of course, the main ingredient is the butt roast. You’ll find butt roasts in many sizes and some are bone-in, and some are boneless. For the very best results when making a butt roast this way, it is recommended to use a smaller sized boneless roast. Boneless roasts of 3-4lbs are quite common and many supermarkets. Roasts larger than 4 lbs are not recommended as the roasting time can greatly increase, drying out the meat. Larger pork butts are best used as a pulled pork. We have a terrific oven roasted pulled pork recipe you can try!

    PREPARATION

    Many smaller pork butts will come with a netting that holds the meat in a nice, compact shape. Go ahead and gently cut the netting away. You can also rinse the meat under cool water. Again, do this gently as you don’t want it falling apart. Then pat the roast dry with a paper towel.

    Some roasts have a fat cap. If the fat cap is very large or thick, you can cut some away with a sharp knife. You’ll want to some on though, it it can greatly increase the juiciness and flavor of the meat.

    Seasoning pork butt roast

    Next, we’re ready to apply our seasoning mix.  Liberally apply all the rub and massage it in well. For extra flavor, seal it in a zip-top bag in the refrigerator overnight!

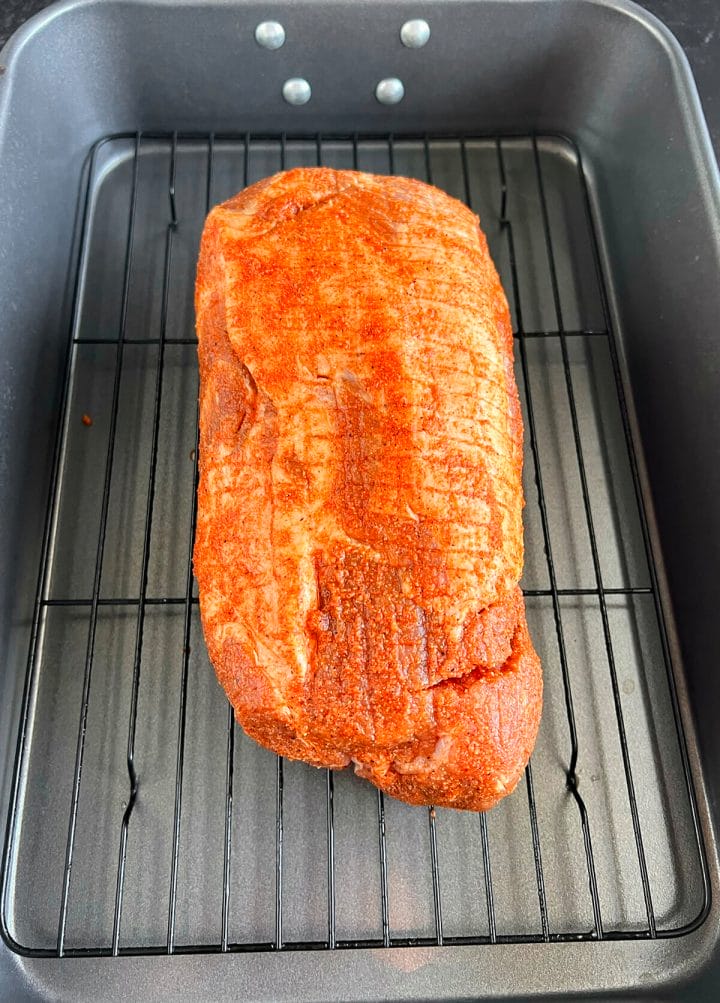
    Now place the roast (fat cap side up if it has it) on the roasting rack. Having the fat side up is important as it will melt into the meat making it extra juicy.

    Seasoned pork butt ready to go in the oven.

    ROAST AT 350°(F) FOR 3-4 HOURS

    Place the roast into a preheated oven at 350°(F). The cooking times can vary, depending on the size and weight of the roast, but for one that is 3-4lbs, we’ll be looking at 3-4 hours.

    The important thing is the internal temperature of the roast. We want an internal temperature of 185°(F). While pork is technically done at 145°(F), a pork butt roast will not be tender at that temperature. Once we start getting above 180°(F), the roast will really start to become tender as the fat and connective tissues start to break down. We don’t want to take this pork roast much higher that 185°(F) as then it starts to become much more supple, and more geared towards shredded pork. Now of course, shredded or pulled pork is totally fine, but we’re looking more for slices of pork roast with this recipe. Use a meat thermometer or instant read thermometer to monitor the internal temperature.

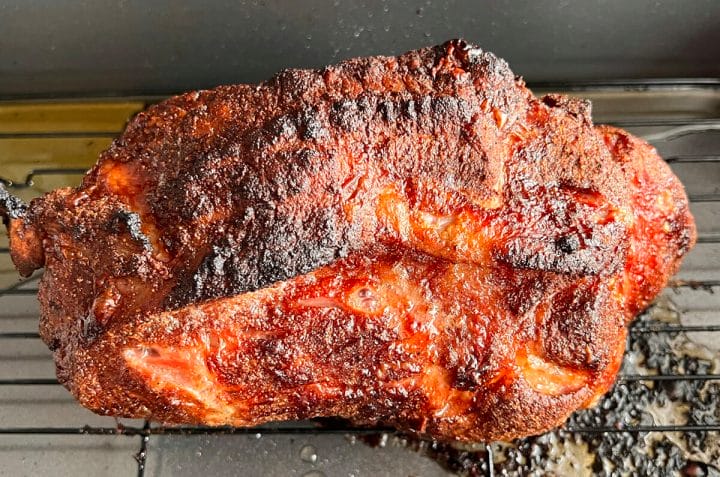
    Oven roast pork butt

    LET IT REST

    Once the pork has reached 185°(F), it’s time to remove it from the oven. But we do not want to dig in right away! We need that meat to rest for at least 15 minutes. This allows all the natural juices to redistribute through the meat. Slicing it too soon will not yield optimum results.

    TIME TO SERVE!

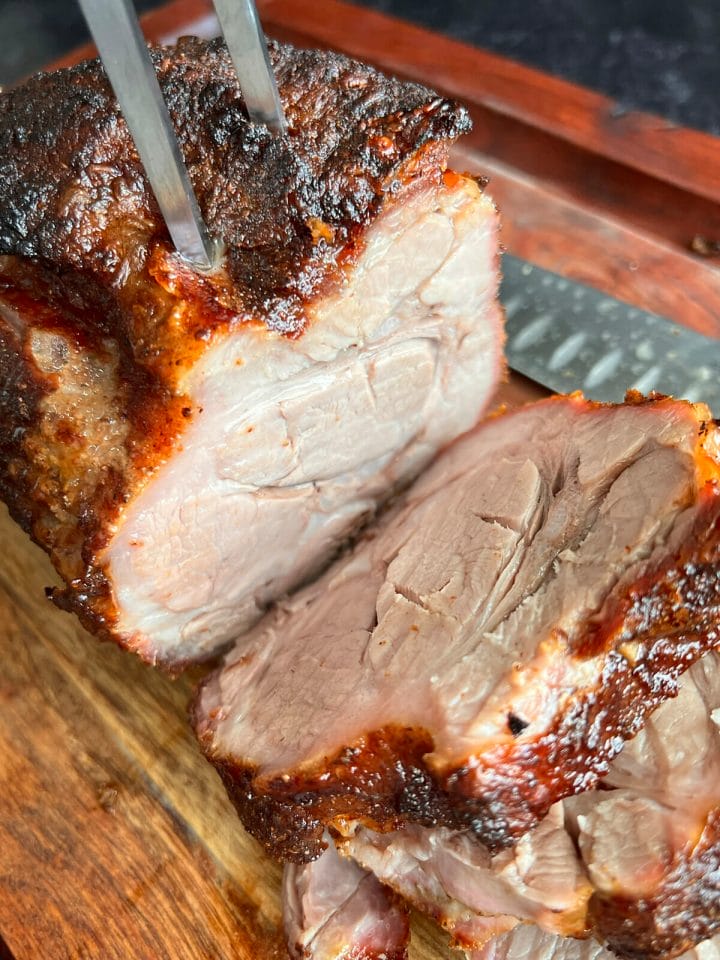
    Once your butt has had a chance to rest, transfer it to a cutting board and begin slicing. I like the slices to be about ¼″ thick. Some of the edges may shred a bit, but that’s fine. You should have a really nice bark on the outside of the roast, while it’s tender and super juicy on the inside.

    Feel free to collect the pan drippings and use it to pour over the served slices. It will have a tremendous flavor all it’s own. And of course, you can also use your favorite BBQ sauce at anytime while enjoying the pork. Slather it right onto the meat or keep it on the side for dipping.

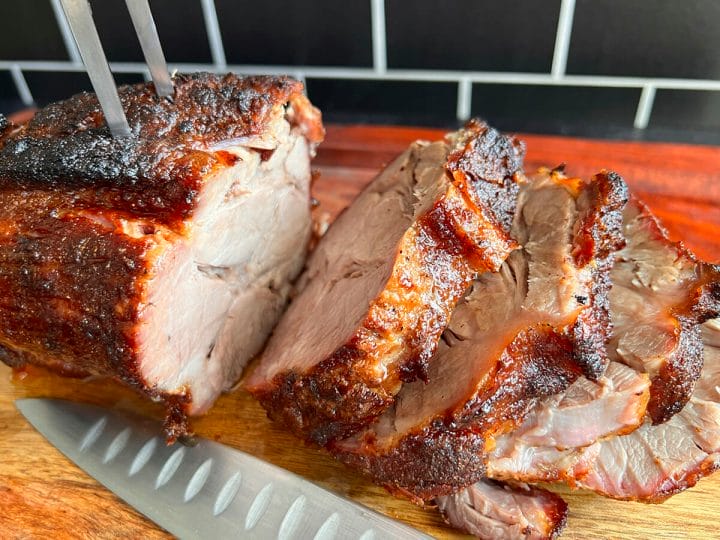
    Oven roasted pork butt.

    FREQUENTLY ASKED QUESTIONS:

    Q: Does the pork need to be seared first?
    A: Nope. By roasting at 350°(F), the roast will form a nice “bark” on the outside.

    Q: Can the pork roast be marinated?
    A: For extra flavor, you can season the roast and place in a large zip-top bag overnight in the refrigerator. The seasoning will act as a marinade and penetrate the flavor deeper into the meat.

    Q: Should the pork roast be covered?
    A: No. We want the outside of the pork to get nice and crusted.

    Q: Can this recipe be made in a slow cooker?
    A: A slow cooker is better for making pulled pork. See our Slow Cooker Pulled Pork recipe for complete instructions.

    Q: Can barbecue sauce be added before roasting?
    A: Barbecue sauce is best added after the pork has been sliced. Our dry rub will take care of all the seasoning needed prior to roasting.

    Q: What’s the best way to reheat?
    A: Place the pork slices in a shallow pan, covered and reheat in the oven at a low temperature, 250°(F) for about 15 minutes. Add a little water or broth to the pork to keep it from drying out. You can also reheat in the microwave. Again, add some liquid to help keep it moist.

    Q: What’s the best way to enjoy leftovers?
    A: Pork sandwiches are a great way to enjoy leftover pork roast. Make sure to use a good, hearty bun and add your favorite BBQ sauce or other toppings.

    GOES WELL WITH…

    Roasted pork can go with just about any side dish. There’s really no wrong answers. But, you’ll find a few things are ideal for sides.

    Macaroni and cheese with pork is a southern BBQ staple. Our Best Damn Instant Pot Mac and Cheese is excellent. Also, BBQ pork goes great with the cool crunch of coleslaw. Try our Homestyle Country Coleslaw for a great and easy recipe. And of course, cornbread. Oh my goodness I LOVE cornbread with any BBQ dish or pork dish. Our Cast Iron Skillet Cornbread is a homemade classic that you’ll absolutely love!

    Ultimate Goal

    Make the most incredible, juicy and tender pork butt roast with just a few simple ingredients and steps. You don’t need any special outdoor equipment, just your oven and a roasting pan.

    Pork butt roast recipe

    This homemade BBQ favorite is an excellent choice for any family gathering, special occasion or even a Sunday dinner. Load up the roast with pantry-friendly ingredients, put it in the oven, and let it slow roast to succulent perfection!

    And for those who don’t know, WHAT IS A PORK BUTT ROAST?

    Pork butt, despite the name, is not from a pig’s rear end. The butt roast cut comes from the thicker park of the shoulder area. It has a lot of fat marbling, which makes it the perfect meat for slow roasting.

    You’ll often see many similar cuts of meat from the same area labeled as pork shoulder, Boston butt, or picnic roast. Perhaps even a combination of shoulder and butt. All of these cuts are very popular for pulled pork recipes. For this recipe, we’ll focus just on the boneless butt roast/shoulder butt roast and cook it in a more traditional pork roast fashion.

  • Mint is shutting down — consider these 7 alternative budgeting apps

    Mint is shutting down — consider these 7 alternative budgeting apps

    Written by Sophia Acevedo, CEPF; edited by Laura Grace Tarpley 

    Intuit has announced it will shut down the personal finance app Mint on January 1, 2024. Intuit is asking Mint users to move to Credit Karma, one of the company’s other personal finance platforms.

    According to an FAQ section on the Intuit website, some Mint features are moving to Credit Karma. For example, it says Mint users will still be able to view their bank accounts, transaction history, spending, cash flow, and net worth. Credit Karma isn’t set to let you make monthly budgets or category budgets, though.

    If you’ve been using the Mint app for its budgeting features, you’ll have to consider other options. 

    Here are seven of the best budgeting apps to explore if you prioritize an app that lets you make a monthly or categorized budget.

    1. Honeydue

    Honeydue is a personal finance app for couples. It lets you create a monthly budget by linking credit cards, loans, investments, and bank accounts. Couples choose what they share and can create a joint budget.

    Honeydue is free to use. The mobile app is rated 4.5 out of 5 stars in the Apple store and 3.3 out of 5 stars in the Google Play store.

    2. Monarch Money

    Monarch Money lets you create a customizable budget, meaning you can create your own categories to track your spending for certain areas. 

    The mobile app has a monthly or annual plan. The monthly plan costs $14.99 a month. The annual plan is $99.99 a year, which breaks down to about $8.33 a month.

    Monarch Money has 4.8 out of 5 stars in the Apple store and 4.6 stars out of 5 in the Google Play store.

    3. PocketGuard

    PocketGuard allows you to make a monthly budget through the free or premium plan (called PocketGuard Plus). PocketGuard Plus lets you make customizable budget categories and unlimited budgets — for example, a personal budget, a business budget, and a couples’ budget. 

    The free plan is $0, while PocketGuard Plus has monthly, annual, and lifetime plans. The monthly plan is $7.99 a month, and the annual plan is $34.99 a year (which ends up being just under $3 a month). The lifetime plan is $79.99.

    The app is rated 4.7 out of 5 stars in the Apple store and 3.7 out of 5 stars in the Google Play store. 

    4. Simplifi by Quicken

    Simplifi by Quicken has budgets with customizable categories. The platform also analyzes your spending and savings through charts and can generate monthly reports for your spending, general income, income after expenses, savings, and net worth.

    Simplifi by Quicken has a limited-time offer to Mint users who switch. You can get three months free through the promotional page. The subscription is billed annually and comes to around $3.99 per month. 

    Simplifi by Quicken has received 4.1 out of 5 stars in the Apple store and 2.8 out of 5 stars in the Google Play store. 

    Simplifi by Quicken Review

    5. Rocket Money

    Rocket Money has free and premium plans that allow you to make a monthly budget. The free plan lets you create a monthly budget using select categories. If you get the premium plan, you can make unlimited budgets. The premium plan also allows you to make customized budgeting categories.

    The free plan costs $0. Meanwhile, the premium plan has a 7-day free trial. After that, you’ll pay what you think is fair through a sliding scale that has price points from about $4 a month to $12 a month. If you select the $4 and $5 monthly plans, you’ll be billed annually instead of monthly.

    Rocket Money is rated 4.3 out of 5 stars in the Apple store and 4.4 out of 5 stars in the Google Play store. 

    Rocket Money Review

    6. YNAB

    YNAB helps you create a category budget through its four-rule method.

    With the first rule, you’ll implement a zero-sum budget, which means you’ll assign every dollar you earn a purpose. The second rule requires you to factor in non-monthly expenses, such as holiday shopping or car maintenance. The third rule reminds you to be flexible with your monthly budget and make adjustments if you see that you’re overspending in a certain category. The fourth rule encourages you to age your money. Essentially, the last rule points out that once you’ve focused on mastering the first three rules, you’ll know where your money is going and spend less than you earn. 

    Ultimately, the four rules make sure you think about where all your money is going and how to adjust for your future savings. 

    YNAB can be used on the computer or through the mobile app. It costs $14.99 a month or $99 annually, which comes to about $8.25 monthly. 

    The app is rated 4.8 out of 5 stars in the Apple store and 4.6 out of 5 stars in the Google Play store. 

    7. Zeta

    Zeta is another personal finance app for couples and families. Zeta has joint bank accounts and uses the envelope budgeting method, which means you put a set amount of money into specific categories. Each month, you’ll spend what you have for that category.

    Zeta has a free plan and a premium plan called Zeta+. Zeta+ can be used by families or people who want to automate their banking. The free plan costs $0. Zeta+ costs $6.99 a month. 

    The mobile app is rated 4.6 out of 5 stars in the Apple store and 4.2 out of 5 stars in the Google Play store. 

    Originally written: https://www.businessinsider.com/personal-finance/mint-shutting-down-alternative-budgeting-apps-2023-11
  • November Dates to Remember

    November Dates to Remember

    November 1

     All Saint’s Day

      Dios Los Muertos , a two day celebration on November 1 and 2

    National Author’s Day

    World Vegan Day

    November 2

    All Soul’s Day

    Deviled Egg Day

    Look for Circles Day

    Men Make Dinner Day – first Thursday of Month

    Plan Your Epitaph Day

    November 3

    Cliché Day

    Housewife’s Day

    Sandwich Day

    November 4

    Book Lovers Day – first Saturday of the month

    King Tut Day

    Check Your Blood Pressure Day

    National Bison Day – the first Saturday in November

    Pumpkin Destruction Day – the first Saturday after Halloween

    Use Your Common Sense Day

    November 5

    Daylight Savings Time ends at 2:00 a.m. – date varies

    Gunpowder Day

    Guy Fawkes Day

    November 6 

    Color the World Orange Day – first Monday of November

    Marooned without a Compass Day

    National Nacho Day

    Saxophone Day

    November 7

    Bittersweet Chocolate with Almonds Day

    International Merlot Day

    U.S. General Election Day – the first Tuesday of the month after the first Monday of the month

     November 8

    Cook Something Bold Day

    Dunce Day

    November 9

    Chaos Never Dies Day – you’ve got that right

    World Freedom Day

    November 10

    Forget-Me-Not Day

    USMC Day

    Pilgrim and Turkey

    2023 November holidays include many International and National Holidays

    November 11

    Veteran’s Day

    World Origami Day

    November 12

    Chicken Soup for the Soul Day  

    Hindu Diwali Day – date varies

    National French Dip Day

    World Pneumonia Day

    November 13

    Caregiver Appreciation Day

    National Indian Pudding Day

    Sadie Hawkins Day

    World Kindness Day

    November 14

    National Pickle Day

    Operating Room Nurse Day

    World Diabetes Day

    Young Readers Day second Tuesday of month

    November 15

    America Recycles Day

    Clean Your Refrigerator Day

    National Philanthropy Day

    November 16

    Button Day

    Great American Smokeout  – third Thursday in November

    Have a Party With Your Bear Day

    International Tolerance Day

    National Fast Food Day

    November 17

    Electronic Greeting Card Day – now who do you think created this day!? 

    Homemade Bread Day

    Take A Hike Day

    World Peace Day

    November 18 

    National Adoption Day – Saturday before Thanksgiving

    Occult Day

    November 19

    Have a Bad Day Day

    Play Monopoly Day

    November 20

    Absurdity Day

    Beautiful Day

    Universal Children’s Day

    Roasted Turkey

    Thanksgiving Preparations Begin

    November 22

    Go For a Ride Day

    Love Your Freckles Day

    National Jukebox Day –  The day before Thanksgiving

    National Tie One On Day – day before Thanksgiving

    November 23

    Eat a Cranberry Day  

    National Cashew Day

    National Espresso Day

    Thanksgiving – Eat, drink, and be thankful, fourth Thursday

    November 24

    All Our Uncles are Monkeys Day

    Black Friday – Friday after Thanksgiving

    Buy Nothing Day – always the day after Thanksgiving…does anyone abide by it!?!

    Evolution Day

    You’re Welcome Day – the day after Thanksgiving

    November 25

    National Parfait Day

    Small Business Saturday – Saturday after Thanksgiving

    November 26

     Shopping Reminder Day  

    November 27 

    Cyber Monday Monday after Thanksgiving

    Pins and Needles Day

    November 28

    French Toast Day

    Make Your Own Head Day

    Red Planet Day

     November 29 

    Chia Pet Day

    Square Dance Day

    November 30

    National Mason Jar Day

    Stay At Home Because You Are Well Day

  • Instant Pot Chuck Roast

    Instant Pot Chuck Roast

    This Instant Pot Chuck Roast is a game-changer! Pressure cooking makes an incredibly tender and flavorful chuck roast recipe that is comfort food at its best. It’s easy to prepare and ready in just over an hour – so it’s perfect for Sunday dinner or even the holidays!

    Ingredients  

    Chuck Roast in the Instant Pot

    • It’s quick and easy to make without compromising on flavor. Your average pot roast might take hours to cook in the oven or slow cooker – Instant Pot Pot Roast takes under 2 hours with minimal prep.
    • The ingredients are simple – you don’t need anything fancy to make this pot roast. It’s a classic pot roast recipe everyone will love, made easy.
    • It’s budget-friendly. Chuck roast is an inexpensive cut of beef, so it’s perfect for making an economical pot roast for a party or even the holidays.
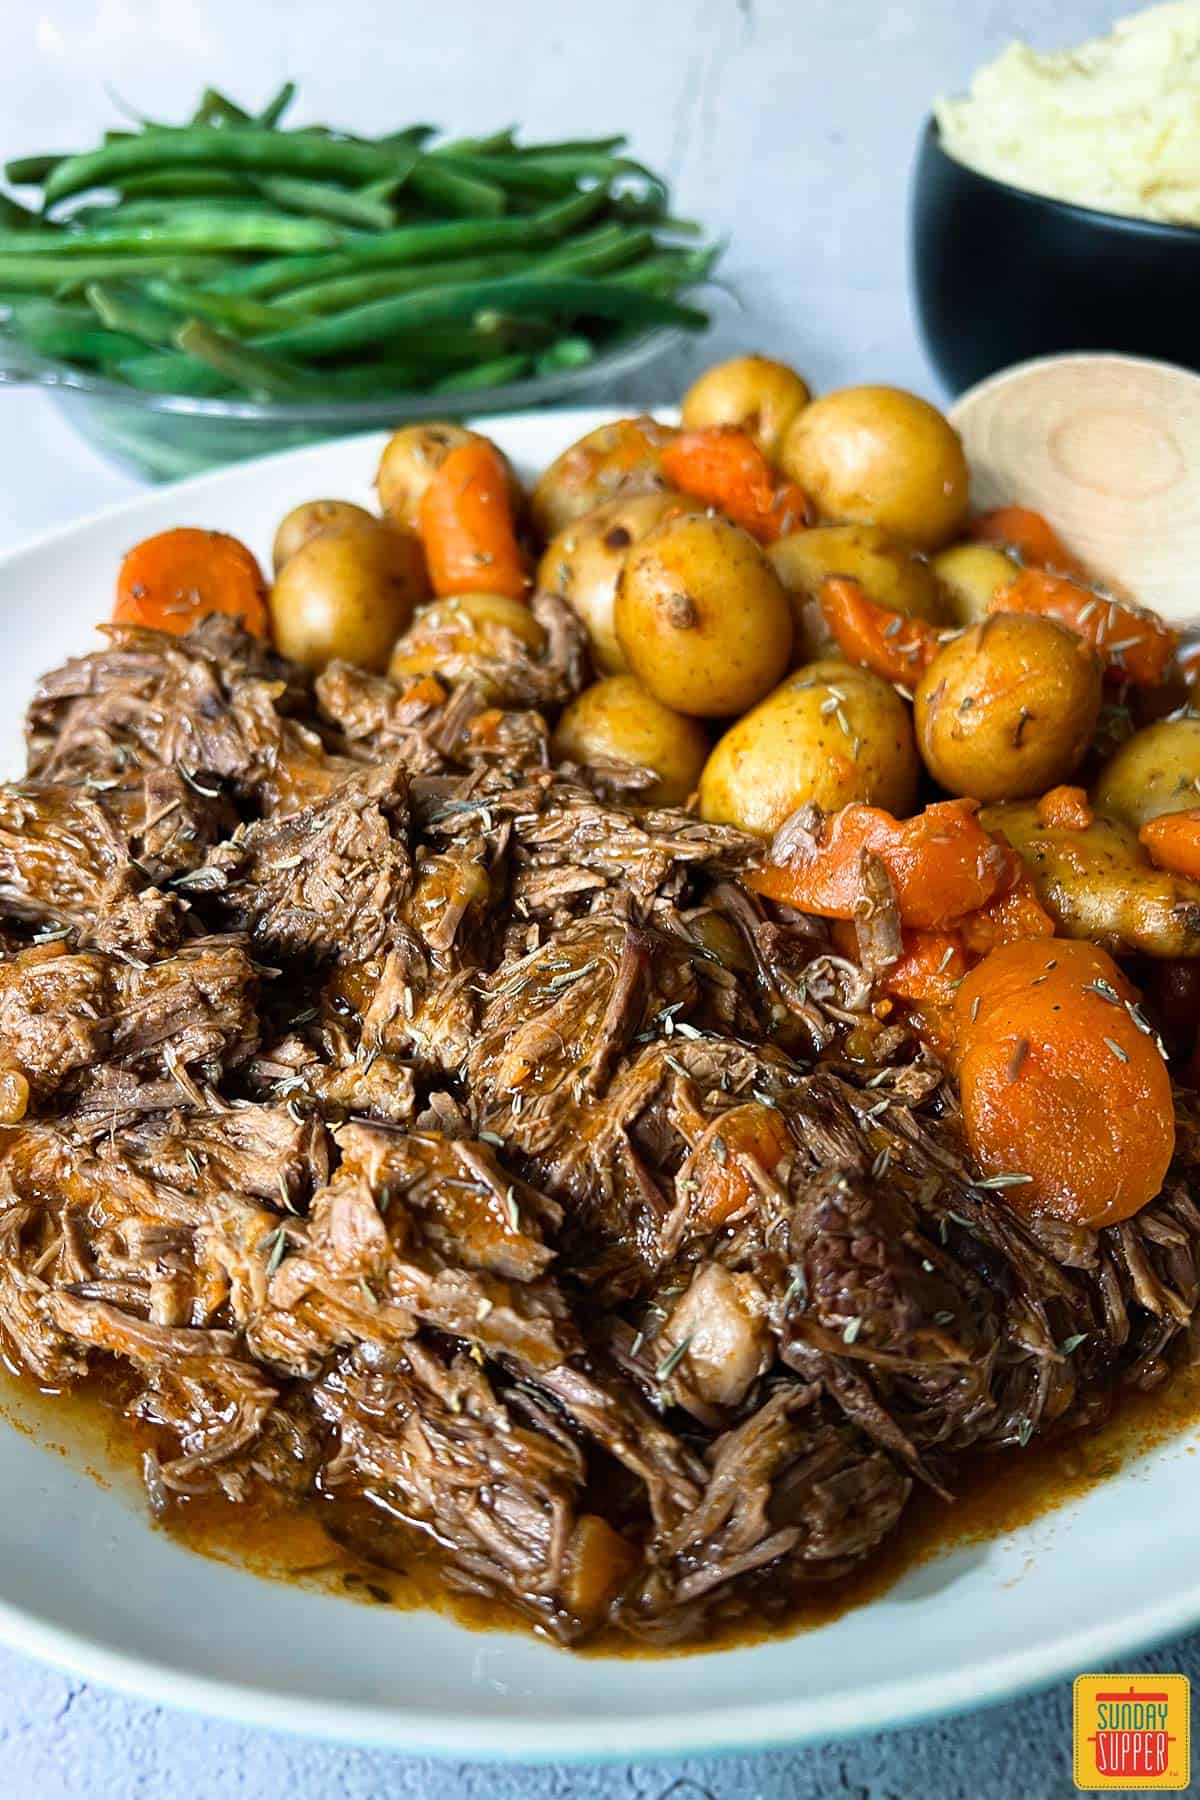
    instant pot chuck roast up close on a plate with potatoes and carrots in front of two bowls of green beans and mashed potatoes

    Instant Pot Beef Roast Ingredients

    • Boneless chuck roast, cut into halves
    • Vegetable oil
    • Garlic
    • Onion
    • Red wine
    • Beef broth
    • Tomato sauce
    • Kosher or sea salt
    • Pepper
    • Fresh thyme
    • Fresh rosemary
    • Corn starch
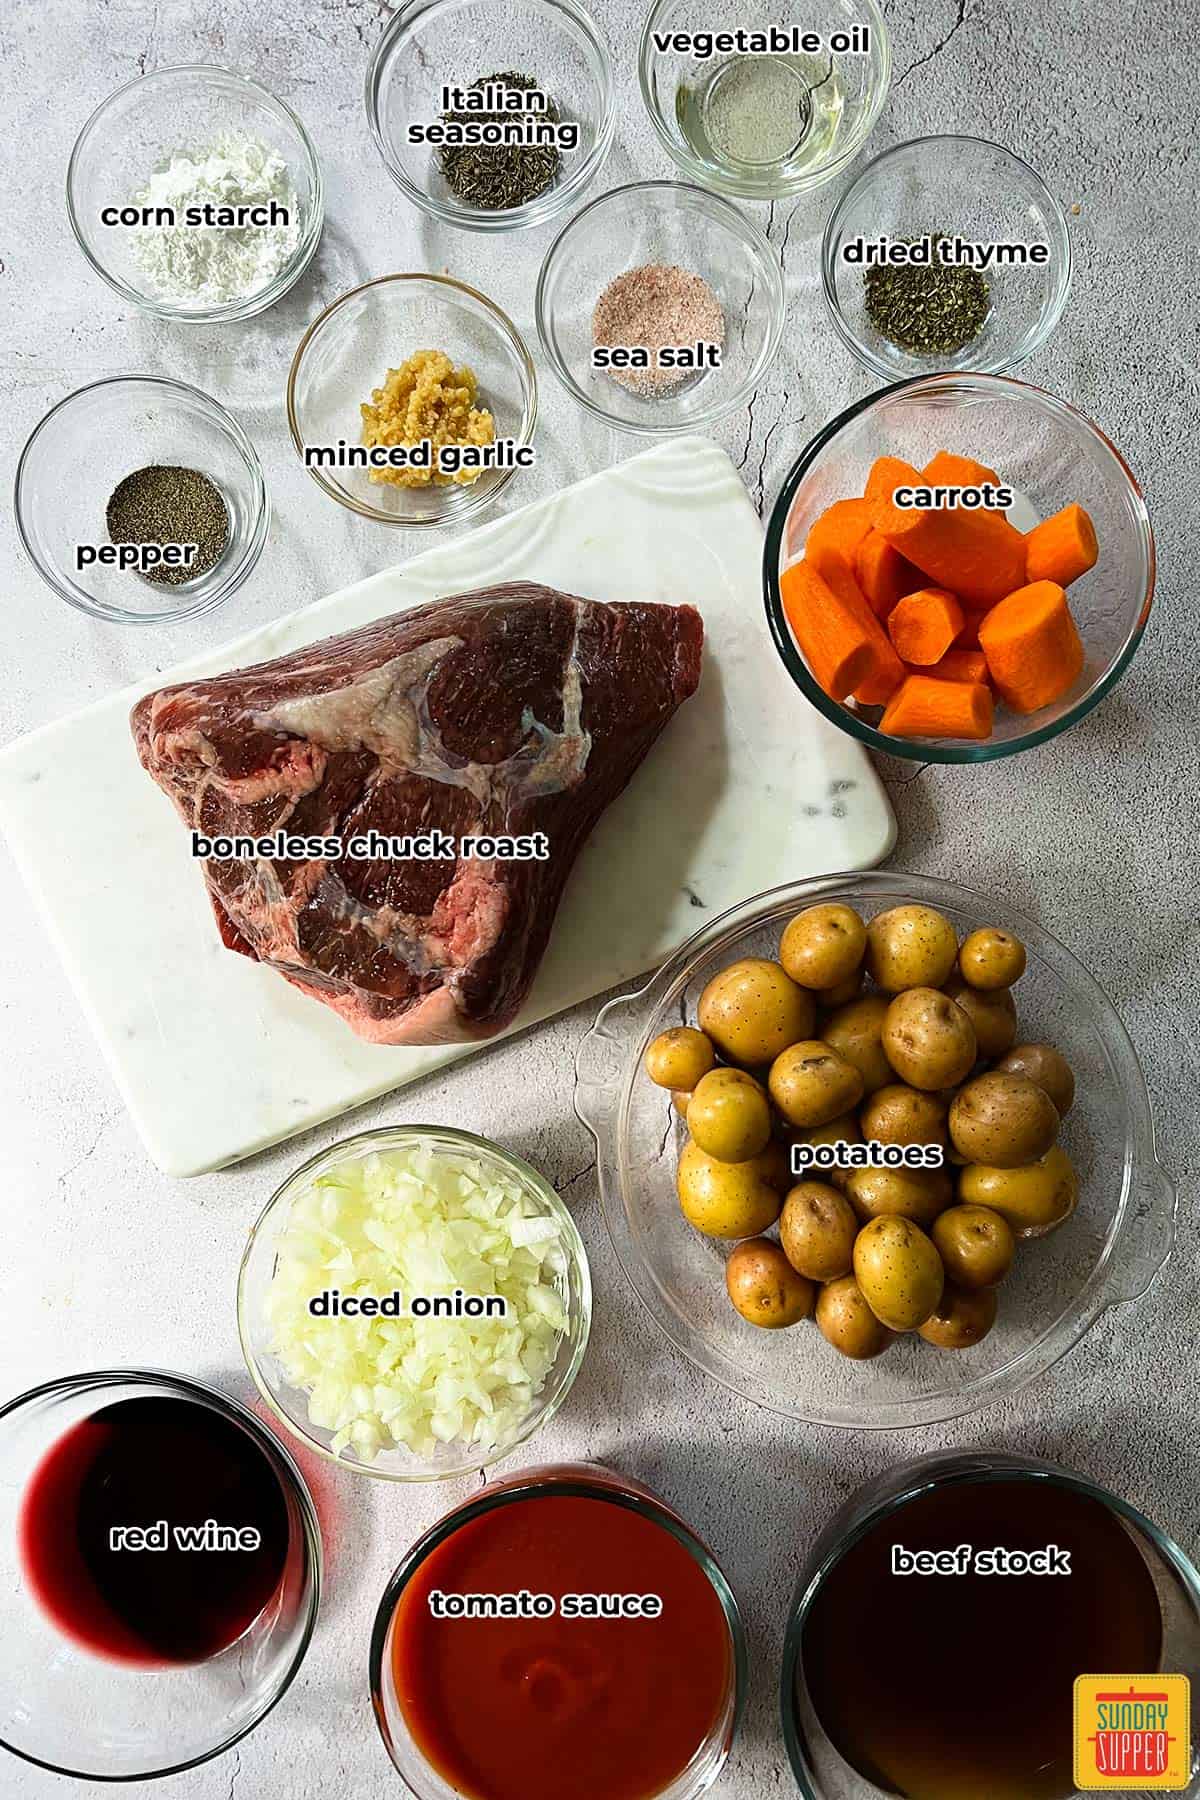
    ingredients to make instant pot chuck roast labeled in bowls

    Chuck Roast Instant Pot Recipe

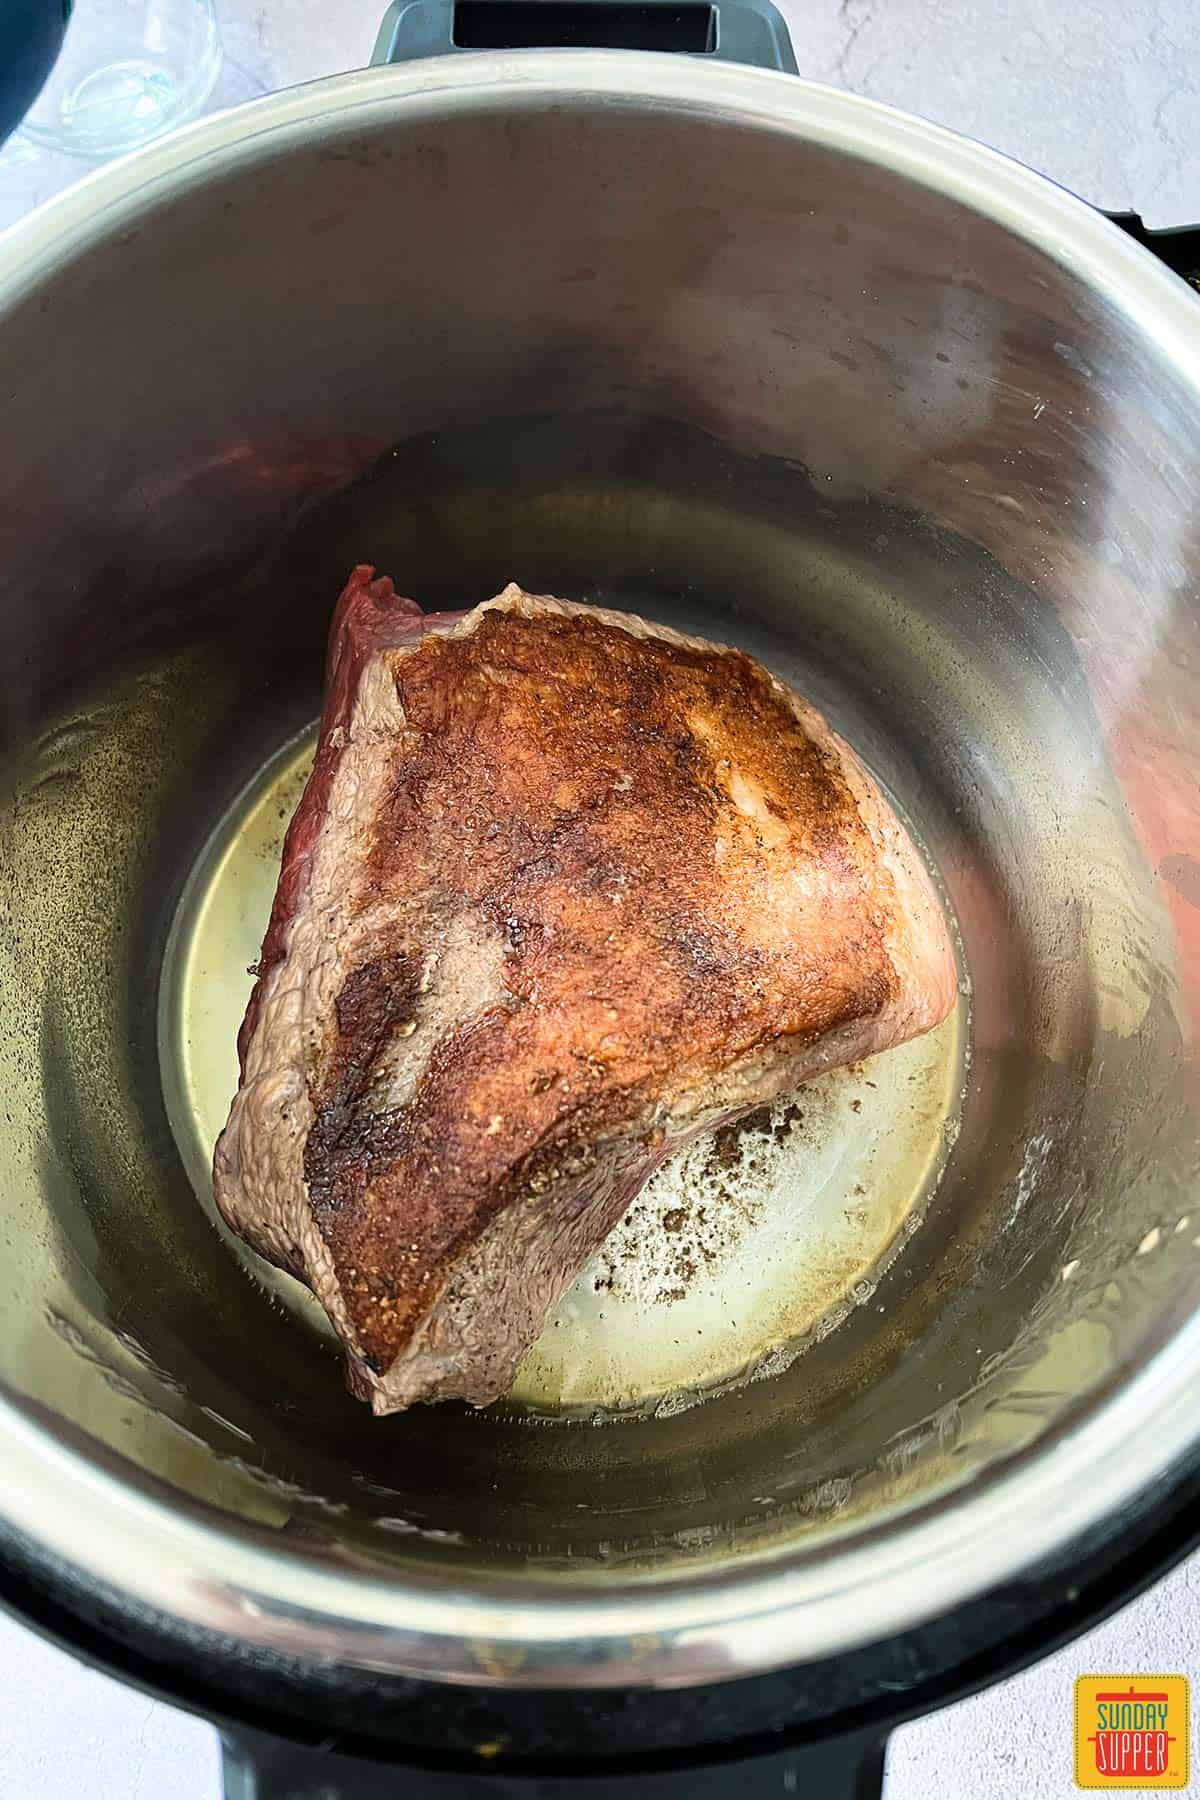
    1. Generously season all sides of your roast with salt and pepper. Set Instant Pot onto sauté mode.
    2. Once the Instant Pot is hot, add in half of your vegetable oil. Once the oil is hot, add your roast.
    3. Sear for 4 minutes on the first side, then flip and sear the opposite side for 4 minutes. Remove roast and set aside.
      cooking instant pot chuck roast
    4. Add the remaining vegetable oil to the pot, along with diced onions and minced garlic. Sauté for about 3-4 minutes, stirring frequently.
    5. When soft and fragrant, add in red wine and sauté for 5 minutes, stirring frequently, until the wine reduces to half.
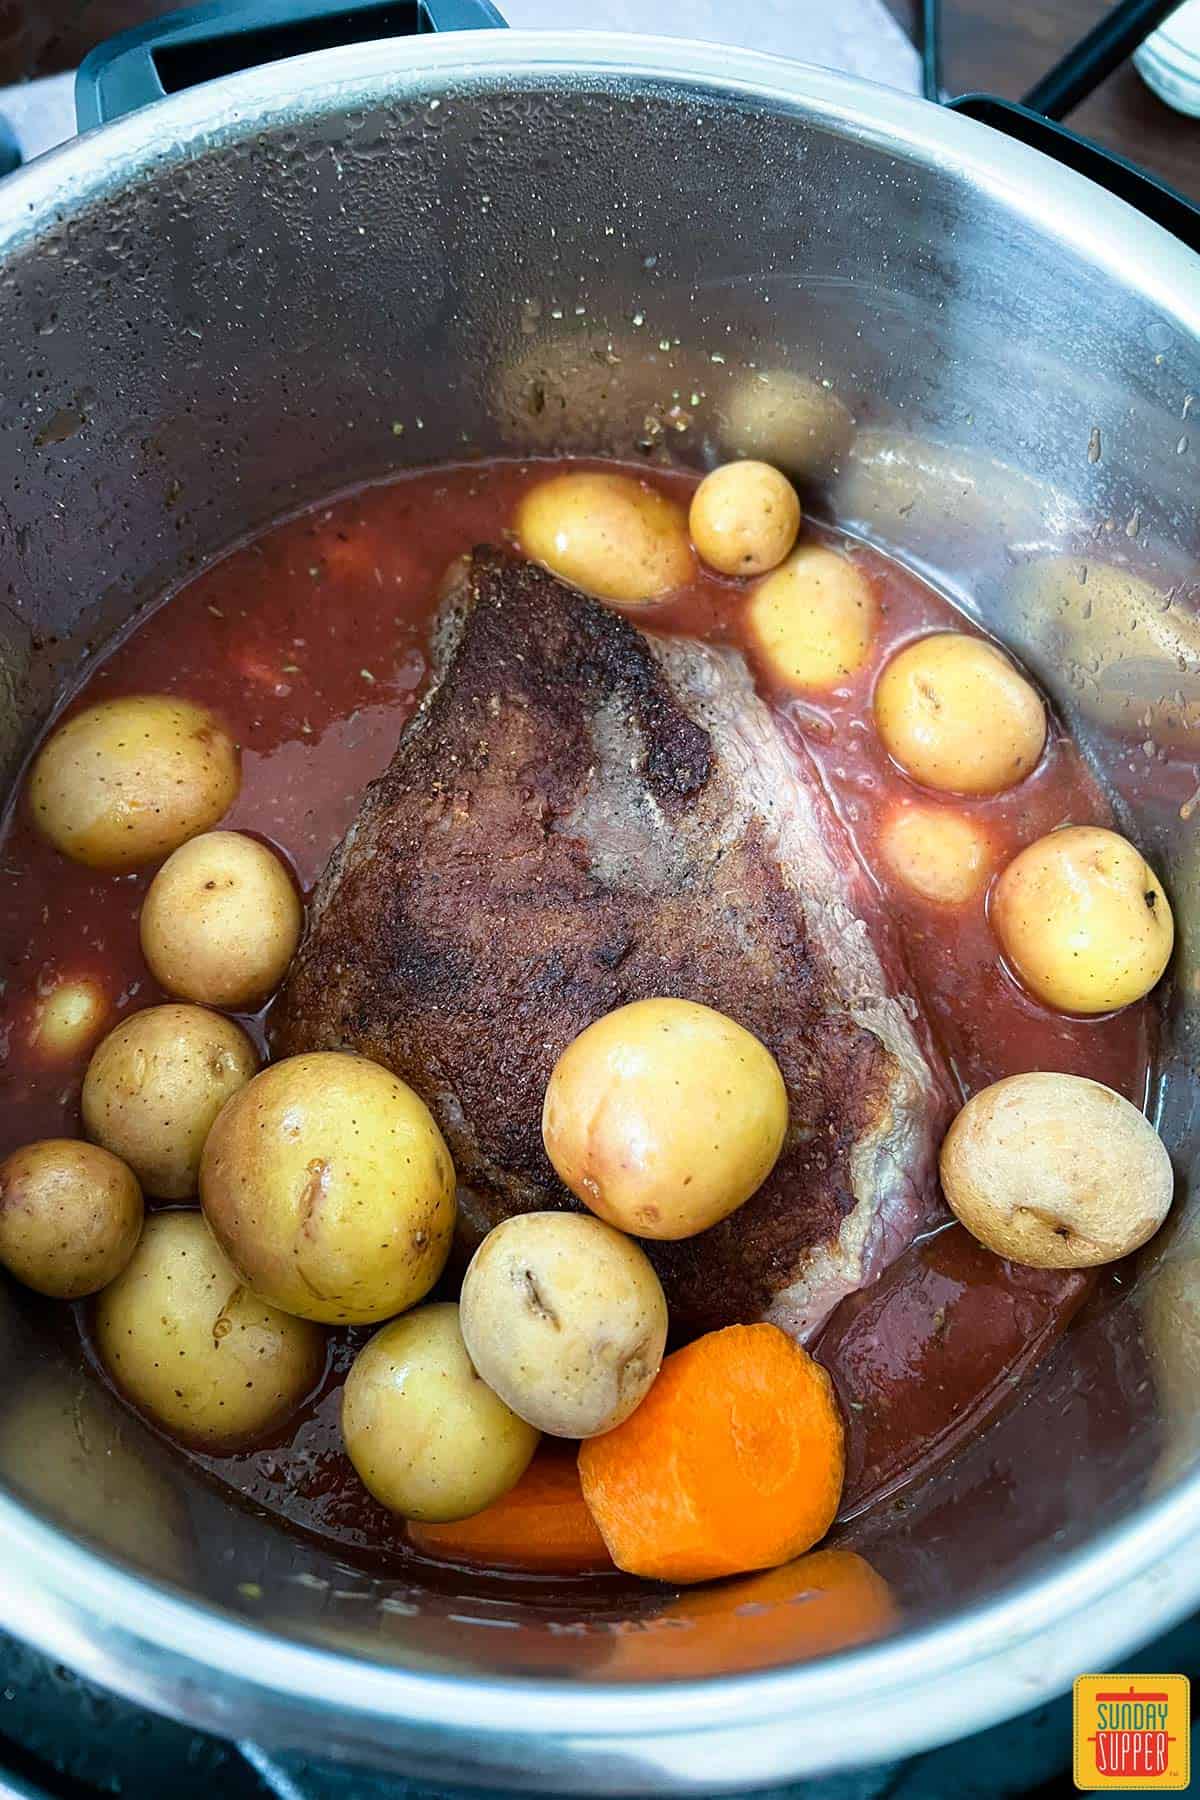
    6. Add in half of your beef broth, tomato sauce, dried thyme, Italian seasoning, salt, and pepper, and give it a good mix. Carefully add your roast back into the pot along with carrots and potatoes. 
      chuck roast in instant pot with potatoes and carrots
    7. Secure the Instant Pot lid and pressure cook on high for 70 minutes. Once 70 minutes is up, let your Instant Pot naturally release pressure for 20 minutes.
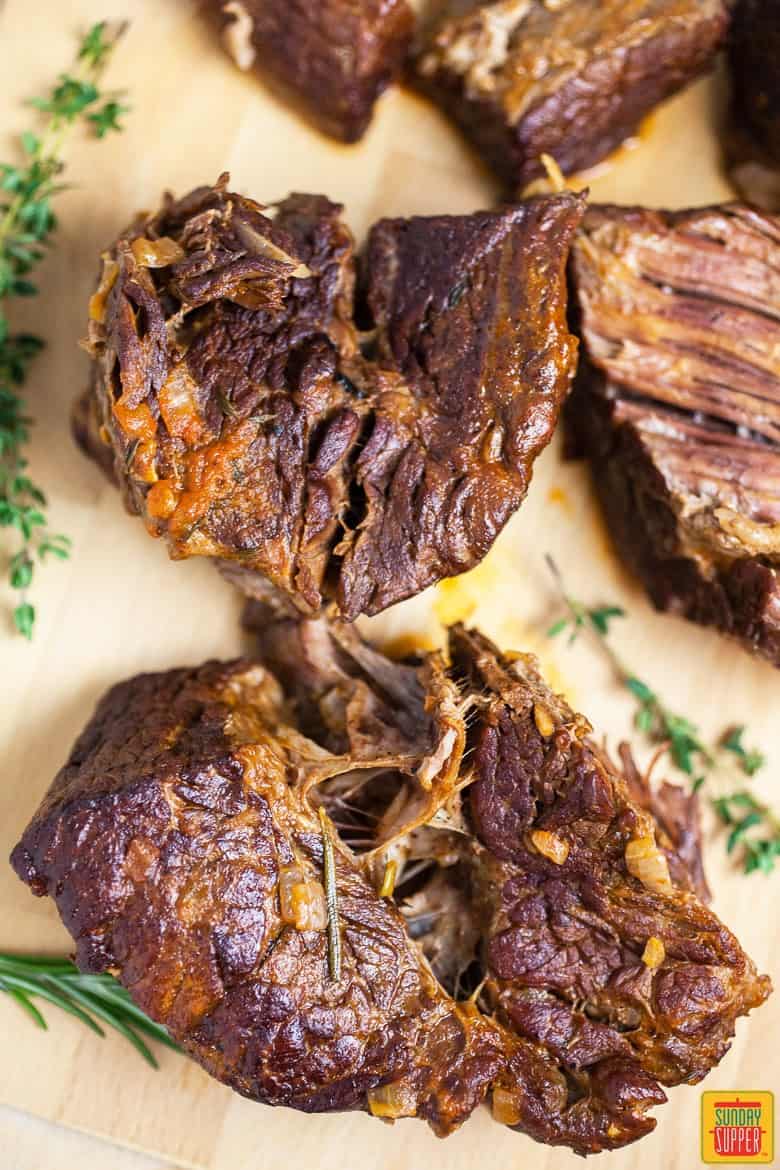
    8. After 20 minutes, you can release any excess steam. Remove the meat from the pot and set it aside. 
      Instant pot pot roast meat on a cutting board
    9. In a small bowl combine cornstarch and beef broth. Slowly add the mixture into the Instant Pot with the drippings from the beef. Stir until the mixture thickens.
    10. Serve gravy over your pot roast, and enjoy!
    instant pot chuck roast up close on a plate with potatoes and carrots in front of two bowls of green beans and mashed potatoes

    Chuck Roast in the Instant Pot Tips

    • It’s important to let the pressure release naturally, so leave it for another 20 minutes after cooking.
    • Feel free to release the vent after 20 minutes. This will release any extra steam and allow you to open the lid.
    • Cutting the roast into halves helps cut down on the cooking time in the pressure cooker and allows you to distribute the seasoning more evenly, giving you a more flavorful dish.
    • Discover more ways to cook chuck roast with our Best Beef Chuck Roast Recipes!

    Instant Pot Chuck Roast FAQs

    How long to cook roast beef in the Instant Pot?

    Cook roast beef in the Instant Pot at approximately 20 minutes per pound, until it is fall-apart tender and easy to shred with a fork. Adjust according to the size of your roast.

    How do you thicken pot roast gravy in the instant pot?

    You can thicken pot roast gravy in the Instant Pot by using a slurry. One of the best ways to thicken a sauce is to simply make a mixture of liquid and cornstarch, also known as a cornstarch slurry. You can do this with water and cornstarch or broth and cornstarch.

  • Paint colors

    Paint colors

    Outdoor

    To complement the sandstone colors and the shed in the backyard


    Indoor

    Connor’s room

    Rainbow

    Selina’s Touch

  • Loud Noise Dangers

    Loud Noise Dangers

    Loud noise can cause permanent hearing loss. There are ways to protect your hearing. Audiologists can help.

    About Noise-Induced Hearing Loss

    Noise-Induced Hearing Loss, or NIHL, happens when you listen to loud sounds. These sounds can last a long time, like listening to a concert, or they can be short, like from gunfire. Three factors put you at risk for NIHL:

    • How loud the noise is
    • How close you are to the noise
    • How long you hear the noise

    Sound-level meters measure noise levels. We record noise levels in decibels, or dBA. The higher the noise level, the louder the noise. You can listen to sounds at 70 dBA or lower for as long as you want. Sounds at 85 dBA can lead to hearing loss if you listen to them for more than 8 hours at a time.

    Sounds over 85 dBa can damage your hearing faster. The safe listening time is cut in half for every 3-dB rise in noise levels over 85 dBA. For example, you can listen to sounds at 85 dBA for up to 8 hours. If the sound goes up to 88 dBA, it is safe to listen to those same sounds for 4 hours. And if the sound goes up to 91 dBA, your safe listening time is down to 2 hours.

    The World Health Organization and International Telecommunication Union 2019 document, WHO-ITU Global Standard on Safe Listening Devices and Systems [PDF], recommends that manufacturers equip devices like smartphones and personal audio players with information that explains safe listening (for adults, a total of 40 hours of weekly exposure to volume levels no higher than 80 dB is recommended; for children, the level is 75 dB); usage warnings and tracking information; cues for taking safe listening actions; options for limiting volume levels; and volume limiters expressly for parents to use. The recommendations would also have safe listening information appear on external product packaging and advertising, as well as on manufacturers’ websites.

    Citations

    Impulse Noise

    A single loud blast or explosion that lasts for less than 1 second can cause permanent hearing loss right away. This noise, called impulse noise or impact noise, may come from gunfire or fireworks. We measure impulse noise in dB peak pressure, or dBP. Impulse noise greater than 140 dBP will hurt your hearing right away.

    Dangerous and Safe Noise Levels

    The noise chart below lists average decibel levels for everyday sounds around you.

    Painful impulse noise—Not safe for any period of time

    150 dBP = fireworks at 3 feet, firecracker, shotgun

    140 dBP = firearms

    Painful steady noise—Not safe for any period of time

    130 dBA = jackhammer

    120 dBA = jet plane takeoff, siren, pneumatic drill

    Extremely loud—Dangerous to hearing; wear earplugs or earmuffs

    112 dBA = maximum output of some MP3 players, rock concert, chainsaw

    106 dBA = gas leaf blower, snow blower

    100 dBA = tractor, listening with earphones

    94 dBA = hair dryer, kitchen blender, food processor

    Very loud—Dangerous to hearing; wear earplugs or earmuffs

    91 dBA = subway, passing motorcycle, gas mower

    Moderate—Safe listening for any time period

    70 dBA = group conversation, vacuum cleaner, alarm clock

    60 dBA = typical conversation, dishwasher, clothes dryer

    50 dBA = moderate rainfall

    40 dBA = quiet room

    Faint—Safe listening for any time period

    30 dBA = whisper, quiet library

    The noise chart was developed using the following two websites:

    Signs That Noise Is Too Loud

    You probably don’t always carry a sound level meter with you. So how can you know if noises are too loud? Here are some signs:

    • You must raise your voice to be heard.
    • You can’t hear or understand someone 3 feet away from you.
    • Speech around you sounds muffled or dull after you leave the noisy area.
    • You have pain or ringing in your ears after you hear the noise, called tinnitus. It can last for a few minutes or a few days.

    Noise and Hearing Loss

    How do loud noises hurt your hearing? It may help to first understand how you hear:

    • Sound goes into your ear as sound waves. The louder the sound, the bigger the sound wave.
    • The outer ear, which is what you see on the side of your head, collects the sound wave. The sound wave travels down the ear canal toward your eardrum. This makes your eardrum vibrate.
    • The sound vibration makes the three middle ear bones move. The movement makes the sound vibrations bigger.
    • The last of the three middle ear bones moves the sound vibrations into the inner ear, or cochlea. The cochlea is filled with fluid and has tiny hair cells along the inside. The vibrations make the fluid in the inner ear move. The fluid makes the hair cells move, too. The hair cells change the vibrations into electrical signals that travel to your brain through your hearing nerve.
    • Only healthy hair cells can send electrical signals to your brain. We recognize sounds in our brains and use that information to figure out how to respond.

    You may lose some of your hearing if the hair cells get damaged. How does this happen?

    • Hair cells are sensitive to big movements. If sounds are loud, they move the fluid in the inner ear more, and that can damage the hair cells.
    • Hair cells that are damaged by loud sounds do not send signals to the brain as well as they should. The first hair cells that are hurt are those that send high-pitched sounds to the brain. This can make sounds like /t/ in “tin”, /f/ in “sin”, or /k/ in “kin” harder to hear.
    • Short, loud noises—like a firecracker or an explosion—can damage hair cells. Listening to loud sounds for a long time, like when you are at a rock concert, also damages hair cells.

    Ringing in your ears, or tinnitus, is an early sign of noise-induced hearing loss. There is no way to fix damaged hair cells. Hearing aids or other devices can help you hear better, but your hearing will not come back on its own.

    Noise and Your Health

    Loud noise does not just hurt your hearing. It can cause other problems that you may not think of as being noise related.

    Noise can make you more tired and cranky. Loud noise can cause other health problems, like:

    • high blood pressure
    • faster heart rate
    • upset stomach
    • problems sleeping, even after the noise stops
    • problems with how babies develop before birth

    Noise can make it harder to pay attention. You may be less safe at work because you may not hear warning signals or equipment problems. Noise can also cause you to get less work done.

    Noisy classrooms can make it harder for children to learn. To learn more about noise in schools, read the Classroom Acoustics page.

    It is harder to understand what others say when it is noisy. You may need to concentrate more and use more energy to hear. And the person speaking needs to talk louder or yell. This can make conversations hard. You may give up trying to talk or listen.

    So, you can see that noise does more than cause hearing loss. It can impact your health, work, learning, and social life. It is important to cut down on the noise in your life for all of these reasons.

    Protecting Your Hearing

    Knowing how noise impacts you is the key to protecting your hearing. You’ve taken that first step by reading this information.

    The next step is to avoid loud noise whenever possible. Remember, if you have to shout to be heard, it is too loud. You should get away from the noise or find a way to protect your ears.

    Here are some things you can do:

    1. Wear hearing protection. Cotton in the ears will not work. You can buy things that protect your hearing, like earplugs or earmuffs, at the store or online.
      • Earplugs go into your ear so that they totally block the canal. They come in different shapes and sizes. An audiologist can make some just for your ears. Earplugs can cut noise down by 15 to 30 decibels.
      • Earmuffs fit completely over both ears. They must fit tightly to block sound from going into your ears. Like earplugs, earmuffs can reduce noise by 15 to 30 dB, depending on how they are made and how they fit.
      • Earplugs and earmuffs can be used together to cut noise down even more. You should use both when noise levels are above 105 dB for 8 hours or more. You should also use both if you might hear impulse sounds that are more than 140 dBP.
    2. Do not listen to loud sounds for too long. Move away from the loud sound if you don’t have hearing protection. Give your ears a break. Plug your ears with your fingers as emergency vehicles pass on the road.
    3. Lower the volume. Keep personal listening devices set to no more than half volume. The World Health Organization recommends a total of 40 hours of weekly exposure to volume levels no higher than 80 dB for adults and 75 dB for children on personal listening devices. Don’t be afraid to ask others to turn down the volume of their devices if you can hear them. Ask the movie theater manager to turn down the sound if the movie is too loud.
    4. Be a good consumer. Look for noise ratings on appliances, sporting equipment, power tools, and hair dryers. Buy quieter products. This is especially important when buying toys for children.
    5. Be a local advocate. Some movie theaters, health clubs, dance clubs, bars, and amusement centers are very noisy. Speak to managers about the loud noise and how it may hurt hearing. Ask that they turn the volume down.

    Don’t be fooled by thinking your ears are “tough” or that you can “tune it out”! Noise-induced hearing loss is usually slow and painless. But, it is permanent. The hair cells and hearing nerve cannot be fixed. If loud sounds don’t bother you, you may already have some hearing damage.

    You can avoid noise-induced hearing. Protect your hearing for life.

    More information on this topic can be found in our Audiology Information Series [PDF].

    To find an audiologist near you, visit ProFind.

    Copied from https://www.asha.org/public/hearing/loud-noise-dangers/

  • 5 Main Types of Dessert Wine

    5 Main Types of Dessert Wine

    Skip the heavy dessert option for something that makes tastebuds twinkle! Learn about the 5 major types of dessert wine, from delicately fizzy Moscato d’Asti, to rich-and-brooding vintage Port.

    Dessert wines are meant to be enjoyed in small glasses and treasured like a glass of Scotch.

    Types of Dessert Wines - Wine Folly
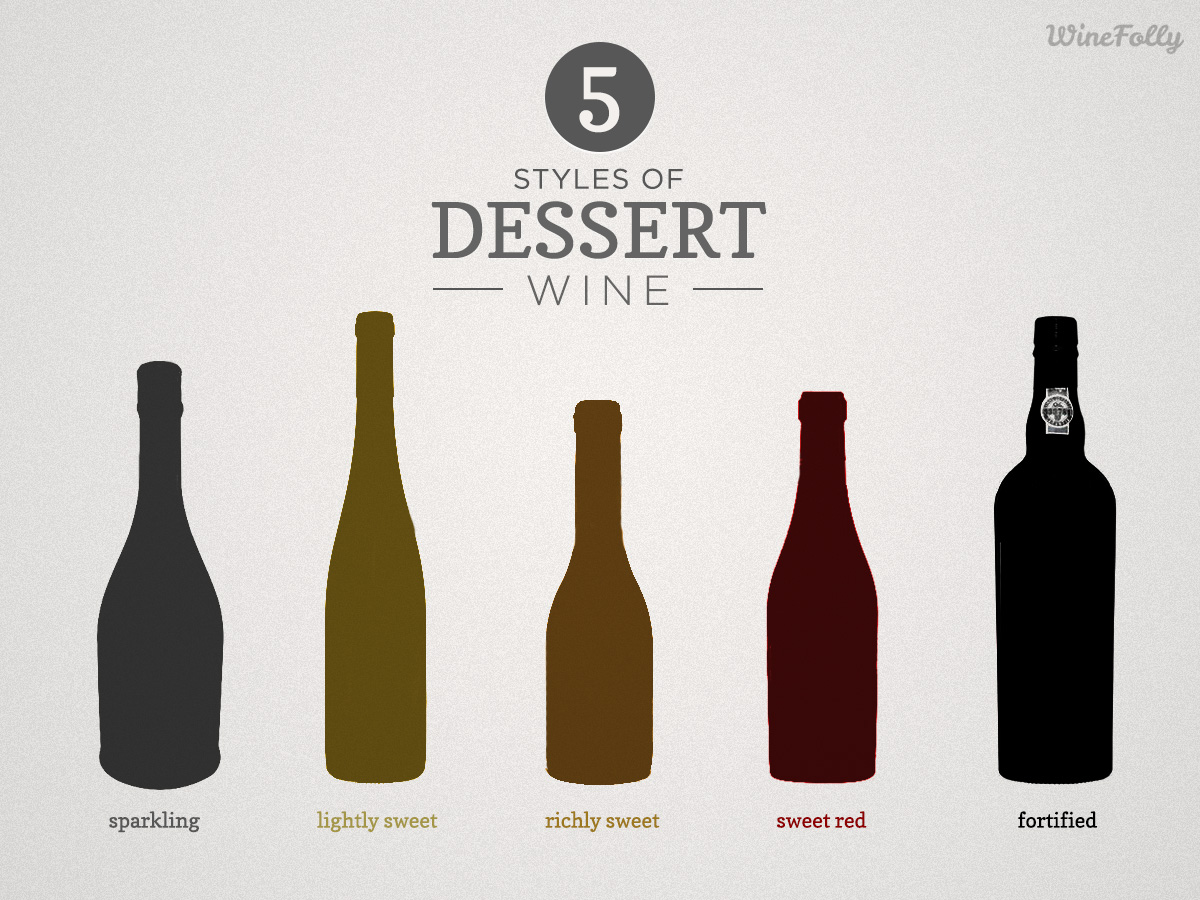
    Most dessert wines can be categorized into 5 styles: Sparkling, Light & Sweet, Rich & Sweet, Sweet Red and Fortified.
    Types of Dessert Wines
    • Sparkling Dessert Wine
    • Lightly Sweet Dessert Wine
    • Richly Sweet Dessert Wine
    • Sweet Red Wine
    • Fortified Wine

    A Guide to Dessert Wines

    Sweet wine comes from extra-sweet grapes! To make a sweet wine, the fermentation is stopped before the yeast converts all grape sugars into alcohol. There are several ways do stop fermentations, including super-cooling the wine or adding brandy to it. The result is a rich wine sweetened with natural grape sugars.

    There are hundreds of different types of dessert wines available in the market, but most fall into 5 main styles. This guide outlines the 5 styles and includes examples of each. Explore all five styles for a deep dive into dessert wines.


    Sparkling Dessert Wine

    Sweet Sparkling Wine Types

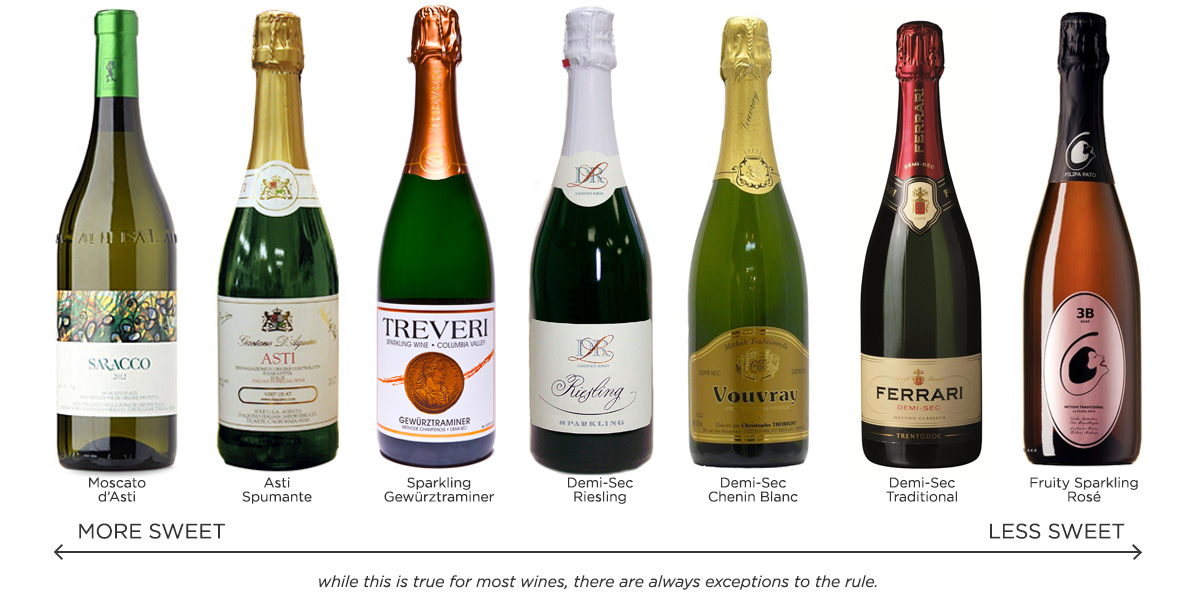
    The carbonation and high acidity in sparkling wine makes it taste less sweet than is actually is! Certain grape varieties smell sweeter than others. This tricks our brain into thinking they taste sweeter too! For instance, a Demi-Sec (aka “Semi Secco”) Moscato tastes sweeter than a Demi-Sec Champagne even though both may have the same amount of sugar.

    When looking for sweet dessert wine Champagnes and other sparklers, keep your eyes peeled for these words on the label:

    • Demi-Sec* (means “off-dry” in French)
    • Amabile (“slightly sweet” in Italian)
    • Semi Secco* (“off-dry” in Italian)
    • Doux (“sweet” in French)
    • Dolce / Dulce (“sweet” in Italian / Spanish)
    • Moelleux (“sweet” for some French wines)

    *not to be confused with “Sec” or “Secco” which is the term for dry in French and Italian.


    Lightly-Sweet Dessert Wine

    Lightly sweet still white wines

    Lightly sweet wines are refreshingly sweet; perfect for a warm afternoon. Many of these sweet wines pair well with spicy foods like Indian or Southeast Asian cuisine. Lightly-sweet wines are best enjoyed as close to the vintage date as possible, save for rare examples, like German Riesling, which age quite well!

    Expect these wines to be exploding with fruit flavors and well suited for fruit-based and vanilla-driven desserts. For instance, consider Gewürztraminer: this wine is known for its lychee and rose petals aromas. A Gewürztraminer pairs excellently with fruit tarts.

    • Gewürztraminer A highly floral wine with moderate alcohol that’s commonly found in Alsace, Alto-Adige (Italy), California and New Zealand.
    • Riesling Available in both dry styles (common in Australia, Alsace and the US) as well as sweeter styles more commonly available from Germany. A wine with high natural acidity which helps cut the sweet taste.
    • Müller-Thurgau A less common variety also from Germany and found in parts of Oregon that has floral aromas with slightly lighter acidity. Classic porch wine and well-loved with sausages.
    • Chenin Blanc Chenin Blanc is commonly made in a sweeter style in the US and it’s also produced in large amounts in South Africa and the Loire Valley of France. Pay attention to labels when buying Chenin Blanc because many South African and French producers create dry versions that taste more like a dry Sauvignon Blanc.
    • Viognier Viognier for the most part, is not sweet. However, as an aromatic grape variety, occasionally you can find it in a fruit-driven style smelling of peaches and perfume. It’s rich and oily on the palate. This style of Viognier is found specifically from Condrieu AOP from the Rhône Valley) in France.

    Richly Sweet Dessert Wine

    Richly Sweet non-fortified dessert wines

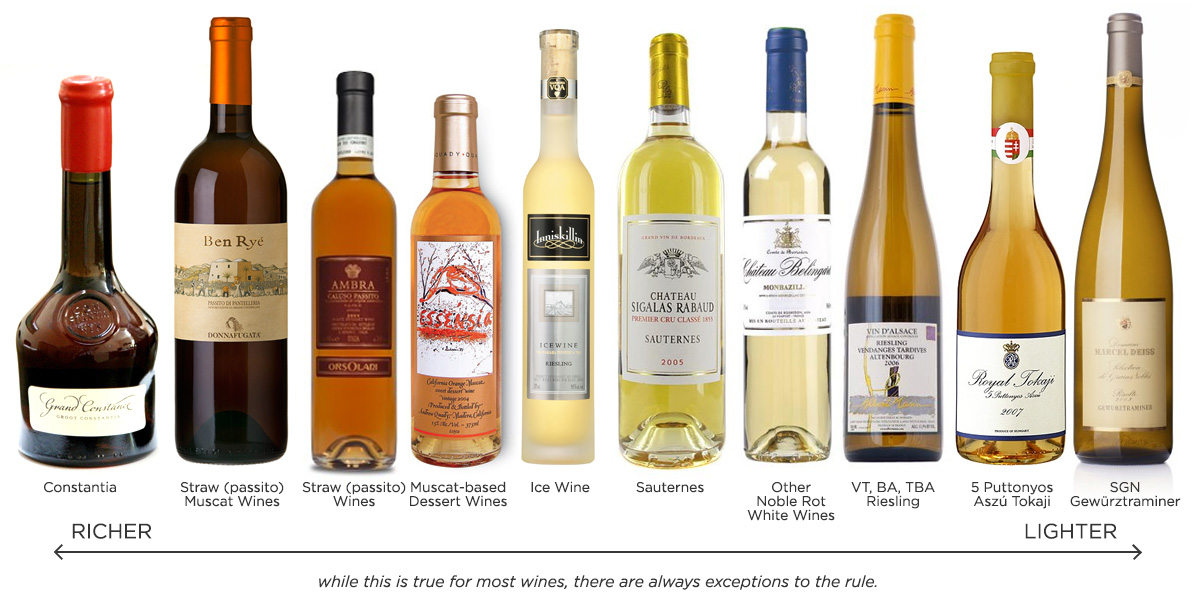
    Richly sweet wines are made with the highest quality grapes in an unfortified style. Many of these wines can age 50+ years because sweetness and acidity preserve their fresh flavor. Some of these wines are historically important including Hungarian Tokaji (‘toe-kye’) which was loved by the Tzars of Russia; South African Constantia which was an obsession of the Dutch and English; and French Sauternes which was loved by Americans in the early 1800’s.

    There are several ways to produce richly sweet dessert wines and you can understand them better by how they’re made.

    Late Harvest

    Late harvest means exactly what it’s called. As grapes hang on the vine longer in the season they become even sweeter and more raisinated, resulting in grapes with concentrated sweetness. In Alsace, late harvest is called “Vendage Tardive,” and in Germany it’s referred to as “Spätlese.”

    Any grape left on the vine can be used for late harvest wines. That being said, it’s popular to find late-harvest wines using Chenin Blanc, Sémillon, and Riesling grapes.

    Noble Rot

    Noble rot is a type of spore called Botrytis cinerea that eats fruits and vegetables. While it sounds (and looks) disgusting, noble rot adds unique flavors of ginger, saffron, and honey to sweet wines. There are many popular types of dessert wines made from noble rot grapes.

    • Sauternais A group of French Appellations in and around Bordeaux including Sauternes, Barsac, Cadillac, and Monbazillac that use Sémillon and Sauvignon Blanc in a rich, golden-hued sweet wine.
    • Tokaji Tokaji Aszú is a wine from Hungary made with Furmint grapes.
    • Auslese, BA, and TBA Riesling (BA = Beerenauslese and TBA = Trockenbeerenauslese) In the German Pradikat system (a sweetness labeling system), Auslese is the first level with a higher proportion of botrytis-affected grapes. Besides being sweeter than “QbA” and “Kabinett” German Rieslings, they also typically feature higher alcohol.

    Straw Mat

    (aka “Passito”) Grapes are laid out on straw mats to raisinate prior to winemaking.

    • Italian Vin Santo is made with Trebbiano and Malvasia grapes and has rich nutty date-like flavors. There are several styles of Vin Santo made throughout Italy.
    • Italian Passito Another straw wine made with several different kinds of grapes, both white and red. For instance, Passito di Pantelleria is Muscat-based and Caluso Passito is made with the rare grape Erbaluce from Piedmont.
    • Greek Straw Wines Greece also produces Vinsanto, which is made with high-acid white Assyrtiko grapes; Samos is a sweet wine made from Muscat grapes; and Commandaria is a sweet wine from Cyprus that dates back to 800 B.C.E.
    • German Strohwein/Austrian Schilfwein Schilfweins are increasingly rare sweet wines made from Muscat and Zweigelt grapes in Austria and Germany.
    • French Vin de Paille Most notably from the Jura region of France, which is adjacent to the alps, these Vin de Paille are produced using Chardonnay and ancient Savagnin grapes.

    Ice Wine (Eiswein)

    True ice wine is extremely rare and expensive for two reasons. One, it only occurs in bizarre years when a vineyard freezes. And two, ice wine must be harvested and pressed while grapes are still frozen!

    The largest ice wine producer in the world is Canada. You can find ice wines in cooler regions like Germany, Austria, and Switzerland.

    Most ice wines are made with Riesling or Vidal grapes, although anything, even Cabernet Franc, can be used to produce an ice wine. You’ll find them to be honeyed and richly sweet, similar to a noble rot wine.


    Sweet Red Wine

    Sweet Red Wine Types of dessert wines

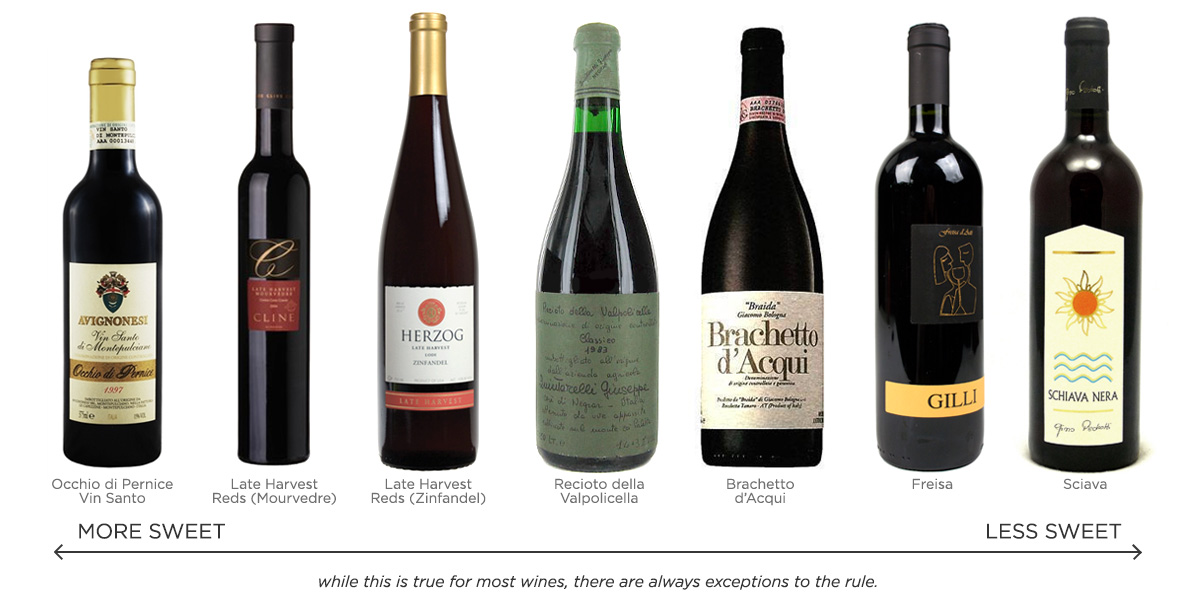
    Sweet reds are on decline except for cheap commercial production. However, there are still a few well-made historically interesting sweet reds worth trying. The majority of these awesome sweet red wines are from Italy using esoteric grapes.

    • Lambrusco A region producing a refreshing bubbly wine in both dry and sweet styles. Since it’s a sparkling wine, it will have a yeasty undertone along with raspberry and blueberry flavors. Sweet versions are labeled as “Amabile” and “Dulce”.
    • Brachetto d’Acqui A still and bubbly red or rosé wine made with Brachetto grapes from the Piedmont region. Famous for its floral and strawberry aromas as well as its affinity to pairing with cured meats.
    • Schiava A rare variety from Alto-Adige that is nearly wiped off the map. Smelling sweetly of raspberry and cotton candy while being refreshing and only a touch sweet.
    • Freisa Once one of the great red varieties of Piedmont, Freisa is related to Nebbiolo with lighter tannins and floral cherry notes.
    • Recioto della Valpolicella Made in the same painstaking process as Amarone wine, Recioto della Valpolicella is lush, bold and rich.
    • Late-Harvest Red Wines There are many red dessert wines in the US made with grapes such as Zinfandel, Mourvedre, Malbec and Petite Sirah. These wines explode with sweetness and heightened alcohol content.

    Fortified Wine

    fortified-dessert-wine-sweetness

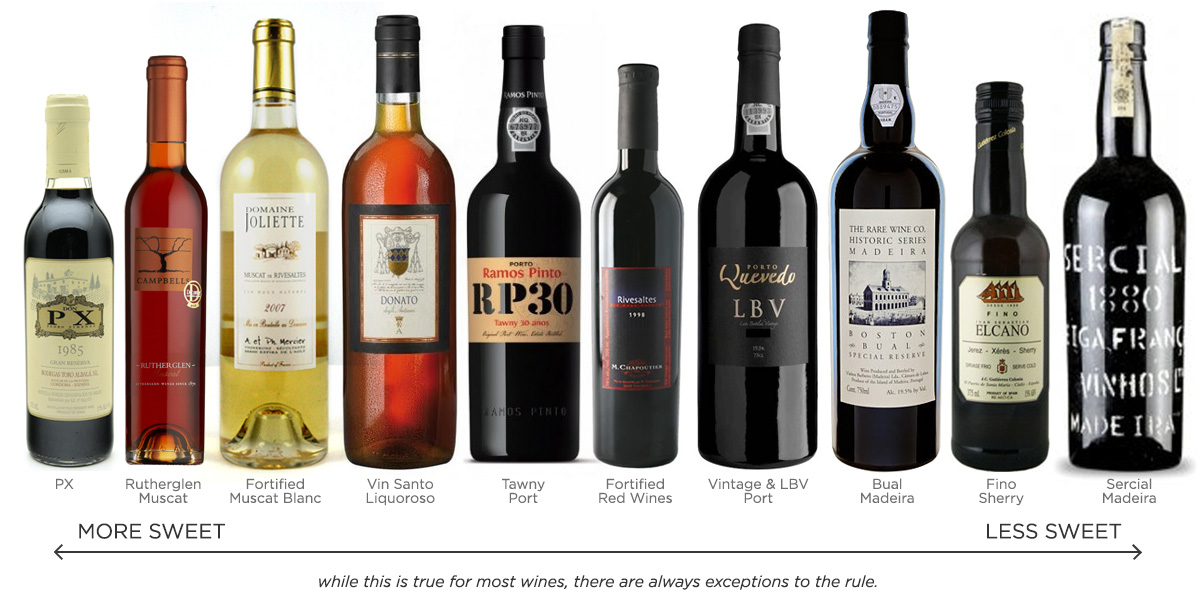
    Fortified wines are made when grape brandy is added to a wine and can either be dry or sweet. Most fortified wines are higher in alcohol content (about 17-20% ABV) and have a longer shelf life after they are opened.

    Port

    >Port wine is made in the Northern part of Portugal along the Douro river. These rare sweet red wines are made with dozens of Portuguese traditional grapes including Touriga Nacional, Touriga Franca, and Tinta Roriz. The grapes are collected and fermented together in open tanks where the grapes are stomped daily as the wine begins to ferment.

    At a point during the fermentation, the wine is strained and blended with a clear grape spirit (with nearly 70% ABV) that stops fermentation and fortifies the wine. After this process, there are a series of winemaking steps that lead into the different styles listed below.

    • Ruby & Crusted Port (sweet) This is an introductory style of Port wine that tastes of freshly minted port and is much less sweet than Tawny Port.
    • Vintage & LBV Port (sweet) LBV and Vintage Port are made in the same style but LBV are designed to be enjoyed in their youth (due to the style of cork enclosure) and vintage Ports are meant to be aged about 20-50 years before drinking.
    • Tawny Port (very sweet) The process of aging a Tawny Port happens at the winery in large wooden casks and smaller wooden barrels. The longer the Tawny Port ages, the more nutty and figgy it becomes. A 30-40 year Tawny is the best.
    • Port-Style Wines a.k.a. Vin Doux Naturel (sweet) Port can only be made in Portugal although many producers all over the world make port-style wines such as Zinfandel ‘Port’ or a Pinot Noir ‘Port’. We refer to these wines as vin doux naturel(see below).

    Sherry

    Sherry comes from Andalusia, Spain. The wines are made using Palomino, Pedro Ximénez (a grape, not a person), and Moscatel grapes. Wines are produced using varying amounts of the three grapes and are purposefully oxidized so that they develop nutty aromatics.

    • Fino (dry) The lightest and most dry of all the Sherries with tart and nutty flavors.
    • Manzanilla (dry) A specific style of Fino Sherry from a more specialized region that’s even lighter than Fino.
    • Palo Cortado (dry) A slightly richer style of sherry that is aged longer producing darker color and richer flavor. These wines are typically dry but will have fruit and nut aromas with salinity.
    • Amontillado (mostly dry) An aged sherry that takes on nutty flavors of peanuts and butter.
    • Oloroso (dry) A very aged and dark sherry that has higher alcohol content due to the evaporation of water as the wine ages. This is more like the scotch of Sherry.
    • Cream Sherry (sweet) A sweet style of Sherry made by blending Oloroso with Pedro Ximénez Sherry.
    • Moscatel (sweet) A sweet sherry with fig and date flavors.
    • Pedro Ximénez (PX) (very sweet) A very sweet sherry with brown sugar and figlike flavors.
    Types of Madeira wine - Wine Folly

    Madeira

    Madeira is a wine produced using up to 4 different grapes on the island in the middle of the Atlantic Ocean. Madeira is very unlike other wines because, in order to produce it, the wines undergo a heating and oxidation process – techniques that would traditionally “ruin” a wine.

    The result is a rich fortified wine with walnut-like flavors, salinity and an oiliness on the palate. Because of the 4 different grapes used, Madeira range from dry to sweet making them work well alongside a meal or even as a pre-dinner drink. Learn more about Madeira here.

    • Rainwater & Madeira When the label just says “Madeira” or “Rainwater” assume that it’s a blend of all 4 grapes and somewhere in the middle in terms of sweetness.
    • Sercial (dry) Sercial is the driest and the lightest of all the grapes in Madeira. These wines will have higher acidity and be dry with notes of peaches and apricot. It’s not too uncommon to see Sercial Madeira aged for 100 years.
    • Verdelho (dry) Verdelho has citrus notes and will develop nutty flavors of almond and walnut with time.
    • Bual (sweet) Bual leans on the sweet side with notes of burnt caramel, brown sugar, fig, rootbeer and black walnut. It’s common to find 10 year old ‘medium’ (meaning: medium sweet) Bual Madeira although there are several well aged 50-70 year old Bual as well.
    • Malmsey (sweet) Malmsey Madeiras have orange citrus notes and caramel to their taste along with the oily oxidized nutty flavor.

    Vin Doux Naturel (VDN)

    Vin Doux Naturel are made in a similar style to Port where a base wine is created and finished with neutral grape brandy. The term vin doux naturel comes from France, but this classification could be used to describe a wine from anywhere.

    • Grenache-based VDN Typically from the south of France, such as Maury, Rasteau and Banyuls from Languedoc-Roussillon
    • Muscat-based VDN Muscat de Rivesaltes, Muscat de Frotignan, Muscat de Beaumes de Venise, Ruthernglen Muscat (Australia), Orange Muscat and Vin Santo Liquoroso (Italy).
    • Malvasia-based VDN Mostly from Italy and Sicily such as Malvasia delle Lipari Liquoroso
    • Mavrodaphni From Greece, Mavrodaphni is a sweet red wine with many similarities to Port.